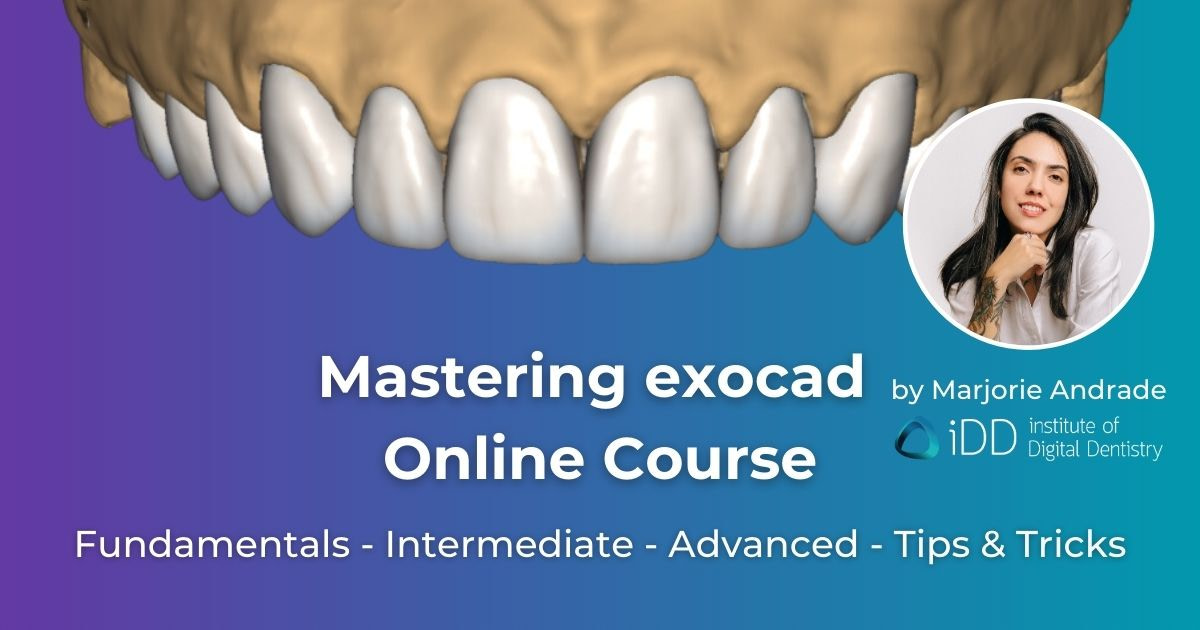
MASTERING EXOCAD IDD Online Training
Unlock the Power of exocad with our Comprehensive, Online and On-Demand Training
83 exocad lessons + follow along STLs
- over 10 Hours CPD/CE in 3 Modules
Now with subtitles in 25 languages!
For Dentists and Dental Technicians
For those with zero experience in exocad and want to learn the Fundamentals, all the way up to Advanced CAD training in smile design, all on x restorative etc.
Recorded using exocad 3.0 Galway
New 3.1 Rijeka and 3.2 Elefsina updates added!
The most up-to-date exocad training available online.
iDD is the only Genuine place to purchase Mastering exocad course bundle.
Any alternative sources offering this course are unauthorized, fraudulent and illegal. You will not get updates and new lessons or access to ask Marjorie Andrade questions.
Protect yourself from scams by purchasing directly from us. If you have seen this course advertised elsewhere, please let us know.
The best and most complete online exocad course money can buy.
The team at iDD have spent the better part of eight months and over 600 hours planning, designing and editing this course to make sure it is the best we can make it.
Learn how to design cases like this:


Are you a dentist or dental technician eager to learn exocad?
It can be a game-changer for your practice or lab, provided you have a good understanding of the software and its advanced features like crown-lengthening guides, implant planning and all on x.
The course modules range from fundamental topics like setting up the software and designing basic crowns, to advanced topics like full-mouth rehabilitation and designing full arch implant restorations.
Use our specialised, step-by-step structured curriculum and downloadable practice cases to master this CAD software.
Expertly curated by Marjorie Andrade, an experienced dental CAD designer and technician at our very own lab in Wellington (iDD Lab), this course will help you navigate the software's intricacies and use its powerful tools in your practice or lab.
Elevate your dental CAD skills to a whole new level.

Click to play
PLEASE NOTE: exocad software is required to follow along with the lessons, and is not included in our course package.
You can contact your local dealer for a demo dongle to test.
We hope you enjoy the course and find it useful in your exocad journey!

Marjorie Andrade
Dental CAD Designer
Meet your educator
Marjorie Andrade is a talented dental CAD designer from Santa Catarina, Brazil. She honed her skills working with high-end laboratories focusing on cosmetic cases in Brazil, delivering hundreds of units per month to clients around the world, consistently producing top-quality work. She now works with our team at our personal lab - iDD Lab.
She's taken her extensive knowledge and passion for exocad, paired it with her industry experience, and channeled it all into creating this highly effective, easy-to-follow course to help you elevate your exocad skills.
Gain instant access to
83 detailed exocad lessons
10+ Hours CPD/CE
with subtitles in 25 languages
Our online exocad training will give you an entire structured education on all you need to know to master this software.
We've developed this course to make mastering exocad as easy and as painless as possible.
You can access it anytime, anywhere, and at your own pace and forever.
STL files are available for most lessons so you can follow along and practice what is being demonstrated in the lesson.

Subtitles available in the following languages:
Catalan
Croatian
Czech
Danish
Dutch
English (US)
Finnish
French
German
Greek
Hungarian
Hindi
Italian
Lithuanian
Latvian
Malay
Norwegian
Polish
Portuguese (BR)
Romanian
Slovak
Slovenian
Spanish
Swedish
Turkish
What's included in the iDD online exocad training curriculum?
Watch the first lesson in full for free below!

Mastering exocad Fundamentals
Access 36 exocad online training lessons designed for total beginners to exocad.
In 4 hours this Module will give you the confidence to tackle fundamental restorative exocad designs.
01 - 01 - Introduction to exocad and this Course
- Acquire a comprehensive understanding of exocad, a leading software in digital dentistry, and its diverse features and functions that can streamline your dental design process.
- Appreciate the significance of ongoing learning and skill development in mastering software like exocad, and develop strategies to overcome learning challenges.
- Understand the structure and objectives of this exocad Masterclass, designed in partnership with the Institute of Digital Dentistry.
- Gain insight into the instructor's background and experience in the digital dentistry field, providing context for the teaching and learning process.
- Familiarize with different versions of exocad, such as the 3.0 Galway and Rijeka 3.1 versions, and how to navigate through them.
- Understand the structure of the course, divided into three main modules: basic, intermediate, and advanced, each covering specific topics to facilitate focused learning.
- Recognize the benefits of exocad's large user base, open format, constant development, and customization abilities in boosting productivity in dental labs or clinics.
- Understand the options and procedures for purchasing exocad, including the choices between perpetual and flex licenses, and the implications of each.
- Learn about the pricing structure and available add-on modules for the software, allowing you to tailor the program to your specific needs.
- Understand the role of system integrators and resellers in providing technical support, and consider how to select a reseller based on your specific needs.
- Comprehend the potential advantages and disadvantages of using an integrated system versus a stand-alone dental CAD software, and gain confidence in achieving optimal results with exocad.
01 - 02 - Understanding exocad Hardware Requirements for Optimal Performance
- Gain an essential understanding of the key computer components, including Central Processing Unit (CPU), Random Access Memory (RAM), and Graphics Processing Unit (GPU), and how they impact the performance of your software.
- Appreciate the significance of sufficient RAM in improving the speed and efficiency of your computer operations.
- Understand the specific role of the GPU in the processing and rendering of three-dimensional images, and its relevance in running graphics-intensive software.
- Recognize the minimum system requirements (screen resolution, power, and operating system) needed for effective use of software like exocad.
- Evaluate the pros and cons of different configurations based on an example, focusing on factors such as storage space and personal workflow.
- Understand the implications of choosing between a notebook and a desktop computer, and make informed decisions based on your specific needs and work style.
- Understand the software compatibility considerations, particularly the need for a Windows-based system and the restrictions on virtual machine environments.
- Learn about potential solutions for using exocad on a Mac, including the use of Bootcamp to install Windows on an Intel-based Mac, and understand the limitations of technical support for this arrangement.
01 - 03 - Setting Up a Case and Setting Options Creating a Case - Settings, Options, and Project Management
- Understand the impact of proper case setup in dental restoration projects.
- Gain a working knowledge of the three main areas in a dental database: the project area, the job definition area, and the action area.
- Learn the role of timestamps, deadlines, and user guides in the project area.
- Discover how to add new clients, input additional information, and track previous works done for specific clients.
- Learn how to manage existing orders, recover deleted projects, and permanently erase files from your hard drive.
- Learn the different formats needed for importing projects from different platforms.
- Understand the process of selecting tooth number, restoration type, material, and parameters in the job definition area.
- Get acquainted with various types of dental restorations and their specific applications.
- Learn how to define missing teeth and adjacent teeth, and how to identify the opposing jaw of your restoration.
- Understand the role and flexibility of material selection, and how this affects the subsequent design phase.
- Recognize the limitations of manufacturer configurations and their implications on the milling process.
- Learn the options available for implant-based reconstructions and understand how to create custom abutments and screw-mounted crowns.
- Understand how additional scans can be used to create designs and how tooth models can be adapted to pre-op scans.
- Learn how to design a virtual gingiva and the options for making it mandatory.
- Understand the thimble crown workflow and how it impacts the design process.
- Learn the significance of numeric parameters, how to adjust them, and the consequences of these adjustments.
- Understand the color coding used in the database to indicate changes in parameter values.
- Learn how to set and reset advanced parameters.
- Understand the role of material shade information and how it can be utilized for future reference.
- Learn how to quickly replicate settings across multiple teeth.
- Understand the role and management of connectors between teeth in the design process.
- Learn how to manage antagonist teeth, scan modes, and the use of virtual articulators.
- Understand how to save and duplicate job details in the database.
- Learn the process of launching various applications for scanning, designing, creating models, and manufacturing.
- Understand the options available for sharing and collaborating on dental cases online.
- Learn how to utilize the multi-die scan mode for multiple dies.
- Understand how to customize the system language, tooth numbering system, interface themes, and type selection style in the settings.
- Learn how to adjust the configuration of the dental CAD app.
01 - 04 - Different Kinds of Files and 3D Viewers Various File Formats and How to Check Received Scans
- Identify and understand the different file formats used in CAD design, their unique features, and their uses in the dental industry.
- Recognize the utility and significance of STL (Standard Triangle Language) files in describing the surface geometry of a 3D object, and how this feature impacts the design and manufacturing process.
- Learn about PLY and OBJ file formats, how they are similar and different from STL files, and the additional value they bring in providing color and texture information.
- Understand the role of software tools, such as exocad viewer, in aiding the visualization of 3D files, and their application in the dental CAD process.
- Develop skills in analyzing 3D files prior to initiating a CAD project, including identifying potential errors, and understand the impact of this process on overall workflow efficiency and client communication.
- Realize the importance of setting default 3D file viewers to streamline the design process and improve productivity.
- Understand the benefits of proactive issue detection in the project setup phase, including how it leads to improved client relationships and time management.
01 - 05 - Hotkeys and How to Boost Your Productivity
- Understand the value of using hotkeys in exocad software, specifically how they contribute to boosting productivity in CAD design tasks.
- Familiarize yourself with common hotkeys in exocad, how they function, and the benefits they offer in streamlining your design process.
- Learn how to hide and display objects in exocad using Control and the middle mouse button, and understand the advantages of this feature in managing your workspace.
- Explore the functions of the group selector hotkeys, which control the visibility of various elements, such as antagonist, jaw scan, gingiva mask, pre-op scan, 2D images, and full jaw meshes.
- Become proficient in using the hotkeys for specific tools such as grid options, distance tool, and measurement tool, and understand how these shortcuts can facilitate detailed design work and analysis.
- Recognize the cumulative impact of time saved through using hotkeys on overall project timelines and efficiency, reinforcing the importance of these features in professional CAD design work.
- Appreciate the importance of practice in mastering the use of hotkeys and realizing their full potential in enhancing productivity.
01 - 06 - Wizard Mode or Expert Mode - What’s the Difference and Indications
- Understand the two workflows in exocad software: Wizard Mode and Expert Mode, their specific functionalities, and how to toggle between them.
- Learn about the characteristics of Wizard Mode, including its guided workflow and the limitations associated with parameter adjustments, specifically understanding when it's beneficial to use this mode.
- Gain insight into the Expert Mode's ability to offer individual parameter changes for multiple teeth, and recognize the application scenarios where this mode would be advantageous.
- Master the process of selecting and manipulating individual teeth in Expert Mode, including the use of the lower toolbar and context menu.
- Become aware of the visual cues that exocad provides (like bolded options and color-coded cues), helping you understand the chronological order of operations in Expert Mode.
- Comprehend how the design tools' availability in the toolbar changes with the progression of the design in Expert Mode.
- Recognize the functions in the right frame toolbar that are consistently available throughout the project regardless of its progress.
- Appreciate the subtle guidance provided by Expert Mode, despite its lack of explicit direction, and learn how to utilize these hints effectively.
01 - 07 - Introduction to v3.2 Elefsina
- Understand the context of the exocad 3.2 Elefsina update within the broader "Mastering exocad" course.
- Recognize the importance of software stability in professional dental CAD workflows.
- Know how to identify their current exocad version and engine build number.
- Be able to locate and interpret the version information in the exocad interface.
- Understand the significance of the engine build number in relation to bug fixes and stability.
- Learn how to check for and initiate software updates within exocad.
- Appreciate the instructor's approach to adopting new software versions in a professional setting.
- Be aware that an official brochure exists detailing all new features and improvements in exocad 3.2.
- Understand that the upcoming lessons will focus on features relevant to previously covered course material.
- Know to contact their reseller if updates are available but not automatically installable.
- Be prepared for a series of focused lessons on specific new features in exocad 3.2 Elefsina.
- Recognize the balance between staying current with software updates and maintaining a stable work environment.
02 - 01 - Data Orientation and Fixing Inverted Mesh Issues
- Become proficient in initiating the design phase in exocad, including completing theThere are exercise STL files download to work along with this lesson dentalDB configuration, setting up case indications, and initiating the design process.
- Understand the process of uploading and identifying the required meshes for the project, starting with the selection of the arch for restoration and the antagonist.
- Master the steps to adjust scan data orientation, a crucial initial step in wizard mode, and become capable of identifying incorrect scan orientation.
- Acquire the necessary skills to manipulate 3D models within the software, including techniques for rotation, zooming, dragging, and setting a new rotation point.
- Understand how to discern the correct orientation of the mesh triangles, focusing on the color indicators within the software.
- Learn the importance of ensuring the arch is oriented with the occlusal side facing upwards, and recognize scenarios when this may not be the case.
- Acquire skills to rectify instances where the triangles are inverted, using the Scan Data Editor in expert mode.
- Master the process of inverting triangle orientation to correct misaligned scans, ensuring optimal scan setup for the rest of the design process.
- Learn to seamlessly switch between wizard and expert modes to perform various tasks, improving overall efficiency in working with exocad.
- Understand the functionality of the 3D data editor and its role in the design process.
02 - 02 - 3D Data Editor - Editing Scans and Adjusting Bite Issues
- Gain familiarity with the 3D data editor and its accessibility through the expert mode in exocad, enhancing flexibility and customization in the design process.
- Understand the importance of scan data cleaning and cropping in the 3D data editor, improving the quality and accuracy of design work.
- Learn to manipulate mesh selection options to target specific areas of interest, improving precision in modifications and corrections.
- Develop proficiency in using various mesh manipulation tools such as Delete, Crop, Cut Out, and Combine, providing more control over the design process.
- Acquire skills to repair physical inconsistencies in the scan data, such as holes or divisions in the mesh, ensuring a complete and accurate representation of the dental structure.
- Understand the implications of scan data intersections and their potential causes, such as bite scan inaccuracies, enhancing problem-solving capabilities during the design process.
- Learn the process of identifying and repairing scan data intersections, promoting the production of accurate and high-quality restorations.
- Understand the decision-making process when dealing with scan data intersections, factoring in client consultation and potential impacts on restoration post-processing.
- Learn to navigate alerts and advisories in the software regarding unaddressed intrusions, ensuring an informed and efficient design process.
02 - 03 - Margin Detection - Tools, Tips & Tricks for Every Type of Preparation
- Understand the significance of margin detection in the dental restoration process and its impact on the longevity and adaptability of the resulting crown.
- Learn to utilize automatic margin detection within the software, streamlining the design process in well-defined cases.
- Develop the skill to manually adjust anchor points for precise control over the margin line, improving the fit of the restoration.
- Learn to manipulate the light source angle within the software to enhance visibility and clarity of the margin, fostering an improved understanding of the dental structure.
- Understand the function of the 'subgingival preparation type' option and when it may be beneficial, allowing for flexibility in dealing with a variety of clinical scenarios.
- Gain proficiency in the manual margin detection process, offering the ability to draw and correct the margin line independently.
- Learn to use the 'adjust light' tool to better illuminate the dental model and more clearly identify the margin line, enhancing precision and accuracy.
- Understand the function of the 'undo' and 'redo' buttons, providing an essential safety net during the design process.
- Learn to utilize the automatic hide feature for adjacent teeth to ensure focus on the relevant area.
- Understand the transition from margin line detection to the 'crown bottom step', moving forward in the restoration design process.
- Appreciate the importance of rotating and viewing the dental model from multiple angles to ensure a comprehensive and accurate margin line.
02 - 04 - Crown Bottom and Achieving Well-Fitting Restorations
- Understand the complexity and significance of parameter adjustment in the restoration design process, and how this impacts the fit and manufacturing method of the final restoration.
- Gain familiarity with the cement gap and 'no cement gap' zones in the design, and learn to adjust these according to the needs of the specific case.
- Learn to utilize the 'Add Another Zone' function to customize the design, enhancing adaptability to individual dental structures.
- Comprehend the role of additional spacing, including axial and radial spacing, in the restoration design, and understand the implications of modifying these parameters.
- Understand the importance of the 'border' parameters, including horizontal, angled, and vertical borders, in the design of the restoration.
- Learn to gradually adjust design parameters to optimize the output of the milling machine or 3D printer, improving efficiency and results over time.
- Gain familiarity with undercut-related options and milling parameters in the design software, and learn to adapt these to individual case requirements.
- Understand the significance of the 'block out' function for dealing with undercuts, and gain knowledge about its proper utilization in the design process.
- Learn about the role of 'untouchable zones' in the design, and understand the potential challenges and solutions related to milling these areas.
- Gain knowledge about the 'anticipate milling' feature and how it impacts the design according to the chosen manufacturing method and tool size.
- Understand the implications of tool shape on the final restoration, and learn to adjust parameters to account for differences in tool shape and size.
- Learn to adapt the design parameters for different types of restorations, such as crowns and veneers, according to the capabilities and limitations of the manufacturing method.
02 - 05 - Insertion Axis and Finding an Ideal Path of Insertion
- Comprehend the use of software in determining an optimal insertion axis for dental restorations and recognize the color indications for ideal or non-ideal axes.
- Develop the ability to manually adjust the insertion direction during the "crown bottom" step when necessary.
- Distinguish between different levels of undercuts using the color scale in the software, and understand their implications on the restoration design.
- Appreciate the importance of minimizing undercuts near the margin of the preparation to ease the compensation process in the "crown bottom" phase.
- Understand the real-time update feature for the crown bottom design in the software, enabling you to see instant changes as you adjust the insertion direction.
- Recognize potential challenges in finding an entirely suitable insertion axis in certain cases, and learn strategies to address these situations, including the communication of potential issues to the client.
02 - 06 - Minimum Thickness and Managing Preparations with Insufficient Reduction
- Understand the significance of defining chrome bottom parameters in dental software.
- Recognize the purpose of creating a minimum thickness layer in dental design.
- Explain the default minimum thickness setting for Zirconia and its relevance.
- Appreciate the importance of evaluating interocclusal space before adjusting default parameters.
- Demonstrate the ability to change the minimum thickness setting for specific teeth in dental software.
- Comprehend the limitations in minimum thickness values based on selected materials.
- Evaluate the advantages of selecting appropriate materials, such as wax, in dental design.
- Acquire the knowledge to adjust the minimum thickness based on specific design requirements.
- Demonstrate proficiency in transitioning between expert and wizard modes in dental software.
- Apply the acquired skills to continue with the dental design process effectively.
02 - 07 - Tooth Placement - Tools and Tips for Choosing the Right Morphology
- Understand the purpose and benefits of the "Place Model Tooth" step in dental design software.
- Learn how to select tooth models using visual previews and navigation options.
- Recognize the key considerations for posterior tooth selection, such as fissure depth, cervical shape, and cusp type.
- Appreciate the importance of selecting anatomically appropriate tooth shapes that fit well with the patient's existing dentition.
- Understand the automatic length calculation feature and how to correct mesial/distal markings.
- Gain proficiency in tooth model placement using basic tools like dragging, rotating, and scaling.
- Explore advanced tooth placement techniques and the advantages of using the "Advanced Placement Tool".
- Learn how to lock tooth placement to specific directions for precise positioning.
- Understand the features and benefits of the "Free-form" tool for selective tooth movement.
- Learn how to adjust the occlusal surface of the tooth model using the slider and mouse wheel.
- Gain knowledge of the "Chain" tab for multi-unit cases (to be covered in a more advanced module).
- Understand the importance and usage of the "Show Distances" tool for evaluating restoration fit.
- Learn how to interpret color-coded intersections between the tooth model and antagonist.
- Understand the various visualization options within the "Show Distances" tool, including intersections with adjacent teeth and healthy arches.
- Recognize the significance of leaving space for occlusion and achieving smooth contact points.
- Gain proficiency in using the transparency feature to visualize contact points and make final adjustments.
- Understand the importance of checking the restoration against the antagonist before proceeding.
02 - 08 - Free-Forming - Tools for Tooth Design and How to Use Them Effectively
- Understand the significance of the "Free", "Anatomic", and "Adapt" tabs in the dental design process.
- Learn the various tools available in the "Free" tab for adding, removing, smoothing, and flattening the surface of the restoration.
- Understand the importance of using appropriate tool strength and size for precise restoration sculpting.
- Learn the purpose and applications of the "Anatomic" Free-forming tab presets, including editing cusps, tooth parts, entire teeth, and ridges.
- Gain proficiency in using the "Paint and Pull" tool for selective surface editing.
- Understand the features and options available in the "Adapt" tab for occlusal and approximal adaptations.
- Learn how to set the desired distance for occlusal adaptation and consider individual client needs and manufacturing considerations.
- Understand the functions of "Cut Intersections" and "Shape-Preserving Adaptation" options in the adaptation process.
- Gain proficiency in excluding selected parts from adaptation calculations.
- Explore the options and techniques for approximal adaptation, such as using disc cutters, blocking out adjacent scans, and adjusting contact points.
- Understand the importance of manual adjustments and considerations for gap prevention and glaze layer thickness.
- Recognize the significance of leaving the adaptation step as the final part of the design process.
- Understand the merging process that occurs after completing the design.
02 - 09 - Save and Merge Restorations - Finalizing Designs for Export and Manufacturing
- Understand the final steps of the dental design process, including mesh merging and file creation.
- Recognize the importance of saving and organizing the CAD project directory.
- Understand the implications of making changes to the design after merging the parts and the limitations it imposes.
- Learn how to delete merge parts in order to make changes to the design parameters.
- Gain proficiency in navigating the context menu and selecting appropriate options for modifying the design.
- Understand the significance of optimizing the file for better free-forming and 3D printing.
- Learn the importance of ensuring the output data is a watertight mesh without any flaws or self-intersections for 3D printing.
- Understand the differentiation between the restoration workflow and the implant workflow.
- Gain awareness of the upcoming modules that will cover different types of designs, providing a deeper understanding of specific applications.
- Recognize the purpose of the training course in enhancing basic CAD skills.
- Learn how to check and access the finished STL file for further review.
- Understand the efficient and concise nature of the course in providing clear and straightforward instructions.
02 - 10 - Automation on Single Crown Workflow - v3.2 Elefsina
exocad 3.2 Elefsina introduces new AI and automation features for single crown workflows.
A new repair margin tool can fix incomplete scans, but it's not 100% accurate and proper scanning is still recommended.
The software now includes an auto articulator feature that simulates jaw movements for more accurate crown design.
The interface has been updated to be more intuitive, including a search bar in the settings menu.
The free-forming stage remains similar to previous versions but may require less manual adjustment due to improved automatic adaptations.
Overall, the new version automates more of the crown design process, potentially making it faster and easier for dental professionals to create accurate restorations.
03 - 01 - Setup and Creating a Lingual Band
- Understand the concept and purpose of offset coping in dental design.
- Recognize the difference between offset coping and a reduced anatomic crown.
- Understand the process of adding the antagonist and gingiva scans to the design.
- Learn how to align and match meshes to ensure accurate positioning.
- Gain proficiency in assessing the alignment accuracy through the color graphic representation.
- Learn how to load the antagonist scan if not defined in the dentalDB.
- Understand the optional step of designing a lingual band for the coping.
- Recognize the importance of leaving the lingual band hidden from the buccal view.
- Gain proficiency in adjusting the collar angle and height for the lingual band.
- Understand the considerations for surface smoothing and preserving the lingual band edge.
- Recognize the importance of ensuring sufficient space for ceramic layering or future crown design.
- Learn how to finalize the case and locate the final file in the project directory.
04 - 01 - Intaglio Settings and Tips for Predictable Design Results in exocad
- Understand the process of designing inlays and onlays in dental CAD software.
- Recognize the importance of selecting the appropriate material and milling machine for the specific restoration.
- Learn how to navigate and switch between different file types, such as OBJ files with color and texture information and basic STL files.
- Understand the significance of analyzing and selecting the appropriate model tooth anatomy for the restoration.
- Gain proficiency in comparing and evaluating the occlusal side of the model tooth and the jaw scan to make informed decisions.
- Learn how to smooth small scan errors and deformities in the jaw scan data to ensure accurate design and adaptation.
- Understand the purpose and utilization of the "Show Distances" tool to assess the fit and contacts of the model tooth.
- Gain proficiency in adapting the design through free-forming techniques while preserving the morphology details.
- Recognize the significance of minimizing extra volume near the margins and leaving room for manual adjustments.
- Learn how to utilize the TrueSmile tool to render the model tooth and visualize the depth of fissures.
- Understand the process of cutting the occlusal and approximal areas to achieve the desired adaptation.
- Gain proficiency in smoothing the intersection with adjacent teeth to minimize adaptation after glazing.
- Learn how to finalize the design and complete the inlay/onlay restoration.
05 - 01 - Quick Workflow for Symmetrical Results Using the Copy Tooth Function
- Understand the process of designing an anatomic crown for an interior tooth using the "Mirror" tool in dental CAD software.
- Recognize the benefits and implications of using the "Mirror" tool instead of loading a custom model tooth from a library.
- Learn how to copy and mirror a tooth model from the scan data and properly define the boundaries and margins.
- Gain proficiency in using the "Advanced Placement" mode for precise tooth placement and alignment.
- Understand the importance of utilizing custom views and the grid feature for accurate tooth placement and symmetry assessment.
- Learn how to analyze and adjust the mesial/distal length of the mirrored tooth for optimal alignment with adjacent teeth.
- Recognize the significance of visual aids, such as the TruSmile module and background grid, in achieving symmetrical tooth placement.
- Gain proficiency in smoothing and refining the tooth surface during the free-forming step while considering contact points and margin adaptation.
- Understand the limitations and considerations when using the "show distances" tool for adaptation purposes.
- Learn how to cut and shape the occlusal and approximal areas of the tooth to achieve proper contour and contact points.
- Recognize the importance of verifying the crown's fit and contact points from various perspectives, such as inside-out and without the jaw scans.
- Understand the process of merging and saving the restorations to complete the case.
06 - 01 - Case Setup, Insertion Axis and Communicating Path of Insertion Issues
- Understand the process of designing a bridge with anatomic crowns and anatomic pontic using dental CAD software.
- Recognize the significance of margin detection and the implications of starting a case with the margin already detected.
- Understand the importance of setting up the insertion axis correctly for bridge cases to ensure proper fit and seating.
- Learn how to approach cases where the abutment teeth are diverging and the steps to equalize undercuts to both sides.
- Understand the potential challenges and solutions for cases with diverging abutment teeth, including printing 3D models for manual adaptation or digitally simulating reduction for the intaglio of the bridge.
- Recognize the importance of patient involvement and communication in decision-making when facing challenges with diverging abutment teeth.
- Gain familiarity with the process of digitally simulating reduction by resetting the case, deleting reconstructions, and using the "smooth" tool to remove extra volumes on the prep.
- Learn how to utilize the "add/remove mesh" tool to bring the initial jaw scan data and create a transparent mesh for visualizing and communicating the reduction to the client.
- Understand the significance of guiding the client through mimicking the reduction and providing print screens or videos to aid in the process.
- Gain proficiency in continuing the bridge design process after addressing the diverging abutment teeth and reduction simulation.
06 - 02 - Library Tooth Placement for Bridge and Troubleshooting Common Issues
- Understand the process of loading custom model teeth and changing tooth library types in dental CAD software.
- Recognize the significance of selecting appropriate tooth anatomy for a specific case and considering the desired shape and characteristics of the teeth.
- Learn how to use custom views to facilitate the placement of bridge units and save time during the design process.
- Understand the importance of aligning the buccal cusps to the correct smile curve and ensuring the buccal volume is appropriate in relation to adjacent teeth.
- Recognize the value of using background grids to assist with aligning jaw scans and achieving proper tooth placement.
- Understand the use of the "Show Contacts" feature and the relevance of focusing on shape and volume rather than color during the design process.
- Gain familiarity with the process of adapting anchor crowns and transitioning to the free-forming stage.
- Gain proficiency in applying the principles learned in the "Single Crown" module to the placement and adaptation of bridge units.
- Recognize the importance of achieving proper alignment and aesthetics in the design of bridge units for optimal patient outcomes.
- Understand the significance of considering the overall occlusal relationship and adjacent contacts when placing bridge units, while prioritizing alignment and buccal volume.
06 - 03 - Free-Forming Phase and Designing a Hygienic Pontic
- Understand the importance of refining tooth shape and making final adjustments during the free-forming step.
- Learn techniques for aligning the occlusal surface of the restoration with adjacent teeth and achieving proper contact points.
- Recognize the significance of considering the client's preferences for cervical adaptation and the desired type of pontic bottom.
- Understand the implications of adapting the pontic bottom to the gingiva and the importance of avoiding food traps underneath the bridge.
- Gain familiarity with different types of pontic bottoms, such as the modified ridge lap, and understand their impact on patient hygiene.
- Learn the importance of smoothing rough edges and creating a smooth surface before completing the design.
- Understand the benefits of using the disk cutter tool to define embrasures and interproximal areas of each bridge unit.
- Recognize the value of preserving anatomic details while ensuring proper overlap and alignment of the bridge components.
- Gain proficiency in adapting the occlusal surface at the appropriate thickness to achieve optimal occlusion.
- Understand the purpose and significance of the Connectors step in the overall design process.
06 - 04 - Connectors - Various Workflows for Long-Lasting Results
- Understand the process of adding connectors to bridge units and the significance of defining connectors in the dentalDB.
- Learn how to delete and add connectors using the right-click menu and the "Connect to Mesial/distal Neighbor" option.
- Understand the importance of defining a "Unique Insertion Direction for Bridges" when designing crowns as single units and later connecting them.
- Gain knowledge about the factors to consider when determining the minimum size of connectors, such as cross-sectional area and height.
- Recognize the importance of ensuring adequate connector size and shape to withstand occlusal forces and prevent rupture over time.
- Learn how to make adjustments to the position, docking place, and shape of connectors using mouse interactions and keyboard shortcuts.
- Understand the significance of maintaining a minimum cross-sectional area and troubleshooting space restrictions by modifying the positioning or shape of the connector.
- Gain proficiency in free-forming the connectors to achieve desired dimensions and alignment.
- Learn how to assess and ensure the smoothness and thickness of the connectors for optimal strength.
- Understand the process of finalizing the bridge design, including smoothing the connectors and saving the merged design file.
- Recognize the value of free-forming the finished design as a whole to refine the overall aesthetics and strength of the bridge.
07 - 01 - Full Anatomy Reduction and Making Room for Layered Ceramics
- Understand the process of changing the reconstruction type in dental CAD to reduce the anatomy of a bridge design.
- Learn how to delete merged restorations and change reconstruction type to modify the design manually.
- Understand the importance of discussing the desired reduction amount with the person who will finish the case manually after milling.
- Learn how to adjust the reduction depth and exclude specific parts from the reduction process.
- Understand advanced parameters such as "reduce less on lingual side" and "multilevel reduction" and their impact on the reduction process.
- Gain proficiency in adjusting the minimum thickness and basal reduction depth to meet material-specific requirements.
- Learn the importance of applying changes to visualize the effects of reduction and using the free-form tool to smooth the surface if necessary.
- Understand the need to correct connectors that may be too large for the framework and learn how to access the connectors tool to make adjustments.
- Gain proficiency in merging and saving restorations after completing the reduction process.
- Understand how to revert the restoration to a full anatomic bridge by deleting merged and reduced parts and changing the reconstruction type.
07 - 02 - Buccal Reduction or Cutback for Partial Veneering
- Understand the concept and purpose of buccal reduction in dental CAD.
- Learn how to selectively reduce the front of a restoration for ceramic layering or frame design.
- Understand the limitations of using cutback designs from libraries and the importance of manual reduction.
- Learn the recommended range of reduction (0.5 to 0.8 millimeters) for buccal reduction cases.
- Understand the potential consequences of using the "reduced less on lingual side" option and the importance of maintaining contact points with adjacent teeth.
- Learn how to exclude selected parts and manually define the reduction areas by painting them.
- Understand the significance of making the jaw scan transparent to assist in eliminating boundaries and ensure proper reduction.
- Gain proficiency in applying and visualizing the reduction changes and using the free-form tool to smooth rough areas and make adjustments.
- Learn how to utilize cusps or tooth parts to refine the reduced boundaries, if necessary.
Understand the final steps of the buccal reduction process and how to finish the case in dental CAD.
08 - 01 - Creating a 3D Printed Master Model with Extra Dies
- Understand the different ways to access the Model Creator module in dental CAD.
- Learn the importance of cleaning jaw scans from artifacts before creating models to ensure smooth calculations.
- Gain proficiency in switching to Expert Mode and accessing the Model Alignment window.
- Understand the concept of model types and their significance in optimizing printing and base plate fitting.
- Learn about the plateless model options, including cut-out dies and extra dies.
- Understand the importance of positioning jaw scans and adjusting the height of the model using the slider.
- Learn how to rotate the model to face the front side and distribute the upper and lower jaw model height equally.
- Gain proficiency in creating the model by toggling tooth dies and accessing the Plateless Model Design options.
- Understand the parameters and presets provided in the Plateless Model Design window and the option to access detailed explanations in the exocad Wiki page.
- Learn how to customize settings, disable certain checkboxes, and adjust the pedestal height for a polished finish.
- Gain proficiency in producing the model and dies by clicking "Run" and saving the model.
- Understand the process of creating models for antagonists and the steps involved.
- Learn how to locate and identify the STL files for printing the models in the project folder.
- Understand the significance of having separate files for the full jaw model and individual dies.
08 - 02 - Creating a 3D Printed Model with Removable Cut-out Dies
- Understand the concept of "cut-out dies" in model design and its significance in creating separate dies for the model.
- Learn how to access the Model Alignment window and change the model type to "cut-out dies".
- Gain proficiency in aligning jaw scans to ensure accurate model design.
- Understand the importance of analyzing the parameters and settings in the Model Design window by referring to the exocad Wiki page.
- Learn how the fitting of dies in the model is affected by printer parameters and resin exposure time.
- Gain proficiency in adjusting parameters, such as horizontal and vertical shaft gap, to achieve the desired fitting between the dies and the model.
- Understand the significance of the ditch parameter in removing material around the delimited margin and ensuring proper seating of the crown without gingival interferences.
- Learn how to create a separate gingiva mask by selecting and delimiting the desired area.
- Understand the importance of setting a minimum thickness for printing flexible gingiva and the option to add retention nubs if necessary.
- Gain proficiency in running the calculation and checking the finished files in the project folder.
- Understand the significance of having separate files for the model and individual dies in the project folder and their role in the printing process.
09 - 01 - Improving Communication - Explain Case Issues with Cut View, Annotations and, Screen Shots
|
10 - 01 - Offset coping, Cutback Crown and a Full-Contour Bridge from Setup to Export
|
11 - 01 - Navigating Version Updates and Exploring New Features - v3.1 Rijeka
|
11 - 02 - Elevating Single-Unit Restorations with Advanced Features, Streamlined Workflows, and Improved Adaptation Techniques - v3.1 Rijeka
|
11 - 03 - Safeguarding Your Work and Personalizing Your Environment - Auto-Save and Customization Features in Exocad - v3.1 Rijeka
|
11 - 04 - Streamlining Workflows, Enhancing Connector Design & Optimizing Model Creation - v3.1 Rijeka
|

Mastering exocad Intermediate
Access 31 intermediate exocad online training lessons to take your skills to the next level.
This 4 hour Module will elevate your knowledge to work in more advanced CAD work.
01 - 01 - Design Setup and Ensuring Proper Fit and Thickness
- Understand the process of designing a bite splint using a virtual articulator to improve accuracy and precision in the design process.
- Recognize the importance of selecting and adjusting parameters for the bite splint to optimize the design and functional fit of the dental appliance.
- Gain an appreciation of the role of material selection and manufacturing types in bite splint design to understand how different materials and manufacturing processes can affect the outcome.
- Learn how to handle and correct potential issues or defects in scan data before progressing with the design, ensuring a smoother and more efficient process.
- Understand the importance of setting proper thickness for a bite splint to maintain the durability and functionality of the dental appliance under the occlusal force of the jaws.
- Acquire knowledge about setting the insertion direction and its implications for the retentive areas to achieve a balanced bite splint design.
- Learn to design the top surface of the bite splint considering occlusal and peripheral thickness, taking into consideration factors like the patient's VDO limitations and grinding habits.
- Understand the significance of margin delimitation and the role of retention and undercut proportion to enhance the functional fit of the bite splint.
- Gain proficiency in the free-forming process for bite splint design, learning to add volume, smooth or flatten the surface to achieve evenly distributed light contacts.
- Learn to use the virtual articulator to activate dynamic cuts, expanding your skill set in using advanced dental design tools.
01 - 02 - Setting up a Virtual Articulator for Predictable Results
- Learn how to activate and operate a virtual articulator, enhancing the design process for dental appliances by enabling precise alignment and movements.
- Understand the importance of accurately positioning jaw scans in relation to the articulator to optimize design outcomes.
- Gain proficiency in utilizing tools for automatic and manual alignment to ensure proper jaw placement and accurate design.
- Discover how to adjust occlusal planes and midlines to optimize jaw alignment, providing a greater understanding of how these adjustments affect bite splint design and functionality.
- Understand the significance of specific measurements, like the Bonwill triangle, and how they can influence the design process, ensuring optimal fit and function of the dental appliance.
- Learn how to select the appropriate articulator type and how to set individual parameters to simulate realistic jaw movements, enhancing the accuracy of the design.
- Recognize the importance of identifying teeth that influence articulate movement, which may vary depending on the type of dental work.
- Understand how to adjust overall parameters for the articulator, learning the significance of the Bennett angle, condylar angle, and immediate sideshift for creating accurate jaw movements.
- Learn how to deal with intersecting meshes in jaw scans and understand the implications for bite height and the functionality of the restoration.
- Understand the importance of thorough 3D data editing before activating the virtual articulator to prevent inaccuracies in bite height.
- Learn to use the free-form tool and cut dynamic intersections after using the virtual articulator, enhancing the design and function of the bite splint.
01 - 03 - Dynamic Adaptation with Virtual Articulator for Functional Splints
- Understand the process of dynamic adaptation in the wizard mode to make final adjustments, emphasizing the value of precision in dental appliance design.
- Learn the significance of creating an optimal bite splint surface that allows for effective canine and protrusive guidance, underscoring the importance of functional design in preserving dental health.
- Discover techniques for excluding specific parts of a bite splint model and manipulating their volume to create effective canine guidance paths, illuminating the importance of strategic adjustments in bite splint design.
- Acquire skills to identify and rectify extreme contacts while maintaining necessary volume for manual adaptation, highlighting the balance between removal and retention of material in bite splint production.
- Master the use of smoothing and flattening tools to create an optimal bite splint surface, demonstrating the importance of these tools in enhancing patient comfort and product functionality.
- Learn how to validate bite splint functionality through articulator movement checks, reinforcing the importance of product testing in ensuring successful design outcomes.
- Understand the importance of continually updating the simulation movements to account for changes in the bite splint's surface, illustrating how constant revision enhances the reliability of the design.
- Learn how to interpret color representations of contact points to avoid unwanted intersections and balance bite height, emphasizing the role of visual aids in guiding precise design adjustments.
- Appreciate the importance of simulation movement updates in not only bite splints but also restorative workflows, highlighting the transferability of this knowledge to other areas of dental design.
- Gain an understanding of the broader implications of detailed digital tool use in creating functional and reliable dental work, underscoring the significance of these skills in contemporary dental practice.
01 - 04 - Bite Splint Automation and Improvements - v3.2 Elefsina
Identify and utilize new automation tools in exocad 3.2 for bite splint workflows
Understand the process of automated tooth segmentation for bite splint design
Recognize the requirements for using cloud-based automation features
Navigate the automated bite splint outline creation process
Understand options for detecting and adjusting in-between points on the splint outline
Appreciate the balance between automation and manual refinement in real-world cases
Identify this lesson as part of an intermediate-level course on mastering exocad, specifically covering new features in version 3.2
01 - 05 - Virtual Articulator - v3.2 Elefsina
Understand the new features available in the exocad virtual articulator tool
Know how to access and use the new in-skull articulator feature
Be able to use the improved bite opening functionality
Recognize the significance of the new bite opening feature for maintaining vertical dimension changes throughout the design process
Understand how this new feature differs from previous workarounds for bite opening (e.g., saving new bite relations as STL files)
Be aware of potential limitations, such as the feature not being available in all modules
Know to expect future updates that may extend these features to other modules
Be prepared for an upcoming lesson on new Smile Creator tools and improvements
Understand that this lesson builds upon previous knowledge from the "Mastering exocad" course, particularly regarding bite opening techniques
02 - 01 - How to Manually Open the Bite and Increase the VDO
- Comprehend the process of opening the Vertical Dimension of Occlusion (VDO) and understand the different methods for achieving this, focusing on the significance of precision in orthodontic interventions.
- Differentiate between the "Correct Antagonist" tool and the "Virtual Articulator" tool for adjusting VDO, underlining the importance of tool selection in achieving accurate results.
- Recognize the implications of varying methods of VDO opening on bite splints or full mouth rehabilitations, illustrating the need for appropriate techniques in differing dental scenarios.
- Understand the potential issues that can arise from VDO adjustment in the virtual articulator, emphasizing the need for careful consideration during the dynamic occlusal adaptation.
- Learn the steps to save and reopen bite scan files after adjusting the VDO, showing the importance of file management in maintaining progress and ensuring precision.
- Master the sequence of articulation, jaw alignment, and simulation for optimal bite splint preparation, reinforcing the importance of following procedural steps for successful outcomes.
- Understand the nuances of jaw alignment in preparing for articulation, demonstrating the impact of precise alignment on overall orthodontic results.
- Gain insight into the importance of correct parameter settings during the simulation process, highlighting how these settings influence the final outcome of the dental intervention.
- Apply the knowledge gained to proceed with complex dental cases involving bite splint designs and full mouth rehabilitations, underscoring the relevance of these skills in professional dental practice.
03 - 01 - Simple Custom Tray Design Workflow
- Identify the steps involved in the custom tray design workflow and appreciate the similarities and differences compared to the bite splint design workflow, emphasizing the diversity of dental tools and applications.
- Understand the role and adjustment of offset value in custom tray design, elucidating the practicalities of creating a comfortable and functional dental appliance.
- Distinguish the need to prevent undercuts in custom trays and grasp the importance of tray retentiveness in achieving patient comfort and device functionality.
- Identify the impact of different parameter settings on the custom tray design, such as the insertion direction and the top surface thickness, illustrating the importance of detail in dental appliance design.
- Master the skill of margin drawing in custom tray design and recognize its significance in tailoring the tray to individual patient needs.
- Develop an understanding of aesthetic considerations in custom tray design, including the smoothing of surfaces and changes to boundaries, which contributes to patient satisfaction and comfort.
- Learn the techniques for designing a handle on the custom tray using both "Paint and Pull" and "Attachments" tools, showcasing the importance of versatility and adaptability in dental design skills.
- Recognize the importance of custom trays in the field of dentistry and how mastery of these skills can lead to enhanced patient outcomes.
03 - 02 - Using Attachments for Open Trays and Other Complex Designs
- Understand the function of the "Attachments" tab in the bite splint workflow, elucidating its role in adding or removing design elements to the surface of your design, and differentiating its application in various restorative workflows.
- Recognize the utility of the attachment library and the importance of the parametric design (extrusion) tool for designing handles, advancing the comprehensiveness and customization of dental appliance design.
- Develop skills to adjust and position attachments efficiently, utilizing move, rotate, and scale options, expanding their proficiency with the dental design software.
- Comprehend the impact of specific software tools and features, such as "Cut on Gingiva" and "Allow Any Changes", in shaping the final design and mitigating potential production problems.
- Learn to merge an attachment profile with the custom tray mesh and place it in different angles, promoting design versatility and the ability to address unique case needs.
- Understand how to load a 3D file to be used as an attachment and integrate it into the custom tray design, expanding the scope of available design options.
- Gain the ability to create holes in the custom tray for implant components using the subtract function, demonstrating the value of these tools in addressing complex dental scenarios.
- Understand the potential of the attachments tool in enhancing CAD expertise and expanding design possibilities, emphasizing the importance of continuous learning and exploration in advancing dental technology skills.
04 - 01 - Simple Workflow for Designing Eggshell Crowns
- Understand the provisional eggshell crown workflow in dentalDB, enabling accurate selection of teeth for design and precise definition of tooth location.
- Develop proficiency in tooth segmentation both automatically and manually, and understand the importance of accurate margin line detection for optimal crown design.
- Learn how to address challenges with poor quality scan data, utilizing corrective tools and expert mode features to enhance automatic detection results.
- Master the free-forming of teeth shapes, ensuring a satisfactory design result that accurately reflects the patient's original dental structure.
- Understand the key parameters for designing the bottom of the provisional crown, including shoulder width, shoulder slope, and taper, and their role in shaping the axial walls of the preparation.
- Familiarize with the process of setting different insertion directions for multiple unit provisional crowns, enhancing the versatility of the design process.
- Comprehend the use of tooth libraries in the design process, including their application in custom model tooth placement and adaptation, fostering an expanded range of design possibilities.
- Recognize the importance of maintaining minimal thickness requirements and accurately showing distance during tooth library usage, mitigating design errors and ensuring a successful restoration process.
04 - 02 - Designing a Provisional Eggshell Bridge and Performing a Virtual Tooth Extraction
- Comprehend the workflow for designing a provisional eggshell bridge without using a tooth library, drawing parallels with the eggshell crown design process.
- Understand the process of tooth detection and digital extraction for eggshell pontic creation, including adjustment of gingival removal and the axis of removal.
- Become proficient in the free-forming of eggshell pontics and bridges, with a focus on the careful adaptation of pontics to the gingiva and the modification of the cervical area of the pontic.
- Learn the specifics of interproximal contact management in bridge design, and understand how different bridge components merge in the design process.
- Understand the limitations of tooth library use in eggshell bridge design, specifically its inability to generate pontics, and learn how to navigate these limitations.
- Familiarize with the process of manual tooth extraction in expert mode, enhancing the range of design possibilities in the dentalDB.
- Recognize the importance of selecting compatible materials in the dentalDB for effective connector generation in bridge design.
05 - 01 - Understand Scanbodies and Information You Need to Manufacture Implant-Supported Restorations
- Understand the complexity and nuances of the implant workflow in digital dentistry, taking into account the multitude of implant companies, implant types, abutment types, scanbodies, and analogs.
- Learn the crucial preparatory steps in implant-based restoration, including acquiring specific knowledge about the implant and scanpost in the patient's mouth, such as brand, connection type, and platform diameter.
- Comprehend the role of scanbodies in showing the software the position and type of implant, as well as how they inform the type of abutment that can be used.
- Understand the significance of brand compatibility in the use of implants and scanbodies, and the incompatibility between scanbodies and abutments from different brands.
- Be aware of the limitations posed by system-exclusive scanbodies and their effect on software compatibility.
- Learn how to identify different brands of scanbodies through their geometric patterns and how to decode their specifications using examples like Straumann and BioHorizons catalogs.
- Understand the importance of studying brand catalogs to access accurate and comprehensive information about different components.
- Learn the process of acquiring and installing implant libraries from company websites or reseller representatives for the utilization in the implant design process.
05 - 02 - Setting up a Custom Abutment Case
- Understand the two main options for designing an implant-based restoration in exocad: custom abutment and screw-retained design.
- Learn the process of setting up a custom abutment and crown workflow in DentalDB, including the selection of materials, additional jaw scans with the scanpost in position, and possible challenges.
- Understand how to manage the position of the scanbody to avoid losing the contact area due to software cropping and the benefit of dual scanning.
- Learn the process of uploading jaw scans and aligning meshes in exocad, with a focus on the importance of accurate alignment for successful implant detection.
- Become proficient in the selection of the correct implant library based on the specifications of the scanposts provided by the client and how to use the implant library effectively.
- Learn the meaning of different implant specifications such as conical morse implants, lab version and intraoral version scanbodies, platform diameters, abutment top cementable parts, and transgingival heights.
- Understand the process of marking the scanbody in exocad, including how to position it accurately and use the "best fit matching" feature to avoid inaccuracies caused by saliva, blood, or other artifacts.
- Develop the ability to assess the accuracy of the transgingival height in the patient's mouth by making the jaw scan transparent and checking against the base of the abutment.
- Learn to design the custom abutment, taking into account the need for adequate room to ensure the metal is not visible.
05 - 03 - Tools to Design Emergence Profiles of Custom Abutments
- Comprehend the concept of emergence profile and its importance in custom abutment and crown designs in implant-based restorations.
- Learn to manually define the emergence profile with the help of Definition Tools in the software, aiming to conceal the connection between the abutment and crown.
- Understand how to customize the shape of the abutment bottom, considering angles and volumes, with the application of the free-form tool.
- Gain proficiency in interpreting the color graphic to measure the distance from the gingiva, ensuring appropriate pressure on the tissue.
- Comprehend how to adjust profile borders in the Advanced Tab according to the type of implant being designed, and understand the potential issues of certain options like "allow below implant analog."
- Understand how to independently adjust the margin limits of the abutment bottom, leveraging control point manipulation.
- Learn the process of free-forming the crown for a custom abutment, performing necessary occlusal and approximal adjustments, and handling intersection areas.
- Understand the importance of setting the secondary insertion direction to ensure a proper fit for the crown and the abutment.
- Become proficient in manipulating the draft angle and spacing of the abutment to achieve the desired design while observing the changes in real-time.
- Understand the application of visualizers in assessing distances, and navigate through advanced parameters to achieve desired results.
- Learn how to make final adjustments to the abutment design, if needed, and understand the process leading up to the Merge and Save Restorations step.
- Gain skills in designing the crown that will fit on top of the abutment, and understand the process of adapting and merging the tooth anatomy with the abutment.
- Learn how to revisit and adjust the anatomic shape of the tooth post-adaptation.
- Understand the outcome of the process, observing the resultant STL files for both the abutment and the crown in the project folder.
05 - 04 - Screw-Retained Crown - Case Setup and Design Workflow
- Understand the steps and considerations in designing a full screw-retained crown, including material selection, tooth selection, and activation of the Screw-retained option.
- Learn to upload and utilize jaw scans, including the selection and placement of the appropriate scanbody.
- Gain insight into the impact of platform diameter and the use of intraoral versions of scanbodies.
- Learn how to manipulate the height of the cementable part of the abutment and the transgingival height according to specific case needs.
- Develop skills in analyzing interocclusal space, with an emphasis on assessing the appropriateness of abutment and transgingival heights.
- Comprehend how to effectively utilize the "best fit matching" feature, focusing calculations on key areas of the scanbody.
- Learn how to define an emergence profile, and understand the significance of this step in the crown design process.
- Gain proficiency in customizing the abutment bottom, adding points and adjusting parameters as necessary.
- Understand how to employ advanced options to adapt the crown directly onto the base of the titanium base.
- Learn how to design the crown surface during free-forming, considering factors such as prevention of concave areas and visualization of intersections with the gingiva.
- Understand the software's limitations, such as its inability to distinguish between soft tissue and adjacent teeth during intersection cuts.
- Develop skills in defining the screw hole design, customizing the chimney around the screw hole, and understanding when to use or disable this feature.
- Learn how to finalize the crown design, merge elements, and save restorations.
05 - 05 - How to Design a Screw-Retained Crown Without a Scanbody Using a Titanium Base Scan Only
- Understand the selection process for designing an implant-based crown without a scanbody, including the choice of anatomic crown, material, and scan type.
- Learn how to process a stone model scan, including adding a separate gingiva scan, and recognize its applications in dental restorations.
- Understand the importance of a straight screw channel for the crown and learn the procedures to clean up and close holes in the screw channel area.
- Gain proficiency in identifying the margin of the implant base and learn how to add points on the edge of the base accurately.
- Develop skills in screw channel definition, including setting the diameter and adjusting the screw channel's position and orientation.
- Gain insight into the crown workflow in the absence of a scanbody, noting how the meshes merge and leave a hole in the end.
- Learn to adjust the emergence profile during the free-forming step and understand the applications of stronger gingival contacts.
- Understand the considerations when working with a separate gingiva mesh, including cutting intersections and managing interferences.
- Recognize the importance of leaving more volume in the design phase to accommodate hand adjustments post-milling or printing, thus avoiding gaps in the final restoration.
- Learn how to manage the screw hole design for the implant-based restoration and understand the steps to merge and finalize the design.
05 - 06 - How to Change the Implant or Titanium Base Type
- Learn how to alter implant or analog types midway through the design process without restarting the project, adding flexibility to your work process.
- Understand how to transition between modes, specifically from Expert Mode to delete merged parts in the project.
- Familiarize with the process of changing implant attributes like transgingival height, and understand how to redo matching and abutment design accordingly.
- Learn how to rectify distortions in the cervical part of the restoration through free-form smoothing, maintaining the aesthetic and functional quality of the restoration.
- Understand how to change the type of implant restoration, for example, transitioning from a custom abutment and crown to a screw-retained crown.
- Discover the versatility of the design software in handling various design challenges and alterations, boosting your problem-solving abilities and efficiency.
- Understand why these skills are important for optimizing workflow, enhancing design precision, and ensuring adaptability to different clinical scenarios.
05 - 07 - Screwmentable Crown - v3.2 Elefsina
Understanding of the new screw-mentable crown workflow in exocad 3.2 Elefsina.
Knowledge of how to create a custom abutment with a screw-retained crown.
Ability to use the new built-in feature instead of previous workarounds.
Familiarity with the step-by-step process for designing a screw-mentable crown.
Awareness of the specific tool (screw holes tab) and its location in the software.
Understanding of when to apply the screw hole feature in the design process.
Ability to customize screw hole parameters if needed.
Recognition of the benefits of this new workflow for dental restorations.
Understanding of how this feature improves efficiency in dental CAD design.
Awareness of the flexibility in cementing the crown while maintaining screw access.
Knowledge of how to navigate between custom abutment and crown design stages.
Understanding of the default settings and when to use them.
Ability to apply this technique to improve patient outcomes in implant cases.
06 - 01 - How to Set up a Wax-Up Case in exocad
- Gain knowledge on how to design digital wax-ups for upper teeth, enhancing your proficiency in aesthetic veneer cases and rehabilitations.
- Understand the process of selecting specific teeth as "Anatomic Pontic" in dentalDB and its impact on the design.
- Learn how to integrate patient photos into the Smile Creator module for improved design accuracy and personalization.
- Understand the importance of strategic planning in wax-up design, focusing on preparation type, choice of material, and considering the properties and limitations of each material.
- Develop skills in uploading and orienting STL files within the digital environment, crucial for accurate representation of the patient's dentition.
- Learn to edit and correct mesh defects from a stone model scan to ensure a precise and undistorted perception for design.
- Understand the significance of each of these skills in enhancing the overall design quality, patient satisfaction, and clinical outcomes.
06 - 02 - Setting up exocad’s Smile Creator for Wax-Up and Digital Smile Design
- Gain understanding of the process to upload and align patient photos within a digital dentistry software, enabling realistic and accurate design of wax-ups.
- Appreciate the importance of professional dental photography and recognize the limitations of different lenses and image compression in capturing accurate representations of a patient's smile.
- Develop skills in setting corresponding points between photos and 3D scans, ensuring accurate alignment for design purposes.
- Learn to adjust the alignment based on potential distortions in photos, using the front teeth as a reference point for maintaining symmetry.
- Understand the importance and process of drawing lip lines to delineate the oral cavity in your digital design.
- Familiarize with the manual alignment of photos, using consistent anatomical points, such as the pupils, for accurate correspondence.
- Grasp the significance of various guidelines such as the midline, interpupillary line, and proportion guide in planning the wax-up design.
- Gain insight into the importance of tooth proportions and smile line placement in designing aesthetic veneers.
- Understand how to select and position suitable tooth anatomy using an advanced tool placement tool, enhancing the realism and accuracy of your wax-up design.
- Recognize the importance of these skills in creating a personalized and aesthetically pleasing wax-up design that can improve patient satisfaction and clinical outcomes.
06 - 03 - Designing a Wax-Up - Workflow, Troubleshooting, Tools, Tips and Tricks for Efficiency
- Learn how to navigate the dental design software, specifically in the context of performing tooth placement in wizard mode, for accurate and personalized smile design.
- Understand the significance of different perspectives (small design view, occlusal view, 12 o'clock view, and inverted frontal view) in creating a comprehensive wax-up case.
- Gain proficiency in adjusting tooth placement and orientation while considering patient-specific factors such as preference for conservative prep.
- Develop skills in using advanced scaling techniques to achieve ideal tooth proportions.
- Appreciate the necessity of checking for tooth overlap and maintaining transparency during design for optimal outcomes.
- Recognize the process to alter tooth anatomy using custom model tooth features, allowing for more personalized and accurate wax-ups.
- Understand the need to overlap tooth mesh with gingival tissue in cases requiring a crown lengthening guide.
- Familiarize with the use of the free-form step to finalize tooth placement and ensure accurate overlap with the gingival tissue.
- Recognize the potential for using the software to simulate tooth reductions, and understand the need for client approval and practical mimicry in real-life prep.
- Learn the method to perform a digital tooth reduction in expert mode, including the addition of a generic visualization mesh for reference.
- Develop the ability to mirror teeth placement to opposite quadrants for efficient and symmetric design.
- Appreciate the importance of frequent checks against smile design guidelines and patient photos for accurate and patient-satisfying results.
- Familiarize with keyboard shortcuts for swift corrections, adjustments and reversals during the design process.
- Gain proficiency in the free-forming step to finalize and perfect tooth placement and occlusal contacts in the digital smile design.
06 - 04 - Gingivectomy Simulation and Finalizing Wax-Up
- Learn to execute the free-forming step, allowing for final adjustments and customization of the tooth library in the digital dental design software, Exocad.
- Understand the importance of being proficient with system navigation to ensure smooth transitions between different steps of the process without losing work.
- Realize the value of utilizing a quality tooth library for efficiency, but also acknowledge the ability to modify this according to patient-specific requirements.
- Master the gingivoplasty simulation, including using tooth parts to overlap with the gingiva and fine-tuning the zenith of the teeth for perfect positioning.
- Develop the skill of removing all volume from the lingual side and re-designing the occlusal by hand for veneer planning.
- Appreciate the importance of transparency in both the jaw scan and the full anatomic mesh for accuracy in adding volume and removing steps.
- Understand the benefits of using the disk cutter to separate teeth meshes, preventing overlapping and saving time during the pre-op adaptation.
- Gain the ability to check the antagonist for intersecting meshes and learn to take multiple screenshots for client approval.
- Learn to save the completed wax-up design as an STL file for future reference, including hiding and showing specific components before saving the scene.
- Recognize the steps to complete and close a case while preserving an STL file with separate teeth meshes for pre-op reference.
- Understand that the saved file cannot be printed as it lacks wall thickness and volume, and know where to find the class on creating a printable model.
06 - 05 - Smile Creator and Enhanced Visualization Tools - v3.2 Elefsina
Utilize new features in the Smile Creator module:
Understand the concept of field of view and its impact on design accuracy.
Learn how to address common photo distortion issues.
Apply advanced tooth shade and color adjustments:
Explore new options for customizing tooth appearance.
Learn techniques for matching adjacent tooth shades.
Improve gingiva visualization in your designs:
Discover new tools for creating realistic gingiva representations.
Understand how to better integrate gingiva designs with scanned data.
Enhance overall design visibility and detail:
Learn about new rendering options for improved anatomical visualization.
Explore tools for adjusting image properties within exocad.
Streamline your workflow with new features:
Understand how automated visibility tools can speed up your design process.
Learn about updates to existing tools that improve ease of use.
Create more effective visual presentations of your designs:
Discover new options for highlighting specific aspects of your designs.
Learn how to generate more comprehensive reports within Smile Creator.
Integrate these new tools into your existing exocad workflow:
Understand how these updates fit into the overall design process.
Learn strategies for incorporating new features into your daily work.
07 - 01 - Case Setup - Margination, Insertion Axis, Bottom Settings and Tips for Well-Fitting Veneers
- Understand the process of designing veneers using a pre-existing wax-up mesh as a pre-operative guide.
- Learn to select the appropriate material, in this case, lithium disilicate, for a 4-axis milling machine, while setting up the veneer design in dentalDB.
- Acknowledge the constraints of indicating a flat-top bur during the veneer bottom step if the case is set as "veneers", and learn to set the case as "Anatomic Crowns" when milling with flat nose burs.
- Learn to upload files and adjust the scan data orientation for veneer design.
- Recognize that a previously approved wax-up can negate the need for the smile creator in certain cases.
- Understand that the process of margin line detection remains consistent in veneer design, as covered in previous classes.
- Realize that the insertion direction step is mandatory when working with veneers, even when there are no apparent undercuts in the preparation.
- Develop the skills to adjust the parameters for inlay bottoms based on the precision of the milling machines used to produce the veneers.
- Learn to modify the "from margin" value and borders parameters in the inlay bottoms to optimize the veneer design.
- Understand how to calculate the appropriate clearance for milling by factoring in the smallest bur of your milling system and adding a certain value for appropriate clearance.
07 - 02 - Following a Wax-Up and Troubleshooting Common Issues
- Understand how to upload and align a pre-existing wax-up mesh within the scene using the expert mode.
- Learn to remove the gingiva from the pre-op scan to ensure a smooth adaptation process.
- Identify the challenges with connected interproximal areas in the anatomic pontic mesh and how it can lead to distorted contact areas.
- Master the process of separating connected meshes to ensure the software can differentiate between individual teeth.
- Become adept at handling excess meshes and potential breaches in minimum thickness during the veneer design.
- Explore multiple solutions to rectify discrepancies in volume between the mockup and the client's actual dentition.
- Develop skills to use free-form tools to add volume and align teeth models within the pre-op mesh.
- Learn to make necessary adaptations to the teeth models and pre-op scan, and to correct issues in the approximal and occlusal sides.
- Become proficient at using shortcuts to hide and reveal objects within the scene for ease of operation.
- Understand how the natural dentition plays a role in veneer cases, especially in terms of contact points.
- Learn to make final corrections in the veneer design and conclude the process by merging and saving restorations.
- Realize the importance of the post-processing step, particularly for the removal of any remaining minimal thickness breaches.
08 - 01 - Designing a 3D Printed Model with Space for Implant Analogs
- Learn how to initiate the "Model Creator" module using multiple pathways within the dentalDB or a finished project window.
- Understand how to choose the correct model type for the task, with a focus on the "Plateless Model with Extra Dies" for implant cases.
- Become aware of the importance of displaying "implant analog parts" while positioning jaw scans to prevent breaches of model boundaries.
- Master the process of toggling tooth dies within the module.
- Comprehend how to handle issues arising from mismatched implant analog libraries, including how to acquire and install the correct library.
- Gain an understanding of how to adjust parameters within the "Plateless Model Design" to enhance the aesthetic quality of the model, such as raising the "Pedestal Height".
- Learn how to adjust the "Horizontal offset" value for analogs when printer and resin calibrations are accurate but analog fitting is still an issue.
- Learn how to create and set boundaries for a separate gingival mask.
- Understand why it is important to remove the gingiva from the solid model, even when a gingiva mask is not being printed with flexible resin.
- Master the process of generating models for both the upper jaw and antagonist, ensuring the correct sequence of steps is followed.
- Gain insight into the future topics of adding attachments and texts within the "Model Creator Wax-up Class".
08 - 02 - Adding Labels and Articulator Attachments for Securing Bite
- Acquire the skills to create a model for wax-up designs, accessing the digital design in expert mode.
- Learn the process of model alignment, including selection of the correct type ("Digital Wax-up Model") and verification of the alignment of the occlusal plane to model boundaries.
- Understand how to apply the "Plateless Models Design" to the digital design, including the importance of checking the full anatomic checkbox based on the final print design desired.
- Master the adjustment of model settings, such as pedestal height, and model generation.
- Develop skills in model surface polishing to remove imperfections using the free-form model tool.
- Gain proficiency in the application and adjustment of model attachments, including placement, deletion, movement, rotation, and parameter changes.
- Learn the correct application of articulator attachments, understanding the need for overlapping meshes for successful merging.
- Become adept at adding and positioning text to the model, including understanding issues of size and surface unevenness, and the options for text size, thickness, addition or subtraction, and font.
- Master the ability to apply different parameters to different texts within the same model.
- Understand the process of merging and saving the final design, and locating the saved files within the project folder.
08 - 03 - Model Creator - v3.2 Elefsina
Utilize the new feature for exporting models with color and texture for compatible 3D printers
Understand that this requires selecting the "plateless model" option.
Recognize the current limitation that wax-up designs cannot be printed in color.
Navigate the updated interface for creating digital wax-up models
Use the new tool to selectively add specific teeth to the model.
Apply this feature for creating composite veneers or clear stents.
Understand how this simplifies the workflow compared to previous workarounds.
Explore and utilize new model attachments
Benefit from improved hover descriptions and images for each attachment.
Make more informed decisions about which attachments to use for specific scenarios.
Recognize changes in the Model Creator module layout
Adapt to the slightly altered text window layout.
Understand that core functionality remains largely the same despite visual changes.
Identify the most impactful recent improvements to the Model Creator module
Focus on features that enhance workflow efficiency and expand design possibilities.
Apply color model export capabilities appropriately
Remember that this feature is currently limited to plateless models.
Anticipate potential future developments, such as colored wax-up designs.
Leverage the new selective teeth addition feature for specialized applications
Create models with alternating waxed-up teeth for specific clinical needs.
Understand how this feature can save time in the design process.
09 - 01 - Closing a Screw Channel Hole - How to Change a Screw-Retained Design to Cementable Crown Instead
- Understand the importance of correctly installing new teeth model libraries in exocad.
- Identify the three essential folders included in a new library: teeth, pontics, and metadata.
- Differentiate the purpose and functionality of each folder in the library (teeth, pontics, and metadata).
- Locate the installation directory of exocad and navigate to the Dental CAD app and library folder.
- Demonstrate the process of installing the metadata folder by dragging it into the exocad directory.
- Explain the significance of correctly installing all three folders (metadata, teeth, and pontics) for the library to function properly.
- Recognize the need to restart the application after installing the library folders for the changes to take effect.
- Access and utilize the newly installed teeth library in the "Load Custom Model Teeth" step.
- Understand the similarities between installing teeth libraries and implant libraries in exocad.
- Identify the two folders associated with implant libraries: scan posts and prosthetics components, and analogs for printable model creation.
- Apply the same method of installing implant libraries by dragging the respective folders into the designated locations.
- Comprehend the value of correctly installing teeth and implant libraries to expand the available options and enhance the modeling capabilities in exocad.
09 - 02 - Split Bridge Design - Simple Solution for Non-Parallel Tooth Preparations
- Understand the challenge of designing a bridge with angulated abutments and the impact of lack of parallelism on the bridge fit.
- Recognize the importance of addressing the lack of parallelism by splitting the bridge to accommodate the angulated abutments.
- Navigate to Expert mode in exocad to access advanced design options.
- Demonstrate the process of merging and saving restorations with the optimization for better free-forming and 3D printing.Identify the "Bridge Split" option in the context menu for splitting the bridge.
- Explore the selection box containing various splitting profiles to choose from.
- Understand the significance of selecting an appropriate splitting profile based on the specific case requirements.
- Set parameters such as gap size and milling bur dimensions to customize the splitting process.
- Utilize mouse and keyboard controls to adjust the insertion axis and rotate the splitting profile into the desired position.
- Verify the correctness of the split and confirm the operation.
- Comprehend the outcome of the split, resulting in two separate files for the divided bridge.
- Appreciate the ability to overcome the challenge of non-parallel abutments through the splitting technique, ensuring a proper bridge fit.
- Understand the practical application of this tip in complex bridge designs, enhancing the versatility and adaptability of exocad in accommodating diverse clinical scenarios.
09 - 03 - How to Open an exocad Project from Another Computer
- Understand the process of opening a project file from an external source in exocad.
- Recognize the importance of receiving and saving the folder containing the .dentalproject and .dentalCAD files for the project.
- Differentiate between the .dentalproject file and the .CAD file, understanding their respective roles in storing DentalDB information and the design itself.
- Navigate to the DentalDB in exocad and access the "Load" option to import a project from an exocad project file.
- Discover the capability of importing project files from other sources such as 3M, iTtero, and TRIOS using the same tool.
- Locate the folder containing the project files and open the dental project file to import the project into exocad.
- Understand the significance of saving the folder in a location that won't be deleted to ensure continued access to the project.
- Comprehend the consequences of deleting the folder and the need to repeat the import process if the path is no longer accessible.
- Appreciate the importance of organizing and safeguarding project folders to maintain efficient workflow and avoid data loss.
- Recognize the value of being able to open project files from various sources, facilitating collaboration and integration with different systems.
- Understand the implications of this lesson in terms of accessing and working with external project files, enhancing productivity and versatility in exocad.
09 - 04 - Tip to Save Resin When Printing Wax-Up Design Models - v3.1 Rijeka
- Understand the importance of proper model alignment and height settings for both upper and lower models
- Learn how to create a base for the model to include patient and client information
- Discover the technique of selecting specific tooth meshes to edit, enabling precise root removal
- Gain knowledge on closing holes in the edited mesh to maintain model integrity
- Master the process of generating a hollow model, significantly reducing resin consumption
- Acquire the skills to apply these techniques to both upper and lower dental models
- Develop an understanding of how these optimization methods can lead to long-term savings and efficiency in high-volume printing scenarios

Mastering exocad Advanced
Access 16 exocad online training lessons for advanced exocad users and master complex design workflows.
In these 2.5 hours you will learn how to handle advanced restorative exocad design workflows.
01 - 01 - Case Setup and Designing a Surgical Guide Using the Splint Settings
- Understand the importance of designing a crown lengthening guide and the prerequisite of having an approved wax-up design with a proper crown lengthening simulation.
- Learn how to select the appropriate teeth for the guide and add an additional tooth to fix the splint in the patient's mouth.
- Understand the significance of adjusting scan data orientation and setting parameters such as off-set, undercuts, minimum thickness, and insertion direction to ensure a smooth fitting splint.
- Gain proficiency in adding the wax-up mesh as pre-op and deleting the jaw scan in the expert mode.
- Learn how to use the Measurement Tool to set the cervical boundary of the wax-up mesh and create annotations for bone structure removal if necessary.
- Understand the process of creating the top part of the splint and setting the lingual boundary.
- Gain proficiency in adding points and adjusting them to mimic the papilla.
- Understand the importance of setting the appropriate thickness parameters for the splint.
- Gain proficiency in progressing through the free-form step without making any changes.
- Understand the need for cut patterns to be added to the surgical guide and the option to save the project for later.
- Learn how to start a new project and select the teeth as "Primary Telescopic Crown" with any material, to proceed with the design of the cut patterns.
01 - 02 - How to Design a Surgical Guide for Gingivoplasty with Windows in exocad
- Understand the process of designing a primary telescopic crown using the same jaw scans used for the surgical guide splint.
- Learn how to add the wax-up as an extra mesh and perform margin line detection on the boundaries of the wax-up mesh.
- Gain proficiency in correcting any areas where the margin line turns red by adding and adjusting points.
- Understand the importance of setting the correct insertion direction for each tooth in the crown design.
- Learn how to adjust parameters such as removing the cement gap and lowering the borders in crown bottoms.
- Gain proficiency in placing the model teeth on top of the cut pattern delimitation and proceeding to the telescopic crown insertion direction step.
- Understand the process of extending the length of the curve pattern by manipulating anchor points and the green arrow.
- Learn how to merge the restorations and save each tooth as an STL file.
- Understand how to integrate the cut patterns into the surgical guide splint project by performing a free-form merge of the parts.
- Learn how to subtract the attachments using the library and load the cut patterns STL files.
- Gain proficiency in aligning and applying the cut patterns to the surgical guide.
- Understand the importance of making final adjustments to surface deformities in the free-forming step.
- Learn how to save and replace the new surgical guide once the design is complete.
02 - 01 - Setting up a Hybrid Crown and Implant Case, Fixing Over-closed Bite Using a Virtual Articulator and Selecting the Appropriate Titanium Base
- Learn how to fill the DentalDB for a full mouth rehabilitation case, including selecting different types of restorations for specific teeth.
- Understand the process of adjusting the lower scan data when working on both arches.
- Gain proficiency in using the virtual articulator to raise the VDO (Vertical Dimension of Occlusion) to make room for the restorations.
- Understand the importance of saving the scene as the new bite-scan relation and aligning the jaw scans using the Bite Alignment Scan.
- Learn how to select the correct dimensions for the titanium base based on the specific implant system used in the case.
- Gain proficiency in adjusting the transgingival height and optimizing the alignment of the titanium base.
- Understand the process of margin detection for crown design and the importance of setting accurate values based on the machine's accuracy.
- Learn how to place teeth in the upper jaw for the full mouth rehabilitation case.
02 - 02 - Tooth Placement Tools, Tips and Tricks for Efficiency in Crown and Wax Up Design
- Learn how to place teeth in the upper jaw using the tooth placement tool, including techniques such as chain mode, single tooth manipulation, and using the fixed bow for simultaneous movement.
- Understand the importance of covering the minimal thickness layers, setting buccal volume, and ensuring proper teeth length during the tooth placement process.
- Gain proficiency in making final adjustments to the tooth placement using the free-form tool, including bending the surface where needed and considering the occlusion.
- Learn how to mirror teeth from one side to the other to achieve symmetry in tooth placement.
- Understand the process of placing teeth in the lower jaw, including considerations for occlusion and adjusting teeth on the free-form tool if necessary.
- Gain proficiency in using grids to assess smile curve, teeth proportion, angulation, and volume.
- Learn how to perform free-forming to make final adjustments to the tooth placement, ensuring proper adaptation and occlusion.
02 - 03 - Free-Forming Crowns Against Wax-Up for Functional and Aesthetic Results
- Learn how to perform final details using free-forming techniques, including adding volume to cover minimal thickness breach, correcting small details like ridges and angles, and integrating the wax-up mesh with the jaw scan for a realistic simulation.
- Understand the importance of achieving proper occlusion and balancing the occlusal plane during the free-forming process.
- Gain proficiency in using the "tooth parts" tool to relocate the angle of the root and ensure proper adaptation of the teeth models to the margin.
- Learn how to save and use pre-op scans for reference and to address distortions during the adaptation process.
- Understand the process of cutting approximal and occlusal intersections at specific values to ensure proper seating and alignment of the restorations.
- Learn how to adapt pontics to the gingiva, considering the impact on the lower arch if it is a wax-up with anatomic pontics.
- Gain proficiency in designing connectors for bridges and free-forming them using points.
- Understand the importance of using the virtual articulator to check jaw movements, align the jaw scans, set bennet and condylar angles, and correct any guidance or interferences.
- Gain an overview of the full mouth rehabilitation design process, including VDO increase, crown and bridge design, implant considerations, and wax-up techniques.
- Understand the benefits of working in expert mode to navigate between different steps and make adjustments as needed.
- Learn how to generate models for the full mouth rehabilitation case using the Model Creator.
03 - 01 - Case Setup for Preliminary Design in Both Jaws Regardless of Implant Placement
- Learn how to design a double All-on-X case using various tools and techniques.
- Understand the importance of having the necessary files, including upper and lower jaw scans, scan markers, bite and teeth reference, and implant and scanbody information.
- Gain proficiency in selecting the appropriate options and parameters in the DentalDB for All-on-X case design.
- Understand the benefits of using anatomic and pontic wax-up instead of anatomic crowns and bridges for All-on-X cases.
- Learn how to design the virtual gingiva to ensure proper adaptation and avoid issues with implant placement.
- Gain proficiency in selecting the desired teeth for anatomic and pontic wax-up and using the shift and control keys to replicate the setup for both arches.
- Understand the importance of adjusting the scan data orientation and switching to expert mode for more advanced functionalities.
- Learn how to add wax-rims to the model using the add/remove mesh option.
- Understand the process of detecting implant analogs and matching them with the corresponding scanbody meshes.
- Gain an overview of the implant-based workflow in exocad, including selecting the implant library, understanding different components, and achieving a passive fit with non-engaging titanium bases.
- Learn how to activate the virtual articulator and use the wax-rim markings to guide jaw correction and position the occlusal side of the upper wax-rim.
- Note the availability of a more detailed class on implant-based workflow in the intermediate module for further learning.
03 - 02 - Deciding on Tooth Proportions and Placement in Aesthetic Cases and Creating a Functional Occlusion Using Virtual Articulator
- Learn how to select the appropriate teeth library for the lower arch in All-on-X cases, considering the potential benefits of using the same library as the upper arch for improved occlusal fit.
- Understand the importance of tooth proportions and how they can vary from case to case, requiring adjustments based on individual factors and library characteristics.
- Gain proficiency in using the measurement tool to determine the width of specific teeth based on reference points and proportion guidelines.
- Learn how to align the upper and lower midlines and fit the lower teeth buccal cups to the upper teeth grooves for optimal occlusion.
- Understand the significance of mirroring the quadrant and completing the placement of the lower arch, while considering the alignment of the upper anterior teeth with the horizontal midline of the lower teeth.
- Gain proficiency in free-forming to make fine adjustments and optimize occlusal contacts, including modifying occlusal sides, closing spaces between incisal embrasures, and achieving ideal occlusal contacts.
- Learn how to use the virtual articulator to evaluate jaw movements, including lateral movements, and interpret the color graphic indicators on the teeth surfaces to identify intersecting meshes, clearance, and static contacts.
- Understand the process of reopening the articulator window, simulating movements, and updating the teeth placement to ensure accurate evaluation of jaw movements after making significant occlusal changes.
- Note the upcoming virtual gingiva design as the next step in the All-on-X case design process.
03 - 03 - Achieving Aesthetic and Hygienic Gingiva Design in Full-Arch Screw Retained Prosthesis
- Learn how to create a virtual gingiva in All-on-X cases, including the steps of virtual wax-up bottom, gingiva base design, and free-form gingiva design.
- Understand the importance of soft tissue morphology and how it contributes to the natural and aesthetic appearance of All-on-X restorations.
- Gain proficiency in using various tools, such as huge region, small region, brush, knife point, and TrueSmile (if available), to shape and refine the gingival morphology.
- Understand the significance of adding volume near implants to ensure strength and prevent future ruptures in the gingival design.
- Learn techniques to mimic gingival texture and create surface details for a more realistic appearance.
- Understand the relationship between tooth proportions and alignment in the upper and lower arches, and how to use the measurement tool to verify alignment.
- Gain proficiency in merging the upper and lower arches, generating a virtual wax-up scan, and refining the merged mesh through free-forming and smoothing.
- Learn how to check for intersections between the merged mesh and the jaw scan and make necessary adjustments.
- Understand the steps for screw hole design and merging the final design for further processing, such as milling or printing.
- Note the upcoming class on reducing the All-on-X design as a cutback design to accommodate ceramic layers, if needed.
03 - 04 - Creating Partially and Fully Reduced Frameworks and Making Room for Porcelain Layering
- Learn the different ways to finish an All-on-X project, including monolithic Zirconia milling, cutback reduction, and full reduction with thick ceramic layers.
- Understand the significance of copying and saving the initial full design before proceeding with reductions in order to preserve the original files.
- Gain proficiency in using dentalCAD tools to separate full anatomic and gingival parts for reduction.
- Learn how to perform cutback reduction by excluding contact areas and applying depth values to the selected parts, including the option for multi-level reduction and designing mamelons structure.
- Understand the process of reducing the gingiva design, considering depth parameters and collaborating with the ceramist.
- Learn how to transform the reduced teeth and gingiva into a virtual wax-up, smoothing the edges and gingival boundaries for improved aesthetics and hygiene.
- Understand the steps for screw hole design and merging the reduced meshes.
- Explore the process of full reduction, including raising depth values for teeth and gingiva, clearing exclusion markings, and modifying the bottom design for optimal strength and aesthetics.
- Learn tips for volume addition near implants and avoiding thin areas during the reduction process.
- Understand the recommended reduction depths for the upper and lower arches.
- Learn how to save and merge restorations after completing the reduced design.
- Recognize the importance of preserving the correct files and verifying the replaced design in the project folder.
04 - 01 Uploading and Aligning 3D Face Scans with Intraoral Scans
- Learn about the benefits and applications of incorporating a face scan into dental designs, particularly in full mouth rehabilitation or wax-up cases.
- Understand the files required for adding a face scan to the design, including the 3D file and PNG file with face texture.
- Gain proficiency in loading and adjusting the orientation of the face scan data.
- Recognize the importance of raising the Vertical Dimension of Occlusion (VDO) before aligning the meshes with the face scan to avoid dislocation.
- Learn how to align meshes by selecting corresponding points, such as the interdental gingival area, to achieve the best fit matching.
- Understand the process of removing the mouth from the face scan to focus on the dental arches.
- Gain proficiency in free-forming the face model, including adjusting the position of the lower lip and correcting scan data errors if necessary.
- Understand the potential benefits of adjusting the lighting of the upper and lower arch renders using the TruSmile module for increased realism and predictability.
- Learn how to activate the virtual articulator and use it to correct the jaw scans, ensuring proper alignment with the face scan and mimicking real angles and movements.
- Recognize the value of the virtual articulator as an alternative to external devices for capturing jaw movements registration data.
- Understand the significance of saving the parameters and movements of the articulator after alignment to proceed with the design of the case, incorporating the face scan data for improved accuracy and predictability.
05 - 01 - Creating 3D Printable Models with Implant Analogs, Removable Gingival Masks, and Articulator Attachments
- Understand the process of generating models for a complex All-on-X case, including separate gingiva attachments and texts.
- Learn how to align the upper teeth with the occlusal plane to ensure accurate model creation.
- Gain proficiency in loading the model analogs and adjusting the model height to ensure sufficient coverage of implant analogs.
- Understand the importance of lowering the width of the model analog supports to zero to allow proper seating of the restoration.
- Learn how to add the gingiva mask and set the boundaries for the gingiva design parts.
- Gain proficiency in adding retention nubs to the gingiva mask to enhance stability.
- Understand the process of adding an articulator to mimic jaw movements for complex cases.
- Learn how to add an incisal pin with a guided table to assist in guiding lateral and protrusive movements.
- Gain proficiency in adding texts for labeling and additional information.
- Understand the importance of checking the size of the model using the measurement tool to ensure compatibility with the printer.
- Recognize the significance of generating accurate models for a complex All-on-X case to ensure a precise and successful outcome.
- Appreciate the comprehensive nature of the process, incorporating various components and techniques learned throughout the course.
06 - 01 - How to Use Smile Creator’s Digital Smile Design Tools without Photos
- Understand the process of using the Smile Creator Module in exocad without uploading a patient photo.
- Recognize the importance of utilizing patient photos as a reference for smile designs but learning alternative methods when photos are unavailable.
- Navigate to the Smile Creator Module in exocad and orient the models in an upfront position for accurate design.
- Demonstrate the technique of taking a screenshot within the Smile Creator Module for reference.
- Learn how to load a retracted photo and select the previously taken screenshot as a substitute for a patient photo.
- Apply the alignment of corresponding points between the retracted photo and the screenshot within the Smile Creator Module.
- Utilize the loaded screenshot as a smile image within the module and align corresponding points for accurate placement.
- Understand the process of drawing an imaginary lip line within the module for further design.
- Manipulate the image placement by using both mouse buttons to partially hide the zenith of the canines and set boundaries.
- Apply proportion guides and guidelines by bringing the models down and placing them according to the guidelines.
- Familiarize oneself with the option to delete unwanted screenshots and images from the scene for clarity and organization.
- Recognize the value of the presented trick in using the Smile Creator Module effectively even in the absence of patient photos.
- Appreciate the flexibility and adaptability of exocad in accommodating various scenarios to achieve desirable results in smile design.
06 - 02 - How to Add Extra Teeth to an Existing Project Without Needing to Start Over
- Understand the importance of careful setup definition in DentalDB before initiating a dental CAD project.
- Recognize the inability to change the setup information once the design process has started, emphasizing the need for careful consideration beforehand.
- Learn the benefits of adding more teeth than requested in the DentalDB setup to allow for flexibility during the design process.
- Explore the trick to work around situations where additional teeth need to be added to the design without starting from scratch.
- Navigate to expert mode in exocad and extract a tooth using a random area near the boundaries of the STL file.
- Adjust the collapsed gingiva value as necessary for the extracted pre-op mesh.
- Add individual teeth or multiple teeth to the project using the extract tooth function.
- Return to wizard mode and proceed to the "Place Tooth Model" step to position the newly added teeth in the scene.
- Understand the significance of being able to incorporate additional teeth seamlessly into the existing design, saving time and effort.
- Appreciate the flexibility and adaptability of exocad in accommodating changes and adjustments during the design process.
- Recognize the importance of this trick in avoiding the need to start over and enhancing workflow efficiency in dental CAD projects.
06 - 03 - Enabling Angulated Screw Channels and Changing Any Implant Library Configuration to Allow for Designing of Angulated Screw Channels
- Recognize the challenge of hiding buccally positioned screw channels in implant-based restorations.
- Understand the significance of being able to configure the software's default parameters to enable angulated screw channels for all implant cases.
- Acknowledge the requirement for higher computer skills and the potential risks associated with modifying default parameters.
- Navigate to exocad's main folder and locate the dental CAD app folder and the config folder.
- Demonstrate the process of backing up the default settings.XML file before making modifications.
- Open the default settings.XML file with a text editor such as Notepad and position the cursor appropriately.
- Access the "Angulated Screw Channel" notepad file containing instructions for enabling angulated screw channels.
- Copy the content from the notepad file and paste it into the default settings.XML file above the bottom line.
- Save and close the modified default settings.XML file.
- Restart the exocad application to apply the modifications.
- Open an implant case and navigate to the abutment bottom step, specifically the advanced step.
- Identify the availability of tools to angulate the screw channels in the advanced step.
- Apply the angulation of the screw channel by either clicking on the desired position or by holding and dragging, taking caution with the angulation value.
- Understand the potential challenges that may arise when exceeding an angulation of 20 degrees.
- Appreciate the ability to customize and enable angulated screw channels in exocad, enhancing the flexibility and adaptability of implant-based restorations.
- Recognize the practical implications of this tip in addressing the challenge of buccally positioned screw channels, ensuring optimal aesthetics and functionality in implant cases.
06 - 04 - Customizing your exocad and Changing exocad Logos to Your Own Branding
- Understand the open format feature of exocad, which allows for customization of the layout and default parameters.
- Recognize the significance of being able to personalize the DentalDB icons and the background of the dental CAD with one's own logo.
- Learn the precautions to take when making changes to the configuration to avoid potential application crashes.
- Appreciate the importance of creating backups of the files before making any modifications.
- Comprehend the recommended dimensions for the logo images to ensure proper display in the DentalDB and dental CAD.
- Navigate to exocad's main folder and locate the specific folders for the dental CAD app and the DentalDB.
- Identify the background image.XAML file in the icons folder of the dental CAD app and create a backup before replacing it with a PNG image of the logo.
- Understand the naming requirement for the new background image as "background image" to ensure proper recognition.
- Repeat the same steps in the icons folder of the DentalDB to replace the bottom logo.XAML file with the PNG image.
- Recognize the need to restart the application for the modifications to take effect.
- Appreciate the ability to personalize the exocad interface with custom logos, enhancing the user experience and branding opportunities.
- Understand the value of this customization feature in aligning exocad with personal or organizational branding and aesthetic preferences.
06 - 05 - Alternative Methods for Missing Scan Bodies and Mesh Data Refinement - v3.1 Rijeka
- Adapt your workflow when scan bodies are out of stock or unavailable, ensuring you can still complete implant cases efficiently.
- Utilize abutments and existing scans to create accurate digital models, even when ideal scanning conditions are not met.
- Leverage implant libraries to replace distorted or missing mesh data, ensuring high-quality restorations.
- Align and manipulate mesh data to create a seamless and accurate model for designing implant-supported restorations.
- Edit and refine mesh data to optimize the design process and achieve precise fit of the final restoration.

Mastering exocad Course All Modules
Gain access to all 83 meticulously crafted lessons and save $180 when you purchase the Mastering exocad Course.
Get access to current and future lessons added to the existing Modules.
Access 36 exocad online training lessons designed for total beginners to exocad. In 4 hours this module will give you the confidence to tackle fundamental restorative exocad designs.
Access 31 intermediate exocad online training lessons to take your skills to the next level. The next 4 hours in this module will elevate your knowledge to work on more exocad design workflows.
Access 16 exocad online training lessons for advanced exocad users and master complex design workflows. In these 2.5 hours you will grow your capabilities to handle advanced restorative exocad design workflows.
Sample the Course Content Below!
Get unlimited access to over 10 hours of exocad online courses, complete with many tips and tricks from an experienced dental technician and exocad expert.
With access, you can revisit the course whenever you need, empowering you to master exocad at your own pace. Also, get access to any new updates we release!
English version now with 25 Subtitle languages.
Check out the Spanish dubbed audio version
Start Mastering exocad
Access the entire course for $990 USD - payment plans available.
You can also buy the Fundamental, Intermediate and Advanced Modules on their own.
Each Module purchase includes current and future lessons that are added to it - your purchase will only increase in value.
If you have been a membership subscriber for over a year contact support to get your discount code.
support@instituteofdigitaldentistry.com
PLEASE NOTE: exocad software is not included with this course.
To purchase the software or get a demo dongle, find a certified exocad reseller here.
Mastering exocad
Fundamentals
Access 36 exocad online training lessons designed for total beginners to exocad. In 4 hours this module will give you the confidence to tackle fundamental restorative exocad designs.
Subtitles in 25 languages
US $360
Payment Plans Available
Mastering exocad
Intermediate
Access 31 intermediate exocad online training lessons to take your skills to the next level. The next 4 hours in this module will elevate your knowledge to work on more exocad design workflows.
Subtitles in 25 languages
US $360
Payment Plans Available
Mastering exocad
Advanced
Access 16 exocad online training lessons for advanced exocad users and master complex design workflows. Grow your capabilities to handle advanced restorative exocad design workflows.
Subtitles in 25 languages
US $460
Payment Plans Available
Mastering exocad Course
Fundamentals - Intermediate - Advanced
Unlock the complete Mastering exocad curriculum with our exclusive offer: Gain access to all 83 meticulously crafted lessons and save $180 when you purchase the complete Mastering exocad course.
$990 USD
The complete course
Get access to current and all future lessons updates added to the existing three modules.
Payment Plans Available
PLEASE NOTE: exocad software is not included with this course.
To purchase the software, find a certified exocad reseller here.
Why learn exocad with iDD?
At the Institute of Digital Dentistry, we've been helping dentists learn everything there is to know about digital dentistry - including intraoral scanning, CAD design, 3D printing and digital implantology - for nearly a decade.
We're a trusted source of digital dentistry training, news and courses - remaining unbiased and objective while collaborating with some of the biggest names in the industry. We understand the real-life struggles people face with digital dentistry as we are real full-time practising dentists and dental technicians. Not just lecturers.
By enrolling in our course, you'll gain a deep understanding of exocad, from basic setup and crown design to advanced topics like full-mouth rehabilitation and implant planning. The course is designed to be engaging and not repetitive, ensuring every moment spent is worth your time. Plus, you'll be able to learn at your own pace, anytime, anywhere.
STL files are available for most lessons so you can follow along with your instructor and practice what is being demonstrated in the lesson.
What are dentists and technicians saying about our
Mastering exocad training after trying it?
")
"I've used just about every design software in the dental industry and I wanted to learn exocad. I had plenty of opportunities to take a weekend course, but I find them too intense and expensive. The "Mastering exocad Course" from the Institute of Digital Dentistry is exactly what I was looking for. The amazing Marjorie took me through all the steps from beginner to the most complicated, all at my own pace. One of my favorite parts is having the file to download so I could design the same case during the training. I would highly recommend any technician or lab looking to learn exocad, to get this course and always have it available for training your next designer."
- Elvis Dahl, Co-Host of the Voices from The Bench Podcast, and Dental Technician.

" This is the best Exocad training program, hands-down! Instead of picking up bits and pieces of information from various sites and sources, seriously consider this one-stop shop program where there is learning material for the novice and the experienced dental CAD designer. You will have this information for life at your fingertips, 24/7, at a very competitive price."
- Dr. Amit Punj, US Board-Certified Prosthodontist and Director of the Prosthodontic Residency Program at Montefiore-Einstein
"A Big Thank-you to IDD and Marjorie Andrade for putting together this Mastering Exocad Course. I was thoroughly impressed with the abundant and easy to understand content. I feel like I can tackle all my cases more confidently with the hands-on practice gained from the good instruction and provided .stl files, including many handy sections, and extras. I feel this course is a bundle of value for anyone wanting to learn everything from the basics to intermediate to advanced exocad. No need to hesitate on this one!"
- Dr Tyler from Alberta Canada.
")

Our Course Was Also Shared by exocad themselves!
Are you an exocad distributor?
If you would like to include this complete exocad training as part of your offering when selling exocad licenses, or you want to inquire about working together, please email support@instituteofdigitaldentistry.com
or send a message through this form.