Video Transcription
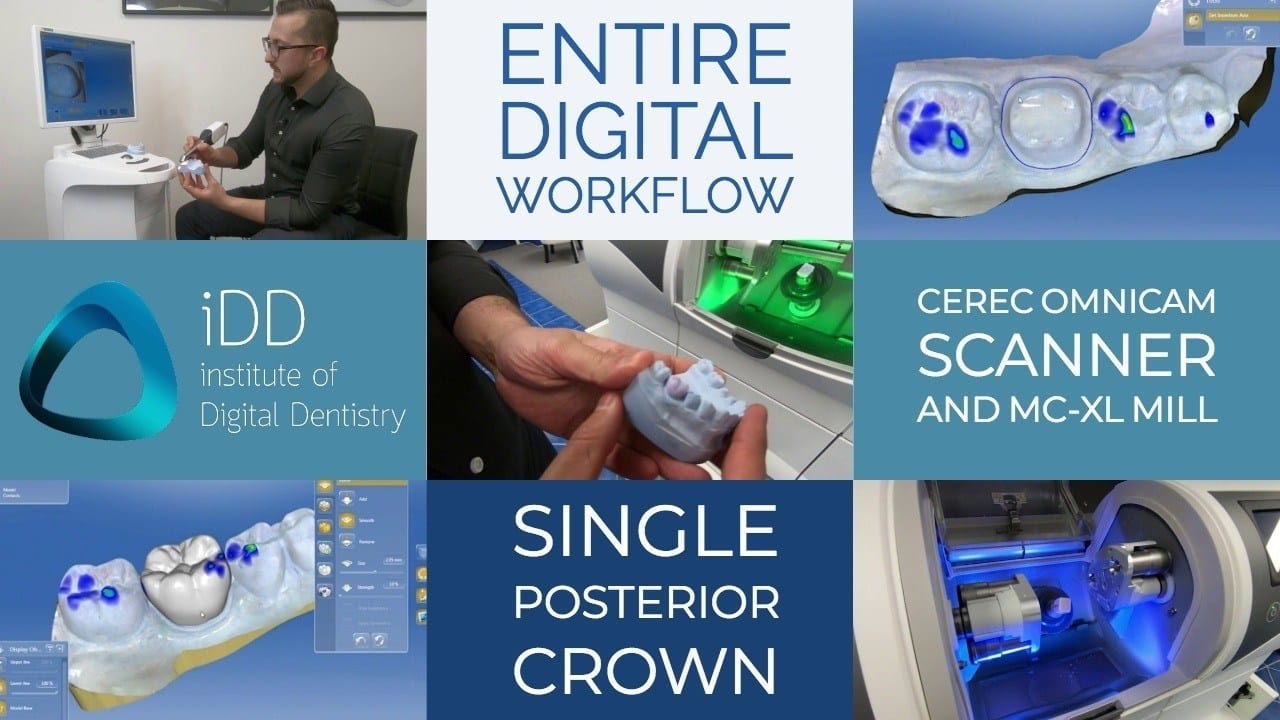
[00:00:00] Whenever dentists talk about CADCAM the CEREC system by Sirona usually comes up. Now have you ever wondered what that actual workflow is like. Today in this video, we'll be gone over the entire digital workflow using CEREC to produce a single posterior Crown.
[00:00:18] Hello my name is Ahmad from iDD today what we're going to do this video is explore the CEREC system and go through scanning, designing and milling a posterior crown.
[00:00:40] Now CEREC is well regarded as one of the most reliable and efficient CADCAM systems and for good reason has a very long history in the game. Now this is the typical CEREC screen that you would start off with. This is a bit like a lab sheet. Now what you do is first you need to decide what sort of restoration you're going to make and on this diagram where all these teeth labeled you going to pick the tooth that you want to make the restoration for.
[00:01:12] Now in our case we're going to use these models and we're going to be fabricating a 46 full coverage e.Max restoration. So then you choose your material and so what we're going to be choosing is an e.Max crown and you can do it through selecting the company and then the material that you like. Now after you have done this you would click the restoration on the tooth number, and this places it into this diagram here with the case details. This is the part when you are ready to start scanning the restoration.
[00:01:53] So this is the CEREC omni cam and how you get it going is there's this foot switch at the bottom of the CEREC cart and what you do is you start usually distal to your preparation and on the occlusal surface you click the switch to start and you move across the preparation. Then you swing over to the buckle side and to the other side. Now once you've done this you can use the mouse wheel to click and roll in check that you've done and scanned all the vital areas.
[00:02:37] Now you can see here where the scan is see through, we've missed part of the adjacent tooth and this is a very important area because this is going to dictate where our contact is. With the CEREC system it's very easy unlike a PVS impression we would have to redo the whole impression if you've got an air bubble that size. With there any sort of CADCAM system. You can easily just go back to the spot where you are scanning and add to that scan. You'll see now that that has been added and that is a satisfactory scan.
[00:03:15] The next thing you do is you need to scan opposing teeth. And in our case again we'll be doing this on a model. Same story here you start on the occlusal and you move distal to medial swing to the buckle and again to the lingual. We then move to a buckle scan. Now what the buckle scan basically is it is taking a bite registration. So you are telling the system how the top and lower arches that you've just scan come together in a real world situation with the patient biting down. You would start distal then you would move forward while taking the scan. That's the acquisition phase.
[00:04:07] So we've done all the scanning and then you would go next into the design phase. We'll wait for it to load the CEREC system is processing all the data and thankfully it doesn't take too much time at all.
[00:04:19] At this time, usually you would bring the patient up and let them rinse let them relax their jaws and then you would analyze the scans that you've just taken. When you go into the model phase it puts you onto this screen straight away which is the orientation of the model. I personally like to go to the bite registration and click on model contacts. This will show you if you take an accurate bite registration as you can look around and more importantly you can see if there's any contact indicated by these blue, green and yellow colors. If there's any contact on your preparation. If there is any contact on your preparation that indicates to you that you haven't reduced enough height and you need to go back and do that.
[00:05:11] So going back to the model axis. Now you notice these three circles ok. So this is basically for the anterior teeth, premolars and molars and you need to sit your model in the appropriate area and you're looking at the model from three axis. So this is the frontal. So these obviously the quadrant one, two, three and four. This is the lateral view and this is the birds eye view or occlusal view. Now this looks all okay. Then you go OK and we go next. Now this is the part where we need to basically marginate our prep.
[00:05:54] Now you can look around this model in three dimensions and you need to set a line that will be the margin of the crown. To start this off you double click and you will lasso the margin along the preparation. Click again to continue and then finally double click again to finish the margin. Now you'll see there's some areas where it's quite jagged. I like to go back and just smooth these out a wee bit.
[00:06:41] It's really important to look at the preparation while your marginating from all angles it will give you a much better view of what you're looking at.
[00:07:13] Now once you're finished with the margination you're happy with that you'll go to set the path of insertion now for single crowns this is not that critical. It becomes more important for bridges for instance. However generally you would want to make sure that there is no undercuts in the preparation and the system will set up the path of insertion for you.
[00:07:39] Now as we move on it does an auto genesis. Now what that basically means is it creates for us a tooth based on the parameters that we've given it. So based on the distance between these two teeth and based on the path of insertion that we've selected now this is the part where CEREC really excels. So these crowns essentially perfect most of the time given that your preparation is well done. The system really can only work with what you give it. Now in this case obviously you can see on the screen there is a lot of buttons here.
[00:08:16] Now this video is a bit too short to go over all of that and this sort of stuff we really go over in greater detail in our own CADCAM courses. However if we have a brief look here you can see there's buttons for context the contacts on the crown. Buttons for the contacts on the models there is viewing options so you can click the top arch and then out you can look at the bottom arch or not depending on what you want to do and the restoration. So these tools here the tools are you going to be using to design the crown that you want. And generally makes it very easy with this model because we don't have to worry about a top tooth but for the sake of simplicity what you really want to make sure you've done well is the contacts and the buckle contours the contours of the tooth. Now you want to check the tooth from all angles to make sure that it aligns up quite nicely and fits the space in a natural way.
[00:09:22] So in this case here the easiest way I like to check interproximal contacts is to turn off the arch that you're working on. And you can see here that this is the contacts showing to be green. Now every system is slightly different. We've found with our system we like to have it slightly turquoise with only a bit of green. So what I will do I'll use the smooth tool here and just smooth over this to take it down a wee bit.
[00:09:56] Maybe a little bit too much there so then you can use the air tool to add to it. And what these colors are showing you is basically how much contact there are between the two teeth smoothing this now can it add to it a little bit smoother again to reduce that a little bit and there you are okay.
[00:10:20] Now there are a host of different tools in the system that you can use. There are all sorts of movement and form tools that you can use. There are a range of anatomical tools where you can pull out their anatomy or push in the anatomy. Basically the options are really endless. It's really up to you and your artistic ability and your understanding of natural tooth anatomy. Once you are happy with the crown that you fabricated and again it's always a good idea to check the collusion and check the contacts. Once you are happy with that, what we would do is go next.
[00:11:06] Now in this final screen what this is showing is basically the block of material that you will be cutting the crown out of. So what you can do is on this side as in you pick what sort of block you want to choose. And again you've already picked the material. All you're picking here is the size. So the machine generally will tell you if a block is too small and you can't use that size as you can see here it pokes out the side. So we need to go the next size up. There's no benefit in using a block that's too large so you generally want to use the smallest possible block.
[00:11:47] You would look around you can choose your manufacturing options if you want fast or fine, generally and it's better to use a fine mode especially with things like e.max where what you'll find is on a faster mode there will be a lot more chipping of the margins. A few more other things like the sprue now the sprue is essentially what holds the crown to the block as the machine is milling it and you can move the sprue around by rotating the crown. The sprue will always be pointing towards the chuck of the block. Now in this case the only thing we really need to make sure is you keep the sprue off the contacts for ease.
[00:12:34] So that's essentially the real crash course of the CEREC workflow to produce a single unit crown. Now again everything we just showed would generally be done behind the scenes. You don't need your patient in the chair while you're doing this. Once all the design is finished and you're happy with the prosthetic that you've designed on the CEREC system you're ready to start manufacture and you do this by clicking this button here.
[00:13:01] At this stage after you've started manufacturing you need to put the associated block that you've chosen into the CEREC system which I'll show you now.
[00:13:11] So here's the CEREC mill in all its glory. Now for example here's a different assortment of CADCAM blocks that you may have in your clinic. Now in our case we have chosen a e.Max CAD 14 block. Now this is the range of e.Max blocks here. Now what we would do is this is a C 14 block open up the hatch pop the block into the chuck and screw this on. You typically want to make sure that that's well put on close the door and start milling.
[00:14:11] Now the handy thing about the CEREC system is once the milling is complete it actually cuts the sprue off for you. So once completed it will give you a green light indicating you can open the hatch. Get the crown and fit it in.
[00:14:28] I hope you've enjoyed today's video a real crash course of the CEREC workflow. Now we would love to hear from you our audience about what you would like to learn more about or other topics you would like us to cover. The next video we'll probably be making is an equivalent Trios workflow video. We have the 3shape Trios here and we'd love to compare and contrast the differences in the workflow. Thank you very much for your time.