Clinical Case - Established Complete Full Arch Dentures
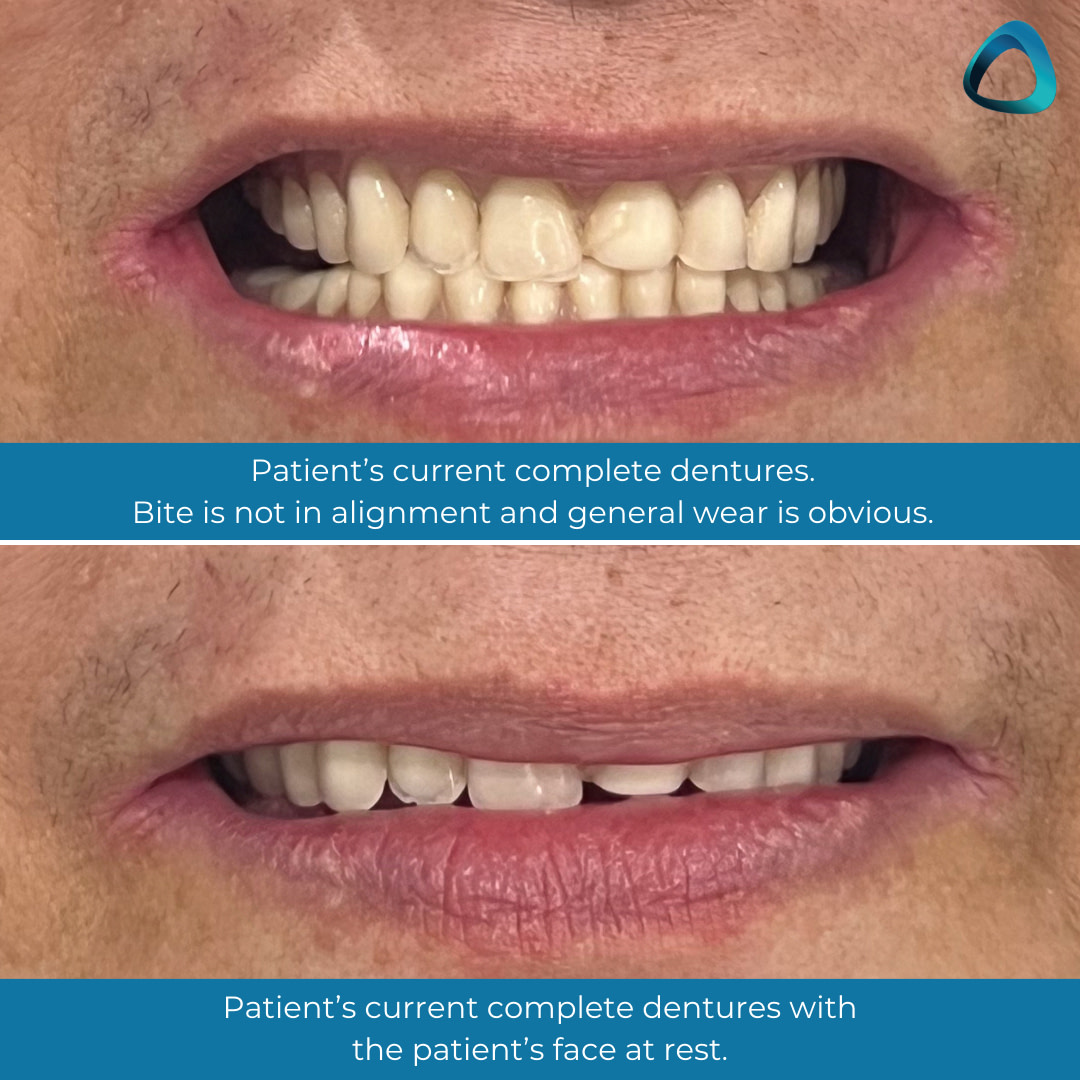
A 65-year-old patient presented with complete dentures that were made in a rural city in New Zealand almost 30 years ago. As is common to see for this timeframe, these dentures were excessively worn, stained, ill-fitting, and causing ulcerations in both upper and lower labial sulcus areas.

To my surprise, the patient had been ‘managing fine’ and the only major concern was the denture aesthetics!
Another reminder of how dynamic the jaw is and just how adaptive patients can be when they are emotionally attached to their dentures.
Another thing that was noted was the loss of mandibular bone height due to being edentulous for a long time. This was one thing that raised concerns.
With this in mind, I formulated a treatment plan to utilize the dimensions of the current lower denture base and shorten the extensions. This was a holistic approach to compromise, to keep emotional attachment yet still provide a new, well-fitting denture.
The maxillary denture posed no challenges thanks to the palate, a well-formed bulbous residual ridge, and the reduced suction in the existing denture, which motivated the patient to consider new dentures.
The digital denture workflow for this case can be broken down into 3 parts:
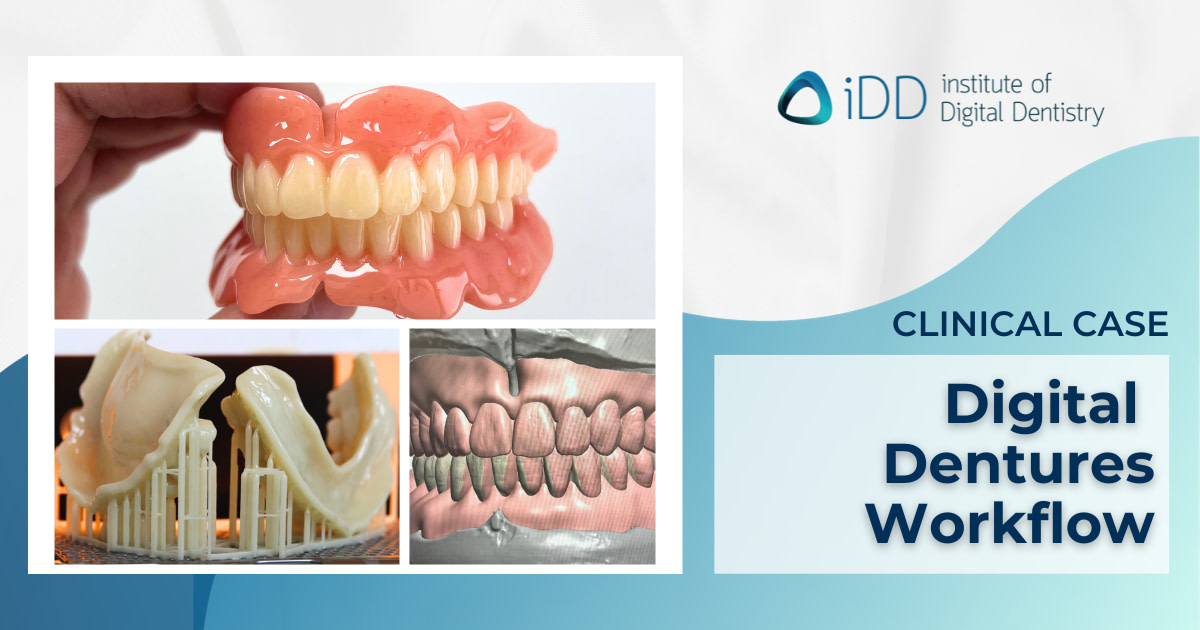
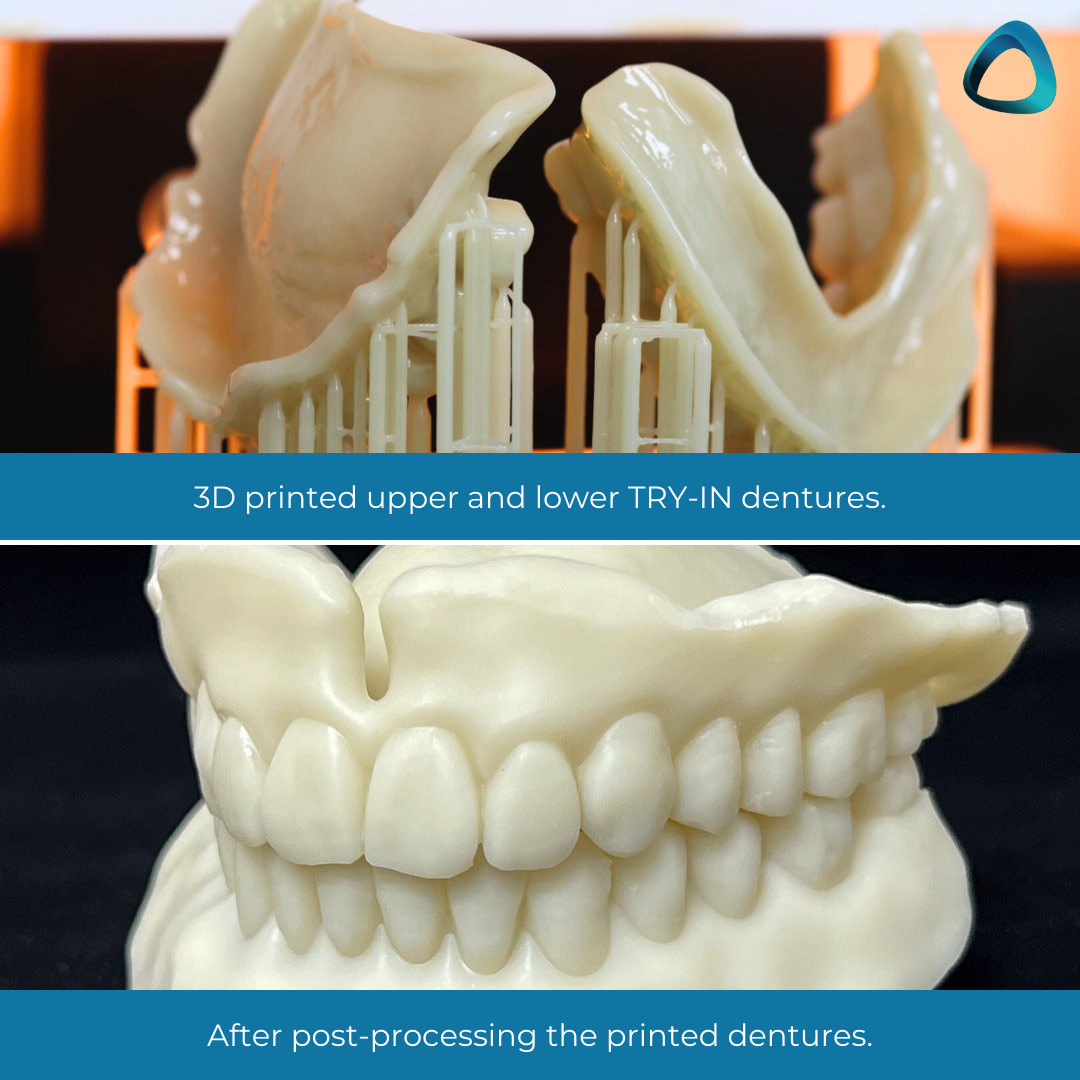
- Scanning and 3D printing - Scanning models and bite blocks. We use 3Shape’s E-series lab scanner (3Shape e-series lab scanner) at iDD Lab to fabricate a try-in, which is 3D printed using the NextDent5100.
- Try-in - Followed by using a base wash impression that is rescanned and used to redesign the Full/Full denture post-try-in.
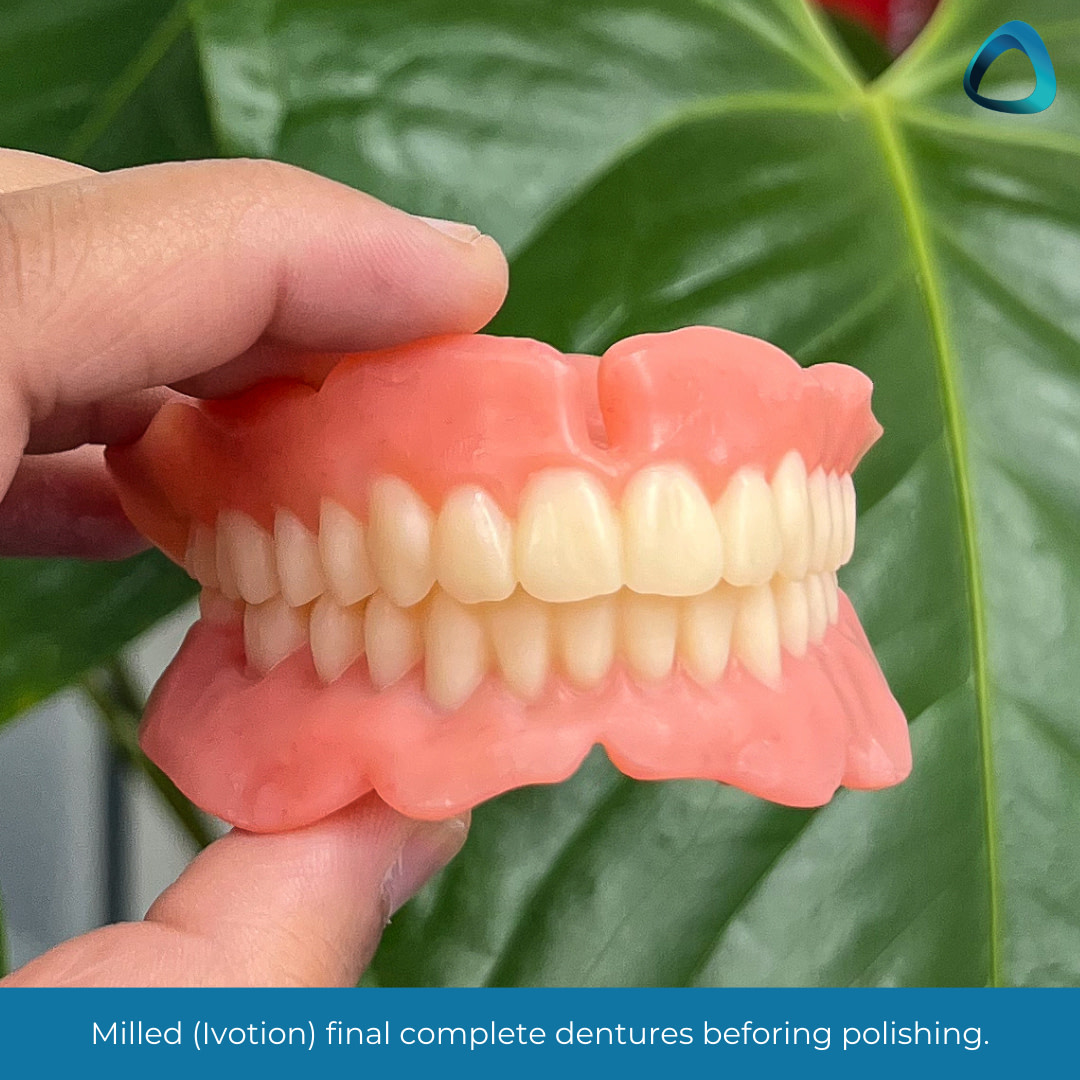
- Milling - The Full/Full or complete dentures are milled utilizing a PM7 mill by Ivoclar and Ivotion bicolor discs.
These steps are outlined below.
Scanning and 3D Printing
Primary impressions were used to make bite blocks to record the centric bite and determine the vertical dimension. Due to general wear of the dentures, the bite required opening, which meant that we needed to re-establish occlusal vertical dimension. A resting vertical dimension value was taken, and 3mm free-way space was subtracted to ascertain the occlusal vertical dimension.
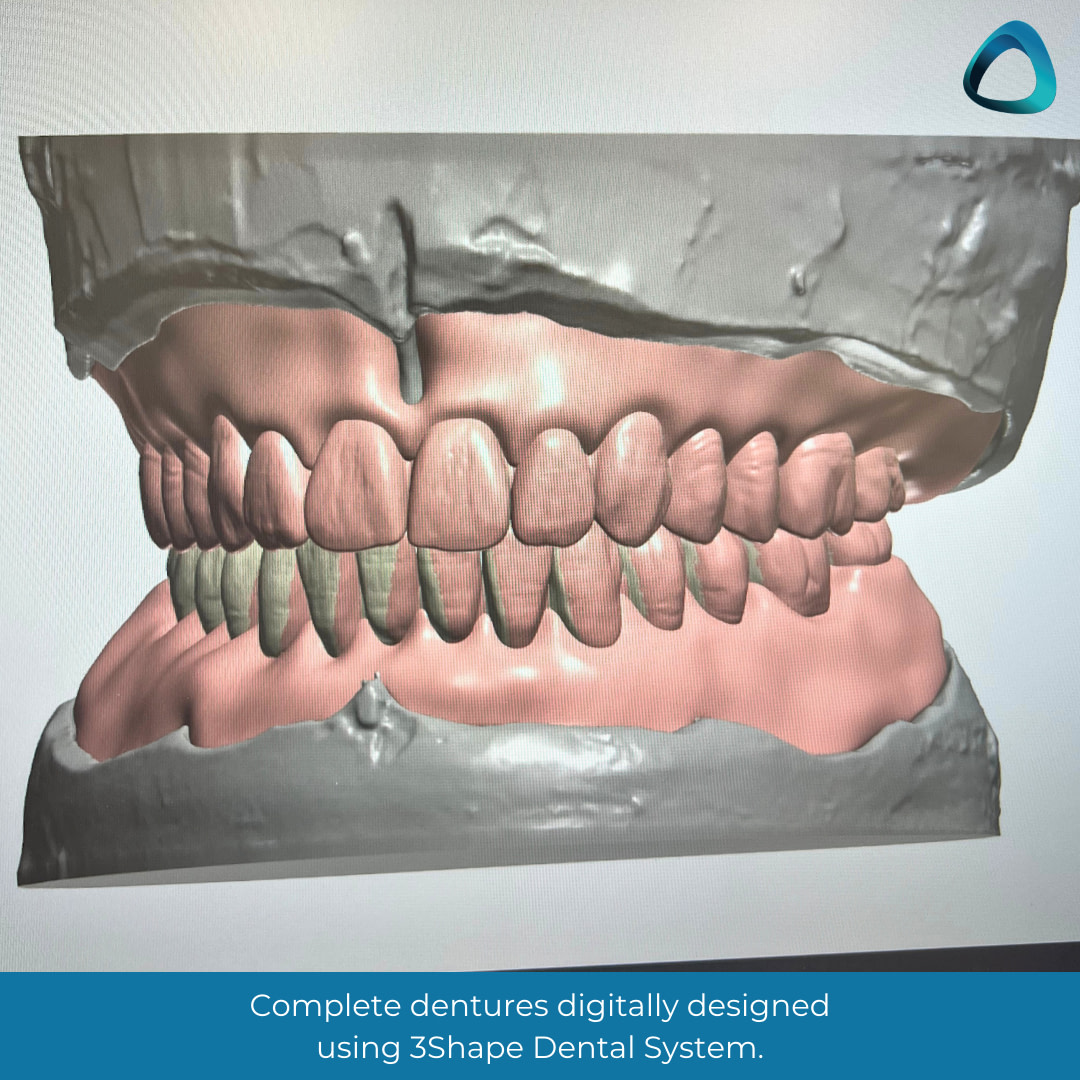
After the bite was established, the 3Shape desktop scanner was used to scan the upper model, lower model, and the wax rims to align both arches into the 3Shape software. The steps in the software were then followed to be able to create an F/F try-in.
Ivotion CAD designs produce both CAM5 and STL files. The STL files are monoblock, which encompasses the design in one file and allows the output designs to be printed with a 3D printer of your choice - which, in our case, was the NextDent 5100 by 3D Systems. These were set using 3DSprint software and printed on standard quality print settings.

The limitation of the monoblock for the try-in print is the ability only to produce the print in one color. Ivoclar does offer PMMA try-in discs, which can be milled. However, I have found from experience that 3D-printed try-ins work best for me, in addition to being more cost-efficient.
Another benefit of a 3D-printed try-in is the ability for the patient to take the try-ins home, experience their day-to-day life with dentures, and use them for a given period. This is especially important for cases with a significant vertical dimension opening.

In this case, the patient took the try-ins home, used them, and returned to the clinic with no complaints after 3 days of use and wanted to proceed with the finish. They reported the lower try-in feeling stable thanks to the new base dimensions and noticed that the teeth had more height than the current dentures - which was to be expected!
Try-in Wash Impression
Wash impressions can be taken using medium-body PVS material, utilizing the closed-mouth impression technique.
These were effectively secondary impressions on which the milled F/F denture would be designed. This time, the wash impressions were scanned instead of scanning models, and the 3D-printed try-in was used as the bite.
This allowed the F/F denture to be made based on the try-in dimensions and the final milled dentures to mimic the try-in dentures, which the patient accepted exceptionally well. This entire process gives certainty in the end result.
Milling the Complete F/F Dentures
Ivotion offers either a 2-step milling process where the denture base and denture teeth are milled separately and then bonded together OR a bicolor disc that comes with both base and tooth acrylic pre-bonded in one disc. This is called Ivotion.

Ivoclar has performed several studies on the hardness of the 2-step milling process, so based on this research, the bicolor disc was the milling method used for this patient case.
Using this disc, we performed quarterly, half-yearly, and yearly reviews to test material strength and report on clinical findings of the bicolor material as a long-term complete denture acrylic.
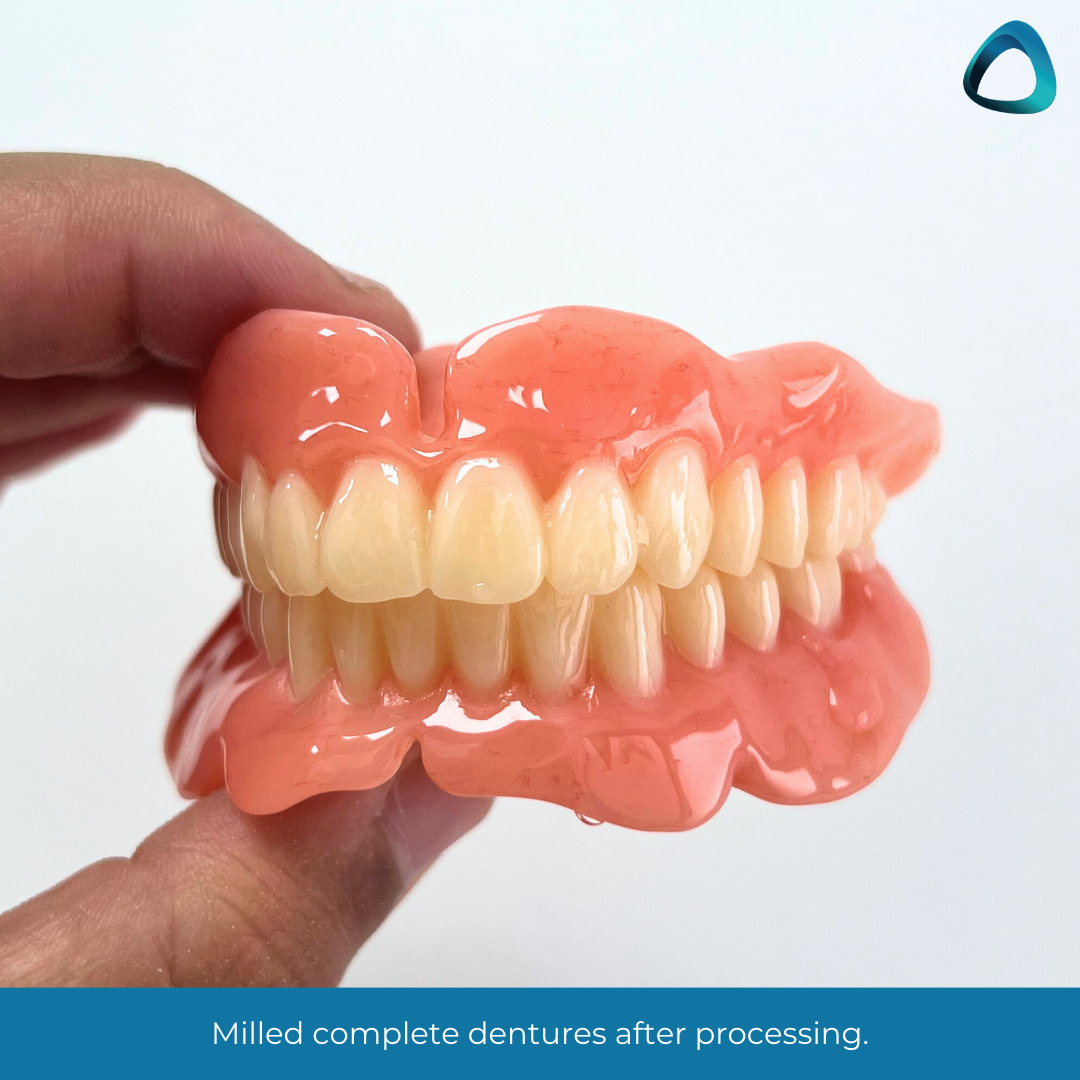
Bicolor ‘Ivotion’ milled dentures are monolithic - meaning that any anatomical effects, light refraction, and anatomical form come from cutting into the acrylic to characterize the teeth individually. This would be a subtractive method for achieving characterization.
There are also additive methods of staining the denture teeth or base. However, these stains require a final layer of a clear acrylic coating to help seal the stains. These layers can in time, chip off.
Being a Clinical Dental Technician, you pick which case warrants each method. For this particular case, a subtractive method was used, and the dentures were simply polished.
Fitting the Milled Denture
At insert, the dentures fit perfectly. It is a well-researched phenomenon that milled complete dentures offer greater suction than conventional or 3D printed dentures, but to observe this chair-side is magic.
The patient was thrilled to have a new smile, which we could keep consistently from try-in through to finish. This meant that the patient could see what their dentures would be like in the mouth at try-in and that the final product she received at fit was the same.

No adjustments were needed as the dentures were comfortable for the patient, and the bite in centric relation was verifiable and constant.
Following the denture insert, a 24-hour follow-up phone call was made.
Follow-up Review
The patient reported no discomfort and continued well with her daily life with the dentures. The only note the patient brought up was the mention of feeling ‘more teeth’ in the mouth due to a worn previous F/F.
At a 1-week review, the patient had no ulcers, the fit was still the same as at insert, the bite was once again verified, and the patient stated she was very satisfied with both upper and lower dentures.
Insights as a Clinical Dental Technician
This case, to me, was evidence of how far digital dentures have come.
Incorporating it into my daily practice is something I would not have thought was possible a few years ago. Now, it is another tool I have up my sleeve for when a person walks through the door and needs new dentures that mimic their current ones.
Every patient is different.
Every clinician is different.
But with technology like this, the results stay the same - from bite to try-in to finish. Consistency never looked so good.
Do you implement digital dentistry with your edentulous patients?
Let us know in the comments below what your workflow is like.

