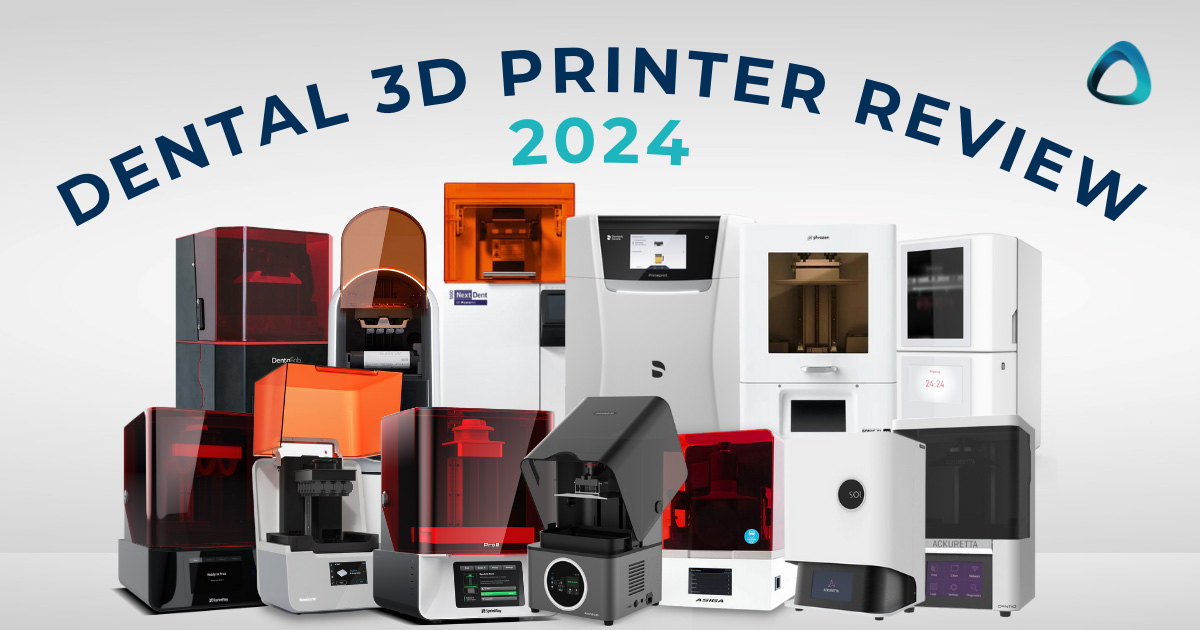
The dental 3D printing market is blowing up. There hasn’t been this much interest and hype in an aspect of digital dentistry in a long time.
This 3D Printer Review is a collaboration with multiple leading digital dentistry clinicians here in Australia and New Zealand (read more about them at the end of this publication). This is based on our own experience with 3D printers in practice. Every single printer reviewed has been used by us extensively.
Before starting, let us clarify what we base our evaluation on. Those familiar with our IOS reviews will understand our completely objective and brand agnostic comparison process. This is not a sponsored post.
We have broken this 3D printer review into categories that you should focus on when purchasing a 3D printer for a clinic or lab, rather than a heap of technical specs that may confuse you.
Let us begin.
Don't have time to read the full article?
Dental 3D Printer Comparison Criteria
Print Speed
How fast does it print? Simple.
We have tested these printers to print everything, including models, splints/night guards, custom trays, dentures, and restorations. This criterion judges a printer on its print speed.
Print speed is mainly critical for those thinking of same-day workflows. Otherwise, it is an aspect that is often given too much emphasis. Print speed is not as critical if you are running your printer overnight etc, but regardless, how fast your device prints may be important to you.
Ease of Use
Ease of use judges a printer based on, logically, how easy the system is to use.
This is an overarching criterion on how easy it is to get your printer ready, software working, your print files sent and printed successfully. This encompasses everything from the unboxing and set-up to the software and user-friendliness of the system.
Ease of use may not be critical to labs, but it may be crucial for clinics considering delegating printing to their support staff.
In essence, how easy is it to print and process your file of choice.
Reliability
This criteria judges a printer based on the number of failed prints we experienced.
Failed prints are one of the most annoying things that can happen while you are printing. There is nothing worse than running a printer for hours and then coming back to find nothing or remnants on the build plate.
This criterion takes into account the overall reliability of the system and software-generated supports etc. What we consider is during our testing process how often failed prints occurred.
Software
Software is critical in 3D printing (the other critical aspect is materials). Research has clearly shown that most 3D printers are accurate and can print well - this applies to the cheapest 3D printers all the way to the most expensive. They all can do the job.
What differentiates printers is access to resins and software. Some printer software is very basic and borderline confusing to use. Others offer streamlined workflows, complete cloud services and, in some instances, even AI design services. This criterion judges the printers based on how good their software is - both downloaded and on the cloud if applicable.
Material Options and Availability
How many resins are available to the printer and more importantly, are these validated?
This criterion takes into account how 'open' a 3D printer is. The access to resins may be important to you if you want to be able to use it all. Or maybe you are just looking for a few gold-standard resins like KeySplint Soft.
The material options available is one of the most important considerations you should look into when buying a 3D printer.
Investment Cost
Another self-explanatory criterion. The cost of the printer and resins is taken into account here.
Least expensive to most expensive printers on the market.
Printer Technology
What is the type of 3D printer technology is being used to cure the photopolymer resins we are dealing with – LCD, DLP or SLA?
Read our blog article to learn more about how these 3D printing technologies differ or take our 3D Printing course bundle to get in-depth training.
Additional 3D Printer Criteria
Build Platform Size
How big is the build platform? This is quite an important consideration that is often overlooked.
This will be important for you based on your needs. Some build platforms can barely fit 2 models placed flat, while others can fit 10+. The build platform size is important for labs or clinics that require large print volumes, e.g. ortho facilities that will print hundreds of models per week.
Or you may only want a small printer to print the occasional night guard/splint and restorations - then a small build platform may be better for you - because these printers tend to be smaller.
Set-Up Difficulty
This criterion takes into account how easy is the printer to unbox and set-up, ready for printing.
Some printers are extremely easy to set up with well thought out tutorials and on-screen instructions. Others can be quite confusing. Moreover, others require a service technician to come in. Which one is it for your printer of choice.
Connectivity
This is important for you to think about when buying a 3D printer for your lab or clinic.
How does the 3D printer connect with your 3D printing software. How do you send jobs to the printer?
Some printers only have a direct LAN connection option. This means it needs to be physically connected to the network to enable communication with a the computer with the 3D printer software installed.
Others have WI-FI available which is far more preferable. There are also some printers that enable plugging in a USB with required files directly into the printer.
Depending on your needs and set-up, this is important to consider.
Cloud
Does the printer utilise a cloud service?
Most leading printers on the market have some form of cloud service available. This allows you to track your print metrics, check the status of your printer and even in some cases run print jobs remotely.
More over, some printers have fully fledged CAD design services either run by technicians or AI all on the cloud.
Open or Closed
Open printers can be use any resin on the market.
Closed printers can only use resins that are validated by the company itself. This often includes third party resins.
The degree of how 'closed' a printer is, varies quite a lot. Some printers are closed but the company has validated 30+ resins. Other printers are closed and only have a resin library of 7-12 resins.
Whether a printer is open or closed really only matters depending on what you want to print. For example, for splints, KeySplint Soft is usually desired. If you want to print splints you usually want to make sure your printer can use this material. However, for models, a printer being closed, doesn't really in reality. Every printer comes with decent enough model resin. Being open really only allows you to to access cheaper resins for this indication.
Heater
Internal heaters are built into the vast majority of printers but not all.
A heater is critical to warm the resin to the ideal temperature for use before printing. Each resin has a different ideal temperature and this is usually advised by the manufacturer and is validated in good printers.
Having the resin at the right temperature is vital for optimal performance and printing success.
If your printer does not have a heater inbuilt you may need to consider an external heater for your resins.
Washing and/or Curing machines
Does your printer come with a complete workflow from print to wash and cure?
Or is it just a printer and you have to buy third party devices to complete the job?
It is important to realize that not every printer company sells a wash and cure machine. Regardless of your printer of choice, for every print job you will need to ensure you have some method of washing the prints and then curing them. The entire workflow is important to consider.
So that is all the criteria we will be covering.
Let's get in to the reviews.
Note - in alphabetical order, not the best to worst 🙂
Download the Full Review PDF
Download the full 78 page PDF to get a full copy of this article to read later.
Get a high resolution printable copy of this review.
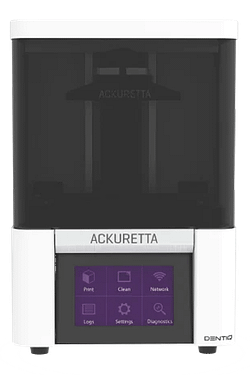
Ackuretta Dentiq Review
3D PRINTER FEATURES
Printer Type
RGB LCD - 385 ~ 405 nm
Build Platform Size
Medium 120 x 68 mm
Set Up Difficulty
Easy
Cloud Software
None Available
Open System
150+ validated resins
Built-in Heater
Connectivity
USB, WiFi and Ethernet
Print Speed
Not the fastest printer. This is now a relatively outdated printer superseded by the SOL which is 3 times faster. The Dentiq focused on reliability and accuracy at a cheaper price point. Still decent for those on a tight budget.
Ease of Use
A true plug and play printer, no messing about out of the box, it is ready to go from the moment you plug it into the wall. Alpha AI is an intuitive app that is very easy to use.
Reliability
Although not very fast in speed, in our experience it has been quite a reliable printer. It was relatively rare to have failed prints with this device when used properly. Perhaps the conservative nature of the engineering pays dividends.
One important thing to note is that the Dentiq lacks a Resin Tank/Vat heater. This means you may need to externally heat certain resins for consistent printing in cooler months.
Software
Alpha AI is user friendly. Most doctors can pick it up without any formal training. It is constantly updated, new versions are always coming out with improved resin profiles.
It does not currently have a any AI features / CAD like Sprintray nor the extensive cloud features like Formlabs. So above average printer software that does the job.
Material Options and Availability
Ackuretta DENTIQ is a complete open system with 150+ pre-validated materials, working with all the big name resin manufacturers to validate the printing process. Everything Ackuretta recognises is also tested and proven, so we can rest assured that the correct process is adhered to. The R&D team is quite response, when new and exciting resins come out, the teams will be working hard to push it out as soon as it's ready.
Investment Cost
Around 4000 USD for the entire set-up.
At about half the cost of the SOL, for doctors who do not need the speed of the newer printer, the Dentiq is a good choice; or perhaps a good option as a second printer for someone who already owns the SOL.
Printer Technology
The Ackuretta DENTIQ uses a RGB LCD which has a lower energy output and also much shorter life span of only 800 hours vs the longer lasting monochromatic LCDs that last 10,000 hours like the SOL has.
The CURIE and CLEANI work very well.
Build Platform Size
Platform is good for 2-3 full arch models, or 3-4 splints angled. Comparable to other printers of this category.
Total volume: 120 x 68 x 140 mm
Build plate area: 8,160 mm2
Set-Up Difficulty
Very easy set up, minimal fuss, takes only minutes to get going.
Connectivity
Wi-Fi, Ethernet, USB. Can connect via IP from a computer on the same network. The menu on the printer is looking a bit outdated, but it does not negatively affect the functionality significantly.
Cloud
No cloud connectivity, unlikely to be introduced as development is happening on the newer model of printer - SOL.
Washing / Curing Machines
The CLEANI is a two stage washing unit, two tanks one for the dirty (first) wash and one for the clean (second) wash, with a mixer at the bottom that creates a vortex. It is a nice unit with a small footprint and size.
CURIE is a fantastic curing unit, many users of other printer brands choose the CURIE due to its capability, speed of curing, efficiency and cost.
The Bottom Line
The Ackuretta Dentiq is a strong entry-level LCD printer for dental professionals. While on the slow side, it makes up for it with its ease of use and software that is generally user-friendly for beginners. Users who want better speed may opt for its more robust successor, the SOL. No resin heating functionality may be a concern for users in cooler climates or those who want to print ceramic-filled resins, which tend to print more reliably at a temperature range of 25-35°C.
Don't have time to read the full article?

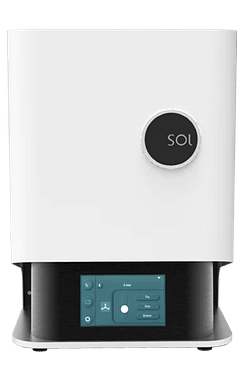
Ackuretta SOL Review
3D PRINTER FEATURES
Printer Technology
Mono LCD - 385 ~ 405 nm
Set Up Difficulty
Easy
Cloud Software
Automated Firmware Updates
Open System
150+ validated resins
Built-in Heater
No Heater
Connectivity
USB, WiFi and Ethernet
Print Speed
Great speed. Not the fastest but good for a LCD printer. Not designed for maximum/reckless speed, the SOL combines reliability, accuracy and fast prints. Having pioneered the medium and small build plates which others have since copied it seems, the SOL gives doctors the option of smaller print platforms that can print quicker.
Ease of Use
A true plug and play printer, no messing about out of the box, it is ready to go from the moment you plug it into the wall. Alpha AI is an intuitive app that is very easy to use like in the Dentiq.
Reliability
A decently reliable LCD printer. Over 2 years’ experience with the SOL, I have experienced less than 5% failure rate. All the failed prints can be put down as generally user error when pushing the limits of what’s possible or not following basic printing principles. However, in saying this, we are seeing a number of users complain of failed prints on FB user groups.
Like the Dentiq, also note that the SOL lacks a Resin Tank/Vat heater. This means you may need to externally heat certain resins for consistent printing in cooler months.
Software
Alpha AI software that runs the SOL is user friendly. Most doctors can pick it up without any formal training. It is constantly being updated with new versions coming out with improved resin profiles.
Material Options and Availability
Ackuretta SOL is a complete open system with 150+ pre-validated materials, working with all the big name resin manufacturers to validate the printing process. Like the Dentiq above, everything Ackuretta recognises is tested and proven. The R&D team is quick to add new resins to the platform when they are released.
Investment Cost
SOL + CLEANI + CURIE is around $8,000 USD.
Printer Technology
The Ackuretta SOL delivers accurate results with its 54 LEDs that perform at 95% light uniformity. Due to a higher power output. brighter stronger light of 5 mw/cm2 compared to the 1 mw/cm2 for the Dentiq, the SOL achieves three times the speed of a regular LCD printer. The dynamic LED auto-selects curing areas to enhance accuracy and extend the LCD panel's life.
The CURIE and CLEANI work very well.
Build Platform Size
Originally starting out with just one build platform at 128 x 80mm, Ackuretta then brought out a medium and small platform for the SOL.
The reason for this is with a smaller surface build platform you can get a faster print because less resin is displaced when the platform enters the vat + less resin needs to flow back into position for printing the next layer, allowing for a shorter wait time in between layers.
The medium build platform has a printing area of 70 x 70 mm which makes it ideal for single full arch applications to be printed flat in around 25 minutes.
The small build platform has a printing area of 40 x 20 mm which is great for crowns, bridges and gingiva masks. It can fit 5-7 crowns or a couple of bridges which can be printed in as little as 15 minutes at a 70 micron layer thickness.
The large build platform is good for 2-3 full arch models, or 3-4 splints angled.
Total volume: 128 x 80 x 140 mm
Build plate area: 10,240 mm2
Set-Up Difficulty
Truly plug and play. Very easy set up, intuitive menu, my first SOL was up and running within 3 minutes of opening the box.
Connectivity
Wi-Fi, Ethernet, USB. Can connect via IP from a computer on the same network. Like the Dentiq - plenty of options but more.
Cloud
Automatic Cloud Based Firmware Updates which makes it easier to get the latest validated settings available
Washing / Curing Machines
The CLEANI is a two stage washing unit. CURIE is a fantastic curing unit, many users of other printer brands choose the CURIE due to its capability, speed of curing, efficiency and cost.
The Bottom Line
The Ackuretta SOL is a great dental 3D printer for those users who want to benefit from a premium product, without the DLP price tag. While LCD printers tend to be slower than DLP printers, the SOL makes up for it with different sized build plates, meaning that restorations may be printed in as short as 15-25 minutes, depending on the print height and layer height.
Resin heating functionality is a curious omission in otherwise a great all-round 3D printing product. The Curie Plus on paper is a fantastic curing option, with many dental resins validated on in already.
Get The Full Review Details

Access the Full Ackuretta SOL Review as a PDF so you can read this when it suits you. You can download it too!

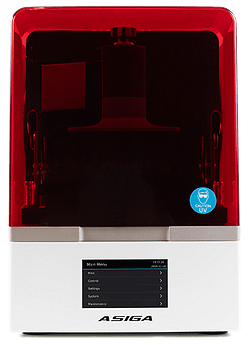
Asiga Max UV Review
3D Printer Ratings
Print Speed
Reliability
Ease of Use
Software
Material Options
Investment Cost
Wash
Requires 3rd party unit
Cure
Curing unit is very basic
3D PRINTER FEATURES
Printer Type
DLP - 385nm or 405nm LED
Build Platform Size
Small - 119 × 67 mm
Set Up Difficulty
Medium
Cloud Software
None Available
Open System
Over 500 validated materials
Built-in Heater
Connectivity
WiFi and Ethernet
Print Speed
Although very capable, the Asiga Max UV is one of the slower DLP printers on the market. This by no means makes it 'slow' but compared to other printers that can print models in 20 minutes, this is not the fastest printer on the market.
Study models positioned straight onto the build platform will take around 45 minutes to print for example. We have also noticed that the print time estimation in the software differs from the actual printing time - often being quite a lot longer in duration. This is due to every layer taking a slightly different time to print which directly correlates to the cross-sectional area of each layer. The larger the cross-sectional area, the longer the platform will take to reach position.
Like other printers, print speed depends on material, slice thickness and print settings, which can vary widely due to the open material system and what resin used. Overall the speed is slightly slower to other DLP printers and is relatively fast compared to laser based SLA products.
Print speed aside, it remains a hugely popular choice in the dental market thanks to its huge resin library and incredible reliability. Of all the printers that are validated for professional dental use, the Asiga Max UV is above average in speed and achieves a great deal considering it is one of the most compact printers available.
Ease of Use
When using this printer it is simple to insert the build platform and exchanging resin vats is super quick and easy to do.
What is somewhat confusing are all the physical printer menus, settings and maintenance options (most of which will never be used), Also, the printer’s display screen is a little too small.
There is a bit of a learning curve to get started, having a lot of sensors and technology built into the printer means the user will need to take time to understand the correct setup process. If calibration and setup process is not done right, there can be issues in the printing process.
Asiga’s Software Composer is quite outdated and feels clunky compared to others. A new update is in the works.
Reliability
The Asiga Max UV is known to be an incredibly reliable and consistent printer. Once you get over the learning curve and software, the Max UV is capable of extremely accurate and precise prints.
It is no surprise the Asiga line of printers are hugely popular in dental labs all over the globe. This printer has sensors that can detect debris in the resin tank during printing, pausing the print and therefore reducing the risk of FEP damage and perforation.
Once setup correctly, the printer is an industry favourite and for good reason. In a high demand clinic, Asiga should be high on the list as a go-to printer for reliability.
Software
The Asiga Max UV uses the Composer Slicer which has been recently updated!
In previous iterations it was not easy to use this software for the untrained user. There was no specific dental functionality and the user interface was convoluted and clunky.
Thankfully in their latest update, the visual presentation has received a major overhaul and it is now substantially easier to use for novices. It is easier to position and orientate models and support them and go through the entire software process.
There is still quite a number of buttons compared to other user-friendly software, but it is a huge improvement and gets the job done.
Material Options and Availability
The Asiga Max UV is a completely open printer and boasts the largest library of validated settings for third party resins. There are over 500 materials validated, and these are all available via Asiga’s Material Library online.
You can find your material of choice and download the required settings to print it. The resin profiles are also constantly being updated to improve their performance.
This is one of the areas where the Asiga Max UV shines. It offers freedom to users all over the world. It is a relatively simple process to download your desired resin settings from their database.
Most notably, Asiga is the only printer aside from the Primeprint that has access to the Lucitone Denture resins - considered widely as the best denture resins on the market.
Investment Cost
The printer will cost you around $11,000 USD depending on your local distributor and region. This does not include a wash or cure, but does include unlimited lifetime technical support for free which is accessible via Asiga Customer Support Centre, online ticketing system, Asiga resellers and all Asiga offices (Australia, USA, Germany).
In addition, vats are consumables and will expire after a pre-determined volume of resin is printed with it, irrespective if the vat is still usable or not.
Printer Technology
DLP - industrial-grade 385nm LED.
The major difference is Asiga’s layering technique starting with their SPS™ technology that provides platform positioning feedback ensuring the build platform is where it needs to be for every layer. This is the part that makes Asiga so special and guarantees Z height precision.
Internally within the projector is Asiga’s radiometer / light meter for automatic LED power adjustment - this provides real-time feedback and automatic cure time adjustment based on actual LED power resulting in precise layer curing for every layer. All these factors combined ensure a consistent and repeatable output.
The company has also recently released the Ultra Gloss resin trays which is a genius invention and results in super clear printing - mainly used for splints.
Build Platform Size
This printer is definitely more suited for chairside printing low volumes rather than a huge print operation, e.g. printing a couple of small items e.g. surgical guides, splints at any one time.
The platform can fit 2-3 full arch models flat on the print bed, or 3-4 splints angled. Comparable to other printers of this size and category.
Total volume: 119 × 67 × 75 mm
Build plate area: 7,973 mm2
Set-Up Difficulty
The Asiga Max UV is relatively straightforward to set up. Levelling is easy to perform and Asiga has easy to follow video tutorials on how to set the printer up on their Youtube channel.
However, the printer’s menu options can be a little frustrating to navigate through and we really wish the LCD screen was a bit larger.
You will require an account with Asiga prior to gaining access to your desired resin libraries. Updating the printer’s firmware is not straightforward. Overall, easy enough but it takes some time to properly learn the calibration and setup process.
Connectivity
Wi-Fi, Wireless Direct, Ethernet. Wireless Direct is where the printer transmits its own Wifi signal allowing you to connect directly when an active Wifi network is not available.
Regardless of what you choose, the connection only needs to be operational during print transfer.
Connecting the printer to the internet was a little inconsistent – at one location, it connected and operated smoothly, but at another, connection to the printer via the internet was slow and unreliable.
There is unfortunately no printing via USB but there is a cool feature - users can control the front panel of the printer from a remote connection.
Cloud
The Asiga Max UV does not utilise any cloud-based software or storage, but you can access the printer menu online.
Heater
It is there but not excellent.
The on-board heater on the MAX UV can warm the build chamber to 10 degrees Celsius above ambient. It is not essential to warm the resin but by warming the resin it reduces viscosity and permits faster printing.
With Asiga you do not need to wait for the printer to warm the resin. You can print materials directly out of the fridge without issue. The only impact will be printing speeds.
Washing / Curing Machines
The Asiga Max UV is sometimes sold with an extremely simple and underwhelming curing unit. There is no washing unit manufactured by Asiga.
This is the Achilles’ heel of Asiga - no good washing and curing options to accompany the printer. Therefore, users are left to find their own solution from a 3rd party company.
The Bottom Line
Despite its age, the Asiga Max UV is undoubtedly a great printer. It is in fact one of the most popular printers in labs and clinics across the globe for good reason - it's super reliability and has the most open system out of any printer. Asiga boasts a huge library of validated resins – the biggest in the market. On top of its reliability, it is a fan favourite.
The printer as a whole is somewhat let down by software that isn’t as intuitive as other competitors and lacks any cloud features. It also lacks a complete workflow - no washing or curing unit. But we are told this is coming next year.
One of the printers on the dental market that is quite easy to recommend.
Get The Full Review Details
Access the Full Asiga Max UV Review as a PDF so you can read this when it suits you. You can download it too!

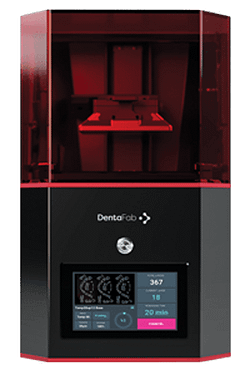
Dentafab Sega Review
3D Printer Ratings
Print Speed
Reliability
Ease of Use
Software
Material Options
Investment Cost
3D PRINTER FEATURES
Printer Technology
DLP - 385nm & 405nm options
Build Platform Size
Small - 120 × 68 mm
Set Up Difficulty
Medium
Cloud Software
None Available
Open System
Large range of validated materials
Built-in Heater
Connectivity
USB & Wi-Fi
Print Speed
If there is anything this printer does well, it’s speed. It is hands down one of the fastest dental 3D printer on the market.
Temporary crowns can easily be printed at 100 micron layers within the 10-15 minute mark. Models can also be printed consistently at 100 micron layers in less than half an hour.
Depending on the print orientation, I have been able to perform an intraoral scan, design a splint chairside and support, print, wash and cure and issue it comfortably within a 60-90 minute window.
Ease of Use
The Dentafab Sega isn’t terribly hard to use – however it’s not the easiest printer either.
Levelling can be a bit of a chore. It is quite easy to slot vats in and out, although not as straightforward as some of its fellow DLP competitors.
Reliability
Over the testing period, in general few failures were encountered. Splints and temporary crowns seemed to fit well. I had no issues fitting crowns onto dies printed on the Dentafab Sega. Not 100% but definitely above average.
Software
This is a tricky one.
The Sega is unique in the sense that the slicing is done internally in the printer itself. However, you will need to prepare whatever you want printed with supports and then export that as an STL, which is subsequently uploaded onto the printer via USB connection.
While Dentafab does have its own proprietary software, the manufacturer has actually recommended to support the prints using CHITUBOX first. CHITUBOX is relatively simple to use, but it’s certainly not dental-specific and does lack the shortcuts that other dental-specific slicing programs have.
The support settings tab can be certainly overwhelming for those who are completely new to 3D printing.
Material Options and Availability
The Dentafab Sega is completely open and the company has a significant list of many dental resins which have printer settings worked out for it. These can be uploaded onto your printer using Wi-Fi.
You can even send your resins to Dentafab’s HQ where they will work out the print settings for you. They have a wide range of dental resins available through PowerResins their sister company which also makes OEM resins for other companies.
Investment Cost
The Dentafab Sega costs $9000 USD.
So while the printer itself is just as pricey as many of its other fellow dental DLP competitors, the resin vats are substantially more affordable.
Also note that the price of $9000 includes:
- Free Remote setup and training
- Finish Kit(tools for post processing)
- 8 resin tanks
- 2 kg silicone A+B material to renew the resin tanks - meaning you can use each resin tank 40 times over.
The ability to change the silicon lining in the vat is always good but it is a slow and slightly tricky process.
Overall the ongoing running costs of the Dentafab Sega are surprisingly low.
Printer Technology
The Dentafab Sega is a DLP 3D printer with options to use 385nm / 405nm light source wavelength options.
Build Platform Size
The build platform is 120 mm x 68 mm.
This means it will fit 2-3 full arch models orientated direct to the print bed.
It is definitely more suited to printing 1 or 2 items at a time and nothing super high volume.
Set-Up Difficulty
Levelling the print bed is very annoying. While it’s very straightforward to do, it does require loosening 4 screws, followed by an additional 4 hexes.
It’s a far cry from other DLP printers which have much easier slot in systems. Once the build plate is loosened, levelling is no different to other consumer-grade printers – not a fast process, but straightforward to do.
Connectivity
I had no issues connecting the Dentafab Sega to the internet. It was a very simple process and I didn’t encounter any Wi-Fi connection issues.
Printing files can be sent to printer via WIFI - it just needs to be updated to the recent printer firmware and software. As prior to this it was not possible - great to see the company improving the system.
Otherwise you can also start prints via USB. You will need the STL of the supported prints uploaded on a USB and inserted into the printer.
Heater
The Dentafab Sega has an internal heater which works very well and very quickly, heating from room temperature to 30 degrees within 10 minutes of operation.
Washing / Curing Machines
Dentafab sells washing and curing units from MEDIFIVE. These are optional purchases but not hugely promoted.
These are imported directly from the manufacturer - and are the same wash and cure units that Ackuretta uses but are OEM in that case. MEDIFIVE is a company from Korea.
Being that same as the Ackuretta units, they therefore work well as we described in the SOL and DENTIQ review.
The Bottom Line
If there’s such a thing as a one-trick pony when it comes to dental-specific 3D printers, the Dentafab Sega is pretty close to being it.
While it does lack some of the polish and finer quality of life features that are part and parcel of more popular DLP printers on the market, where it excels is in its printing speed and completely open nature.
If you plan on printing same-day or even same-appointment restorations, there are very few options out there on the market that can come close to this speed demon.
Download the Full Review PDF

Download the full 78 page PDF to get a full copy of this article to read later.
Get a high resolution printable copy of this review.

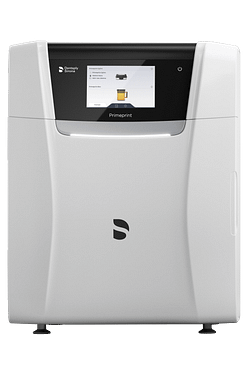
Dentsply Sirona Primeprint Review
3D Printer Ratings
Print Speed
Reliability
Ease of Use
Software
Material Options
Investment Cost
3D PRINTER FEATURES
Printer Type
DLP - 2K - 385 nm
Build Platform Size
Small - 134 x 76 mm
Set Up Difficulty
Hard - Technician Only
Cloud Software
None Available
Open System
Closed System
Built-in Heater
Connectivity
USB and Ethernet
Print Speed
The Primeprint is not a slow printer but it is also not the fastest by any stretch. Typical models will take around 45 minutes to print and for a DLP printer this makes it on the slower end.
Overall considering the entire market (including SLA printers) it above average in print speed.
The printer itself seems like it is slowed down by the mechanical arm that is involved in a lot of the automation.
Ease of Use
Primeprint’s ease of use is an interesting one.
On one hand, the company offers one of the most clinical workflows on the entire market. Printing itself, washing etc can be easily delegated to the team thanks to the Primeprint box concept and automated technology.
It is also the only printer that has a air extraction and filtering built in, therefore not requiring any major room ventilation etc. The final products that come out of the printer are fully cured and dry - they can be used directly in the mouth. It is a great workflow.
On the other hand you need to use inLab to send any prints to the printer, which quite frankly clunky. It is a lab software and even importing STLs involves a few steps rather than dragging and dropping into a printer software like most other devices.
The software is nowhere near as easy to use as other printers on the market, but once you get going everything is done for you by the automated system. You can literally put the boxes into the printer and walk away, including the post-processing.
Reliability
Over the testing period, we did experience a couple of failures with the Primeprint system, in particular with the model resins. These happened at the start of usage and then with troubleshooting improved significantly. This was not major and overall it was a smooth experience.
The system as a whole is quite rigid and this is a by-product of everything being highly intelligent and automated. You don’t simply pour resins into a tray, rather the system keeps a record of this every print. This on one hand is great for cleanliness and minimising resin contact, but on the other hand if you have a failed print, cleaning the vats is a nuisance.
Another issue is the resin amount that is in the cartridges - if the amount of resin to be used exceeds what is left, the system will not allow the print to go through. Sometimes the reading can be a large amount of remaining resin (150ml) in the reservoir for a little 25ml print. If you clean a tank and pour the resin back into the container, it doesn’t acknowledge the quantity of resin poured, so every-time you clean the reservoirs, you need to dump the unused resin.
Software
As mentioned above, software is a big strength and somewhat a weakness of the Primeprint system.
The Primeprint is actually bundled with inLab not some new stand-alone printer software. On one hand, it is a good lab software you are getting and enables you to do a lot of non-printer related things, such using CEREC mills with third-party scanners + design a host of appliances etc.
On the other hand, it is a lab software - these are not the easiest to use and inLab can feel clunky. Dentsply Sirona may have been better creating a separate printer software for Primeprint - minimising menus and allowing the user to quickly import a desired print and add supports all on one screen.
In saying that, Dentsply Sirona's focus is their new cloud system - DS Core. So it looks like everything is going to the cloud with time anyway.
Material Options and Availability
Primeprint is a closed system meaning that you can only use the Primeprint cartridges with this printer. This is a limitation of the printer. The Primeprint materials do however cover the full scope of printing applications for dentistry.
Currently you have access to a single resin made for each of the standard options – model, surgical guide, temp crown, custom tray etc. Most notably - Lucitone denture resin is the stand out feature of this system although this is also available for Asiga too.
Because it is locked, if you want to use the widely popular Keysplint Soft, you cannot do so with the Primeprint.
Investment Cost
The entire Primeprint system is sold with the Primeprint PPU (wash and cure) and it is 22,500 USD.
Its important to clarify that Primeprint includes a CAD software (inLab, valued at $6-10k).
At any rate, this does mean the Primeprint is the most expensive 3D printing set-up on the market.
Printer Technology
DLP Technology.
385 nm, 2K (1920 x 1080) pixels projector resolution.
Build Platform Size
The build platform at best will first 2-3 full arch models orientated direct to the print bed.
The software itself does not allow you to print direct on the build platform but rather you have to use a raft with every print. Again, this is the rigidness of the system.
Total volume: 134 x 76 x 150 mm
Build plate area: 10,184 mm2
Set-Up Difficulty
Set-up of the Primeprint can only be carried out by a Dentsply Sirona technician. Although the footprint itself of the Primeprint and PPU is similar to other systems, this is a far larger (vertically) and heavier printer.
This is sophisticated equipment and there is no way someone could be able to do an unboxing alone.
Connectivity
Primeprint uses USB or a network LAN connection via RJ45.
The technician will set everything up and the Primeprint will not work unless it recognises the computer with the software installed on the same network.
Cloud
No cloud software currently that allows you to directly control the printer.
Dentsply is working hard on their cloud platform DS Core which allows cloud-based remote service clarification, access to design services and triggering the design software inLab from DS Core.
Keep an eye out on the DS Core and Create which seems to be the future for Dentsply Sirona.
Heater
The Primeprint has an internal heater that works well.
Before any print the system heats up to the appropriate temperature for that specific resin. This can take anywhere between 15-20 minutes depending on the resin. It is a little on the slow side but not bad.
Washing / Curing Machines
The Primeprint PPU is the most sophisticated wash and cure machine on the market. It is completely automated and is an impressive feature of the system.
You simply inserted the Primeprint box into the PPU and it will do the rest including 2 washes, cure and dry. Printed objects come out completely clean and ready to use. The PPU works very well.
It does take some time however and the company will likely need to make this entire process more efficient if they want Primeprint to be considered for single-visit dentistry - which does not really seem like the purpose for this printer given the company also sells CEREC.
The Bottom Line
The Primeprint is an interesting offering. It provides the user with arguably the most automated system on the entire market and likely nothing will come close to how little the dentist/team has to do physically to get a printed product ready for use.
The prints are generally high quality and for the most part it is reliable. The system as whole allows full delegation and requires almost no manual work in setup, printing and post-processing which allows a "white glove" experience. That's a significant difference to any other system.
However, the downsides are the cost. By far the most expensive on the market and it seems to fit a practice with a Dentsply Sirona ecosystem more than anything. The system is also closed in regards to resins. Dentsply has resins that cover the full scope of printing applications, but you are limited to only using those.
Don't have time to read the full article?

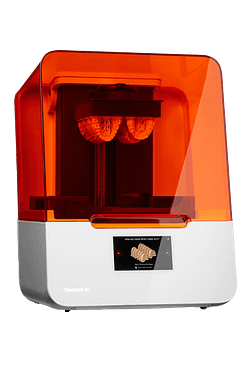
FormLabs 3B+ Review
3D Printer Ratings
Print Speed
Reliability
Ease of Use
Software
Material Options
Investment Cost
Wash
complete system
Cure
complete system
3D PRINTER FEATURES
Printer Type
SLA 250 mW laser power 25 micron
Build Platform Size
Medium 145 × 145 mm
Set Up Difficulty
Easy
Cloud Software
Yes
Open System
Closed
Built-in Heater
Connectivity
USB, WiFi and Ethernet
Print Speed
The Formlabs 3B+ is based on SLA technology which is slower on average than its DLP or LCD counter parts. It is not the slowest printer on the market but it is nowhere near being the fastest. Standard models will take around 60-90 minutes to print with the Formlabs 3B+. Because of how SLA technology works, printing multiple models is not as fast as LCD or DLP either.
The company does combat this with faster to print draft resins and larger layer thicknesses. Tinkering with all of this you can get models printing in around 30-45 min. But this is only for models.
When it comes to crowns and other indications it is also not the fastest. A single crown takes about 50-60 minutes to print for example.
Ease of Use
The FormLabs 3B+ is an excellent printer in terms of ease of use and is one of the easiest printers to delegate to staff. The setup up process is a breeze and can easily be done by anyone on the team without a technician.
The software itself and menus are all very clear, intuitive and easy to understand. The printer warns you if the wrong resin for the job is added and it is generally an extremely user-friendly system.
The resin tray system has a wiper to always keep the resin mixed and auto-filling resin cartridges make it one of the most easy printers to operate.
Reliability
Another one of those super-reliable printers on the market. The Formlabs 3B+ just works. It may not be the fastest but failed prints are rare using this printer. The printer software works well and supports are generated intelligently by the AI where required. The printer is very enjoyable to use.
Software
PreForm by Formlabs is one of the best printer software on the market in terms of ease of use.
It is slick, easy to use, intuitive and makes printing a breeze. The company has also released a dental version of the software which makes the entire workflow even better.
We hardly ever had any issues with printing and that’s thanks to the software. It even has a one-click print function in which any design will be orientated, placed on supports and ready to print in a single click. Furthermore the software has a great cloud system and printer management interface online.
The only thing it is missing is an AI or CAD design feature.
Material Options and Availability
This is the Achilles' Heel of the Formlabs printers.
Being a closed system there are a limited number of resins available for you to use. Most notable you cannot use KeySplint Soft or many other popular third party resins. In saying that, the company are aware of this and have released a new soft splint material for example, so they are trying to stay competitive.
When considering Formlabs resins, they are incredibly reliable but are not market disrupters. The model resin works well but looks a bit off in terms of translucency. The crown resins are made by BEGO which are quite dated these days and don’t look the best.
Investment Cost
This is one of the strongest aspect of the Formlabs 3B+ system. The cost is incredibly attractive.
At around 10k USD you can buy an entire Formlabs 3B+ system which is an excellent entry point for those looking at printing.
Printer Technology
Low Force Stereolithography - helping minimise failed prints.
The optics engine uses one Light Processing Unit using a 250 mW laser power and a 25 micron XY resolution.
Build Platform Size
The build platform is large. Great for printing multiple models. You can easily fit around 8 models on this platform laid flat. You are spoilt for space when printing dental prosthetics such as splints, guides and restorations on the Form 3B+,
There are no smaller build platforms for example for crowns etc.
The company has innovated in the build platform space - the new easy to release - Build Platform 2. This enables easy release of all printed products by using a propriety flexing build platform. This makes printing and removing multiple models a breeze.
Total volume: 145 × 145 × 185 mm
Build plate area: 21,025 mm2
Set-Up Difficulty
Levelling the print bed itself is easy with smart and intuitive in screen instructions and included tools.
The entire unboxing process is enjoyable and easy to do for anyone. Turn the printing on and follow the on-screen prompts.
There is also a range of different tutorials and help online.
Connectivity
Direct connection, ethernet, LAN or WIFI. All work well. Easy to connect to clinic Wi-Fi and get the printer going.
Cloud
Cloud service works very well. You can start prints completely remotely. The interface is great and printer statistics are a nice addition. With the new Form Auto Feature, you can set up an entire automated production facility. This will be useful for high volume printing - e.g. ortho labs/clinics.
Heater
Internal heater present in the printer. It works well. All resins are automatically heated to optimal temperature based on the resin chosen before starting the print job.
The printer can also be ‘primed’ before a print job is sent which basically heats the resin and gets everything ready for immediate printing.
Washing / Curing Machines
The Formlabs 3B+ comes with a complete system.
The washing units come in 2 varieties - what is basically two plastic containers for manual cleaning of print products. This is a budget option. Or a automatically agitating wash unit with timers built in for close to automated washing of print products, called the Form Wash.
The curing unit also has 2 varieties - Form Cure, older slower unit and the Fast Cure - much faster unit. The Form Cure is quite a slow machine which takes anywhere between 30-60 min curing time. The Fast Cure is much faster, cutting this down to 2-6 minutes for all dental indications.
Entire workflow is validated.
The Bottom Line
The Formlabs 3B+ is not the fastest printer on the market and in fact its use for same-day dentistry is tricky to argue. It is however one of the most reliable and easy to use printers available.
Where this printer excels is its great economic value. Formlabs printers were widely popular because of this and were adopted quite a lot early in dental printing.
Given the resin limitations, it is usually best for clinics/labs who want an easy to use and delegate printer for things like models and surgical guides. It is a great printer for novices and the company is working hard to release new validated resins.
Get The Full Review Details

Access the Full Formlabs Form 3B+ Review as a PDF so you can read this when it suits you. You can download it too!

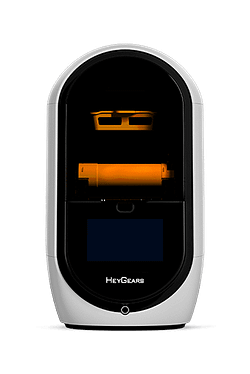
HeyGears UltraCraft ChairSide Review
3D Printer Ratings
Print Speed
Reliability
Ease of Use
Software
Material Options
Investment Cost
3D PRINTER FEATURES
Printer Technology
DLP - 385 nm
Build Platform Size
Small - 124.8 x 70.2 mm
Set Up Difficulty
Easy
Cloud Software
Yes
Built-in Heater
Connectivity
USB and WiFi
Print Speed
The UltraCraft ChairSide isn’t blisteringly fast, but it it’s not slow either. Above average for sure. It is able to print a standard model orientated directly on the plate in 100 µm layers in 35 minutes using HeyGears own model resin. This is impressive and inline with other DLP printers.
Ease of Use
It is very easy to install the build platform - it simply slots in and out, and then you load a proprietary resin capsule to get it ready for printing.
The entire process takes seconds to move a fresh print and load it into the AirWash – a motion that can be performed gloves-free without the fear of contacting uncured resin.
The cloud-based user portal has access to everything you need at the touch of a button, including a nifty dental design service.
As the build platforms are disposable and pre-sanded, there are virtually zero platform adhesion and cleaning issues.
Reliability
Over two months worth of regular printing, we only had two print failures, both of which were due to outdated resin profiles on the printer. Once the printer was updated, these issues were resolved.
Given the entire system is closed and involves a build platforms that are disposable, it seems to be quite reliable.
Software
As for print preparation, it is simple to choose the resin to be used, upload the STL’s and support them from any PC using the cloud software.
The software is surprisingly smart enough to orientate models and surgical guides in an ideal way and default support settings generally work well, even though they are very simple and non-customizable.
The software also has a nice hollowing functionality for models which works with the click of a button.
However, I did run into some errors which the technical support team were already aware of and planning to fix. For instance, adding more than 2 study models per build seemed to confuse the cloud-based slicing software.
In addition, one thing to note is that the entire platform is internet dependent.
Material Options and Availability
The Hey Gears ChairSide 3D printer is a closed system - particularly due to the patented capsule delivery system. This means that it does have limited resin options.
Although it is a closed system, HeyGears has resins for almost all printable dental indications – this includes models, temporaries, denture teeth, dentures, surgical guides, definitive printed restorations (onlays, inlays, crowns) and splints/night guards.
To note is their temporary denture resin, which when fully processed, is surprisingly aesthetic (although strength will need to improve in future iterations.
The company have also validated popular resins such as KeySplint Soft.
Investment Cost
The combined ChairSide, AirWash and AirCure will cost around $14,000 to $15,000 USD depending on local distribution.
In addition, resins are priced higher to take into account the unique capsule-dispensing system and the disposable build platforms they come with.
There are no annual subscription fees at this stage.
Printer Technology
The HeyGears UltraCraft ChairSide is a DLP 3D Printer using a light source wavelength of 385 nm.
Build Platform Size
The build platform is small, measuring 124.8 x 70.2 x 70 mm.
It will at best fit two full arch models orientated direct to the print bed. It is definitely more suited to printing one or two items at a time, and not high volume printing.
Total volume: 124.8 x 70.2 x 70 mm
Build plate area: 8,760 mm2
Set-Up Difficulty
HeyGears claims that with their ChairSide printer, it only takes 5 minutes to learn 3D printing. While this may be a bit of marketing spin, it's not too far from the truth.
The ChairSide is surprisingly easy to set up. Levelling was easy and what needed to be adjusted was visualised on the printer’s display. There is no need to level the disposable build platforms as long as the machine itself is level.
Everything just seemed to work.
Connectivity
This printer needs to be connected to the internet to work. Connecting the printer to the internet was smooth and straightforward. Updates to the firmware and resin profiles was fast and easy.
Cloud
The ChairSide software and printer management is completely cloud-based.
Printer management, print metrics and a nifty design service is all accessible via HeyGear’s cloud-based platform - HeyGears Cloud.
Because of this, this printer does need to be connected to the internet at all times.
Heater
The ChairSide has an internal heater and humidity control.
Heating from room temperature to 35 degrees took around 10-15 minutes.
Quite standard for a good printing heater.
Washing / Curing Machines
The ChairSide truly shines when it is used alongside its corresponding wash unit (AirWash) and the curing unit (AirCure).
The workflow is smooth and seamless between each step and the ChairSide, AirWash and AirCure should really be purchased as an entire system to make the most out of the efficient workflow it provides.
The Bottom Line
The HeyGears UltraCraft ChairSide is a niche printer for a niche portion of the market.
It’s an impressively easy printer to set up and get going and it works well as a complete system.
However, the trade off is that the printer is completely closed and users will have to use their proprietary resin and delivery system.
Don't have time to read the full article?
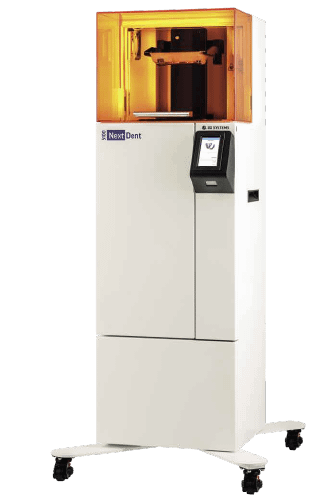
NextDent 5100 Review
3D Printer Ratings
Print Speed
Reliability
Ease of Use
Software
Material Options
Investment Cost
3D PRINTER FEATURES
Printer Type
DLP - 2K - 405 nm
Build Platform Size
Small - 124.8 x 70.2 mm
Set Up Difficulty
Easy
Cloud Software
None Available
Open System
30 unique NextDent materials
Built-in Heater
Connectivity
Ethernet only
Print Speed
The NextDent 5100 is a blazingly fast printer. No question about it.
It is one of the fastest 3D printers on the dental market which is impressive given it was released in 2018.
This printer print models easily within 15-20 minutes and an entire arch of restorations within 10-15 min.
This is a printer you should consider if print speed is important for you.
Ease of Use
Like most dental printers, the NextDent 5100 is relatively straightforward to use, yet the software is a tad on the complicated side.
There is nothing too hard in its operation. The trays are easy to install and resin is poured directly in. Therefore, the printer uses resin bottles rather than cartridges etc. The build platform is simple to insert and remove. Levelling the print bed etc is all straightforward.
One thing to note is that the resin trays are quite expensive, so you want to ensure you handle them properly.
Reliability
Over the testing period, a few failures occurred but not to the point this felt troublesome to use. We are aware that some users on FB groups that have complained about reliability issues.
We personally use this printer in iDD Lab all the time with little issue. For us it has been a reliable printer that is still in operation in our busy lab for over 4 years.
Software
The NextDent 5100 software is called Sprint, and it is similar to all other printer software.
It works well, STLs are easy to import and has AI for supports etc. Sending jobs to the printer is easily. Nothing to noteworthy, just a good printer software.
The only downside is that it is a little complicated to use. It also does not have any cloud features.
Material Options and Availability
This is a closed system but there are a large variety of resins for this printer.
NextDent have spent years validating more and more resins. These are all under their own brand so once again no 3rd party resins can be used in this printer like KeySplint Soft.
In saying that the NextDent range of resins are generally very good. In particular, their temp crown options and denture resins are very decent.
In total there are 30 unique NextDent biocompatible materials - the largest number available from any individual dental material supplier - the NextDent 5100 addresses multiple dental applications.
All NextDent materials are biocompatible and CE-certified, FDA listed and classified in accordance with the international medical device regulations. It is quite impressive for a closed printer.
Investment Cost
The NextDent 5100 priced around 13,000 - 14,000 USD.
So it is not a economic printer but not the most expensive either.
One thing to note is that the NextDent resins and resin trays are also in general more expensive than other printers.
Build Platform Size
The build platform will first at most 2-3 full arch models orientated direct to the print bed.
It is definitely more suited to smaller print jobs such as 2-3 appliances / models at a time.
Total volume: 124.8 x 70.2 x 196 mm
Build plate area: 8,760 mm2
Set-Up Difficulty
Setting up the NextDent 5100 is straightforward. Follow the prompts to level the printer and it comes with a spirit level to help with this.
Resins are scanned before printing with the printer barcode reader before use making sure you select the right resin for the print job sent.
Connectivity
The NextDent has only one way of being connected – ethernet port.
This is not a big deal but it does seem like this printer maybe better suited for a lab rather than a clinic.
These days most printers offer a range of options such as Wi-Fi or cloud-based connection. Not in this case.
On top of that, the other strange thing is that the software is licensed. You cannot install it freely on any computer. Rather you pay a fee for each software license.
Built-in Heater
The NextDent 5100 has an internal heater which works well. No issues here and it heats up resins promptly.
Washing / Curing Machines
The company does not sell its own washing unit but does sell an excellent curing box.
The Bottom Line
The NextDent 5100 was popular as it was one of the first printers to have FDA approved denture resins and other prosthetic resins, however these days in a more competitive market its facing stiffer competition.
There is no doubt this is an extremely fast and enjoyable printer to use. There is something special about being able to print a wax-up model in 15 minutes and this does open up workflows simply not possible with other printers, such as same-day smile design prints.
The drawbacks of this printer appear when you consider that the cost of it is quite significant and the resins as well are not cheap. Also, one thing we wish it had was cloud capabilities.
Although this is a completely closed printer, NextDent offers a large range of resins and some of them are arguably the best in the industry.
So even though this printer is over 5 years old now, if print speed is key for you, NextDent is hard to beat.
Download the Full Review PDF

Download the full 78 page PDF to get a full copy of this article to read later.
Get a high resolution printable copy of this review.

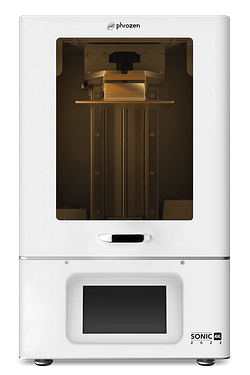
Phrozen Sonic 4K 2022 Review
3D Printer Ratings
Print Speed
Reliability
Ease of Use
Software
Material Options
Investment Cost
Wash
Requires 3rd party unit
Cure
Requires 3rd party unit
3D Printer Features
Printer Technology
Mono LCD - 4K - 405nm
Build Platform Size
Small - 134 x 75 mm
Set Up Difficulty
Medium
Cloud Software
None Available
Open System
Large range of validated materials
Built-in Heater
Connectivity
USB, WiFi and Ethernet
Print Speed
The Phrozen Sonic 4K 2022 LCD 3D Printer is a slower printer compared to others. A simple dental model printed flat on the print bed can take more than an hour even if printed at 100 µm rather than 50 µm.
We have tested a range of prints including printing a splint in KeySplint Soft orientated almost vertically, and it was projected to take at least 5 hours, or 3.5 hours on “Turbo” mode.
There are limited same-day applications for this printer for sure.
Ease of Use
The PS4K 2022 is just like most consumer-level resin 3D printers.
It is relatively straightforward to remove and install the print bed and begin prints.
There is nothing really special here.
Reliability
Over the testing period, we didn't experience many failures.
Splints printed on the PS4K 2022 fit well clinically and crowns seemed to fit well both on models and in the mouth.
This printer is capable of producing very accurate prints and can compete with much more expensive printers on the market.
Software
The PS4K 2022 unlike most Phrozen printers, uses its own proprietary slicing software, DS Slicer.
It does have some marvelous functionality that doesn’t appear in slicing programs of far more expensive printers. Such as a hollowing function and even an option to base and intraoral scans without additional software.
Many popular resin profiles come pre-loaded onto DS Slicer – a big plus. However it is not the easiest software to navigate and can be confusing to follow for someone new to 3D printing software.
Material Options and Availability
The PS4K 2022 is a completely open system with a range of validated materials.
There is a surprisingly large variety of resins validated for this printer – many resins in the popular KeyPrint and NextDent ranges have official settings for this otherwise unassuming printer.
Depending on your location, it will not be hard to find resins for any printable dental application for the PS4K 2022.
Investment Cost
The PS4K 2022 costs around $1500-2500 USD depending on local distribution. This makes it an extremely affordable 3D printer for dentists.
The FEP (printer film) can be replaced and replacement vats are very affordable when you compare them to other dental 3D printers.
Cost is the biggest strength of this printer. It is likely the best bang for your buck.
Printer Technology
The Phrozen Sonic 4K 2022 is a Monochromatic LCD 3D printer using a 6.1” 4K Mono-LCD Light Source with 405nm ParaLED® 3.0 Module
Build Platform Size
The build platform is small and at best will fit 2-3 full arch models orientated direct to the print bed.
It is definitely more suited to printing 1 or 2 items at a time or
Set-Up Difficulty
Levelling the print bed itself was no different to levelling other consumer-grade printers – definitely not a fast process, but straightforward to do.
Phrozen didn’t seem to trust the adhesion properties of the build platforms provided and so some sandpaper was provided with the printer for users to pre-sand them (how thoughtful).
It must have been my bad luck, but the unit I received had a software issue with the display screen (it would freeze). Eventually I had to reformat the mini-SD card containing the printer’s firmware and reload the firmware using Phrozen’s instructions on their website. Even as an experienced user, this process still took a long time to do.
Apart from this one hiccup which we will call unlucky, set-up was overall OK. Not the most user-friendly, but not the hardest.
Connectivity
I had issues with connecting the PS4K 2022 to my internet and in fact had to abandon this.
Prints can be done via USB slot – annoyingly located at the rear of the printer.
I have however heard of other users having no issues connecting the PS4K 2022 to the internet for wireless printing.
Otherwise ethernet connection also works.
Heater
The PS4K has an internal heater which works relatively well - heating from room temperature to 30 degrees within 10-15 minutes of operation.
It also has internal air purifiers – a nice addition, although it remains to be seen how effective they truly are.
Washing / Curing Machines
There are no specific dental curing units manufactured by Phrozen.
Phrozen has recently announced a new washing unit, but this appears to be more suitable for washing dental models.
The Bottom Line
The PS4K 2022 can be slow and a little clunky to use. However, where it excels is its great economic value.
The fact that it has a significant range of dental resins validated on it means that users will generally not need to look far for any printable dental application.
Based on its low cost and resin accessibility, this makes it a great first printer for novices dipping their toes into 3D printing or those who are on a budget.
It is important to note that it is somewhat hampered by relatively hard-to-follow software and potential challenges with setting up. In saying that, overall this is an excellent economic choice.
Don't have time to read the full article?

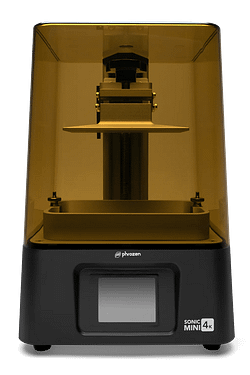
Phrozen Sonic Mini 4K Review
3D Printer Ratings
Print Speed
Reliability
Ease of Use
Software
Material Options
Investment Cost
Wash
Requires 3rd party unit
Cure
Requires 3rd party unit
3D Printer Features
Printer Technology
LCD - 4K - 405nm
Build Platform Size
Small - 134 x 75 mm
Set Up Difficulty
Medium
Cloud Software
None Available
Open System
Medium range of materials
Built-in Heater
Connectivity
USB Only
Print Speed
As a consumer-grade LCD printer, don’t expect the Phrozen Sonic Mini 4K to be super fast. It is not.
Slightly faster than its brother the Sonic 4K but again, there are minimal same-day applications for this printer unless you have additional accessories (third-party vat warmer and mini build plate).
Ease of Use
The Phrozen Sonic Mini 4K is similar to set up and use as the Sonic 4k. It is a consumer-grade resin 3D printer.
It is straightforward to remove and install the print tray, pour resins and start prints.
There are no bells and whistles here or anything that makes it particular beginner friendly like some other printers..
Reliability
Over the testing period, only some failures were encountered. However, overall, everything we printed using the Phrozen Sonic Mini 4K worked well. This includes splints that clinically fit well, and crowns.
One thing to note is that there is no internal heater in the Mini as compared to the normal PS4k. This means that that more viscous ceramic-filled resins would need to be heated externally before printing otherwise you risk print failures.
Software
The Phrozen Sonic Mini 4K uses Chitubox, a consumer-grade slicing software option.
It is not made for dentistry and thus is not as simple to use as other software.
Because it is just a generic printer software it may be confusing for a novice. In particular, the support settings can be as simple or convoluted as you want.
Material Options and Availability
The Phrozen Sonic Mini 4K is a completely open system. Some dental resins are officially validated for this printer and may have unofficial settings worked out by other user.
There are many resins that have been validated, in particular the popular KeyPrint range. You can also dial in the settings manually for any resin if you like to tinker with these things.
This particular printer has an almost a cult-like following amongst many dental users. As a result, there are settings for many dental resins that have been unofficially “dialed in” for this printer and can be used by anyone.
Take note that while these settings may work very well, they may not have been approved by your local regulatory body per say and are not a 'validated' workflow. We will leave that up to you whether this matters or not.
Investment Cost
The Phrozen Sonic Mini 4K is the most economic printer option on the market.
This is one reason why it has gained such a strong following.
It costs around $350 USD and can sometimes be bought even cheaper on sale.
Often third-party accessories such as a mini build plate and vat warmer cost substantially more than the printer itself.
Printer Technology
This is a monochrome LCD printer using a 405nm ParaLED Matrix 2.0 as its light source to cure the resins.
Build Platform Size
At best, the build platform will be able to print 2-3 full arch models orientated directly on the build plate.
Like many other small build platform printers, it is more suited to printing 1 or 2 items at a time or low-volume printing.
Total volume: 134 x 75 x 130 mm (W x D x H)
Build plate area: 10,050 mm2
Set-Up Difficulty
Leveling the print bed itself was no different from leveling other consumer-grade printers – not a fast process, but straightforward.
It should be noted that the lid that Phrozen Sonic Mini 4K comes with does NOT block out specific wavelengths, so it is recommended by some circles to spraypaint the lid black to avoid any resin stored in the printer from curing by being exposed to background light.
Connectivity
The only way to print is via a USB connection. There is no wireless or ethernet printing.
Cloud
The Phrozen Sonic Mini 4K does not utilize cloud-based software.
Heater
The Phrozen Sonic Mini 4K has no internal heating.
Washing / Curing Machines
Phrozen manufactures no specific dental curing units.
The Bottom Line
The Phrozen Sonic Mini 4K is excellent value considering the price point, which makes it a superb printer to get into 3D printing.
Based on its low cost and resin accessibility (official or otherwise), this makes a great first printer for novices. However, this can be hampered by software that is far from intuitive for the dental-specific user.
Overall it is likely the best printer money can buy from a value perspective. Just take note that this is not a 'dental' specific printer with clear workflows and easy menus. What your trade for money you will pay for with time.
Download the Full Review PDF

Download the full 78 page PDF to get a full copy of this article to read later.
Get a high resolution printable copy of this review.

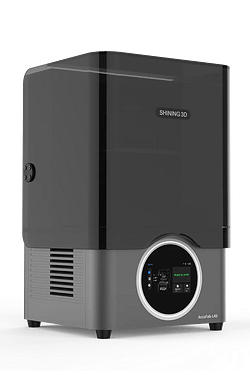
Shining 3D L4D/L4K 3D Printer Review
3D PRINTER FEATURES
Printer Type
LCD - 4K - 405 nm
Build Platform Size
Large - 192 x 120 mm
Set Up Difficulty
Medium
Cloud Software
None Available
Open System
Use Any Material
Built-in Heater
Connectivity
USB, WiFi and Ethernet
In case anyone is wondering what the difference is between the L4D and L4K there isn’t any except the color of the plastic cover. Shining 3D thought they would have a dental-specific model and another for other markets. Still, since the dental model demand was significant, you may find your supplier selling you an L4K due to supply constraints of L4D.
Print Speed
The Shining 3D AccuFab L4D/L4K is not a super fast printer, as is the case with most LCD printers.
A simple model printed flat on the print bed will take less than an hour if printed at 100µm.
A splint orientated vertically will take around 5 hours.
Same-day applications are relatively limited for this printer.
Ease of Use
The Shining 3D AccuFab L4D is one of the easier printers to use in the market. The touchscreen is clean and bright, and it’s straightforward and easy to understand the menus. The entire thing is well thought-out.
There is a nice vat cleaning option which is absent in many other competitors – this is a welcomed feature.
Leveling is quite standard and is similar to most LCD printers in the market.
I did feel the build plate was rather heavy, mainly if handled with one hand. This admittedly made it clunky to clean after each print.
Reliability
The support settings are fully customizable. That being said, using the default support settings proved to be very consistent overall.
If anything, I felt the default support settings were optimized for print success rather than support removability, and prints were still consistent even after I reduced the support overshoot.
By default, objects were printed with a beveled raft, which made removing them from the plate easy.
I feel that the absence of vat heating is a slight shame, as this type of functionality makes printing the more viscous ceramic-based restorative resins much more predictable.
I have, however, been assured that as long as the ambient temperature lies between 20-35°C, the printer will automatically compensate for the temperature.
Software
Shining 3D printers use their own proprietary desktop software Accuware, which features a pleasant interface that is easy to follow.
I’m really satisfied with how the software workflow flows. It also features a very nice hollowing tool and functionality to add drainage holes all within the printer software itself.
Sending prints via WiFi was quick and easy and did not take long to load.
Overall the software is amazing and especially so when you consider that this is quite an affordable printer.
One thing I would like to see in the future is if Shining 3D could make the text bigger in their software – some users may struggle to look at the different menu options.
Material Options and Availability
There is a large variety of resins validated for the Shining 3D printers. The company also makes their own resins.
Many resins in the popular Keyprint and NextDent ranges have official settings for the L4D.
Depending on your location, it will be easy to source resins for any dental application for the Shining 3D AccuFab L4D.
Investment Cost
Depending on regional distribution and exchange rates, the Shining 3D AccuFab L4D will cost around $3,000-4000 USD.
Printer Technology
The Shining 3D AccuFab L4D uses an LCD light source with a 4K (3840×2400) resolution and a 405 nm wavelength.
One of their differentiators that not all LCD printers have is a DCS (District Cooling System), which maintains the temperature of the optical system under 40°C to significantly extend the 3D printer lifespan.
Build Platform Size
Large build platform that can fit around at least eight well-trimmed models orientated horizontally.
Alternatively, it should be able to fit more than a dozen models orientated vertically.
Total volume: 192 x 120 x 180 mm (W x D x H)
Build plate area: 23,040 mm2
Set-Up Difficulty
The physical setup was super easy.
Even easier was connecting the printer to the network to allow network printing.
I was delighted that the machine was up and running quickly and without a hitch.
Connectivity
WiFi connection was straightforward and overall very consistent.
It was honestly refreshing to see this after experiencing this hurdle with other, more expensive printers.
You can also print via ethernet network connection or USB direct to the printer.
Cloud
Shining 3D printers have no cloud-based software options available at the time of this review.
Open or Closed
The Shining 3D printers are “open” and have a moderately large library of third-party resins validated on the system.
Heater
Unfortunately, the Shining 3D AccuFab L4D lacks internal heating functionality.
Washing / Curing Machines
The Shining 3D AccuFab L4D is best paired with the FabWash and FabCure 2 to allow for a validated workflow. These are both great washing and curing machines made by the company.
However, you are not locked into any particular wash and cure unit.
The Bottom Line
The Shining 3D AccuFab L4D makes an excellent general-purpose dental 3D printer that is not only suited for entry-level users but allows for enough customizability to satisfy the advanced digital dentist/technician.
Although it lacks the speed of some printers for same-day applications and also vat heating, it makes up for this with pleasant and easy-to-follow software, simple connectivity, and a decent range of dental resins covering all applications.
If your practice wants to get into dental printing and you’re looking for a premium product without the price tag, the Shining 3D AccuFab L4D is definitely one not to ignore.
Don't have time to read the full article?

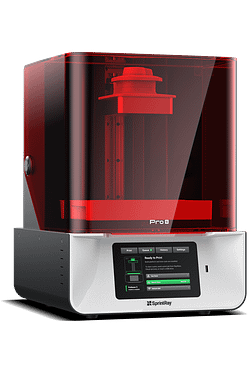
SprintRay Pro 55 S Review
3D Printer Ratings
Print Speed
Reliability
Ease of Use
Software
Material Options
Investment Cost
3D PRINTER FEATURES
Printer Type
DLP - 2K - 405 nm
Build Platform Size
Small - 105 x 59 mm + Crown Kit.
Set Up Difficulty
Easy
Cloud Software
Yes - Fully Fledged with AI.
Open System
Closed but many validated resins
Built-in Heater
Connectivity
USB, WiFi and Ethernet
Print Speed
The Sprintray Pro 55 S can be considered a fast printer, particularly after the “Bolt Mode” update.
A simple model printed flat on the print bed will take around 25-35 minutes to print at 100µm.
When you combine this with the blazingly fast curing times of the ProCure2 (which can cure study models in as little as 54 seconds), there are some really nice same-day capabilities here.
The Pro 55 S seems to be the chairside focused printer for SprintRay. You can only use the recently released crown kit with this printer and this makes printing restorations (crowns, veneers, onlays, etc.) blisteringly fast – a crown can be printed in as little as 10 minutes. Now same-appointment applications are more than feasible.
Ease of Use
Much like it’s bigger brother (the Pro 95 S), the Pro 55 S is very straightforward to use.
The touchscreen is simple to navigate and intuitive to use. Menus are clear and logical.
It’s one of the easiest, if not the easiest system to use in the market right now.
The entire SprintRay system was truly engineered with dental staff delegation in mind.
Reliability
The limited default support settings mean that generally prints are optimized for success, making the printer quite reliable.
For the few failures I have had in the past, they were due to me pushing the envelope by manually changing supports and their settings.
We’ve experienced failed prints, rare enough to not really be a bother, but we have seen some unexpected failures.
Software
All SprintRay printers use the RayWare software – this can be in the desktop form, or the awesome cloud-based platform.
Both options have good and easy-to-use functionality. I do feel that the desktop version of RayWare is still more reliable and consistent, but unfortunately it lacks some nice little tricks the cloud version has, such as the option for “skinnier” supports that are easier to peel off, and adjustable fit offset.
Both options will tell you when a print is likely to fail and will do a relatively good job at orientating prints in the optimum way possible.
In saying that, RayWare desktop will still crash once in a while, despite being out for several years now, and the cloud version will certainly not handle bulk printing (such as aligner models) too well in my experience. This is being improved and updated all the time however.
Overall both software versions work very well and this is easily one of the best printer software I’ve come across.
Material Options and Availability
There is a large variety of resins validated for the SprintRay system – many resins in the popular KeyPrint and NextDent ranges have official settings for SprintRay printers.
However, the best thing about SprintRay resins is that they are all classified as biocompatible so they can all theoretically be washed in the same unit.
I have personally found the SprintRay resins to cover more or less all indications, but there are some 3rd party resins that can be officially printed on the ProS 55, depending on regional availability.
So overall SprintRay printers are “open” in the sense that there is a very good library of 3rd party resins with official print settings validated for it. However, depending on what is available in your geographic region, you may need to consider the SprintRay system as closed.
Investment Cost
The price of convenience and ease-of-use does not come cheap. The Pro 55 S is the most expensive SprintRay printer.
The printer alone will cost around $10,495.00 USD, depending on regional distribution and exchange rates.
Most users will want to buy entire ecosystem consisting of the printer, washing and curing unit. The Prowash and Procure 2 both cost around 3000 USD each.
The company does sell a package deal with a discount. The printer + wash + cure for around 15,500 USD.
Not the cheapest system, but for the peace of mind of the complete system, many would agree it is money well spent.
Printer Technology
Sprintray uses Digital Light Processing (DLP) technology for their printers.
SprintRay custom-built 2K (1080P FHD) projector resolution with a Texas Instruments DLP chip (405 nm) LED light source with 50,000 hours expected lifetime.
Build Platform Size
The Pro 55 S seems to be designed more for small-item and low-volume printing. It seems to be the companies chairside dental clinic focused printer.
Surgical guide, splints, restorations, etc can all fit easily. One or two models at a time depending on the size of the arch.
The crown kit which is only available for the Pro 55 S is specifically designed for restorations. It comes with a tiny build platform and small resin tray.
An arch kit has also been recently announced for full-arch printing e.g. dentures, all-on-X, etc.
The Pro 55 S is a small format printer, aimed to produce high quality, fast, accurate prints
Total volume: 105 x 59 x 200 mm
Build plate area: 6,195 mm2
Set-Up Difficulty
The printer comes pre-levelled and physical set up was easy. Beautiful menus makes setup a breeze.
However, what took me a long time messing around with was connecting the printer wirelessly. It took me well over half an hour playing around with my network settings until my PC could detect the Pro 55. I have heard of similar stories too from other users, so depending on your firewall and/or network status, be prepared to contact your IT guy if needed.
Apart from that small hiccup, the rest was easy.
Connectivity
Multiple options exist to set up your printer - Ethernet, WiFi or direct USB connection.
You can can connect and send jobs via the IP from a computer on the same network, or via the cloud.
The USB slot is intelligently placed at the front of the printer for easy access.
Cloud
SprintRay has by fat the best cloud platform and software on the entire 3D Printer market by quite a margin.
SprintRay enables you to use the entire printer software online, on the cloud, from any browser.
It also comes with a CAD design service and AI-designs all from the same online website.
The company seems very serious about moving everything to the cloud and making it so you can control your printer all in the cloud. It is a great platform that is being improved regularly.
Heater
The Pro S line of SprintRay printers has resin (tank) heating and build platform heating functionality, which is noticeably more effective compared to the original Pro line printers.
This is one of the main differences between the Pro and Pro S SprintRay Printers.
The built in heaters work very well.
Washing / Curing Machines
The SprintRay Pro 55 S is best paired with their own wash and cure units - the ProWash and ProCure2.
The ProWash is an semi-automated 2 stage washing unit. You simply take your build platform and insert it into the wash and it will wash and dry the printed objects. It is one of the few 'semi-automated' wash devices on the market.
Depending on how you orientate your supported models, the ProWash is a generally good unit. However, we did notice that some objects still come out a little sticky. You may be be better off with an ultrasonic unit for certain prints such as temporaries or splints which seem not to wash fully. The wash unit does detect when it is time to change the washing fluid (99% IPA).
The ProCure2 is a fantastic addition of the SprintRay printer line, particularly when paired with SprintRay resins, which are clearly optimized for it. With its “Bolt mode” functionality, curing times can be cut very short (as low as 57 seconds). It is simply one of the best curing units on the market.
The Bottom Line
The SprintRay ProS 55 is an excellent 3D printer for dental clinics. It was clearly designed with the dental office in mind. While it may not completely excel in a single particular category, it performs very well in almost all criteria.
Coupled with an extensive library of SprintRay manufactured resins, a large validated resin library and a blazingly fast curing unit, this is a fantastic general purpose dental 3D printer which all dental team members can enjoy.
The SprintRay team have also done a great job developing their software and cloud offering. The Sprintray system is one of the easiest systems to use on the market and so printing tasks are easily delegable to trained team members.
Lastly, you cannot mentioned the SprintRay Pro 55 S without mentioning the Crown Kit. This company is spear-heading the permanent printed crown/restoration workflow, and are adamant this will contest traditional milling of ceramics.
Overall an excellent printer. The only downside really is the premium cost, the fact is technically a closed system and the small build platform of the Pro 55 S which would not really suit high-volume printing (only fits 1-2 models at a time). Oh and also take note that although the company has done a fantastic job at marketing, the printer is not the fastest available :).
Download the Full Review PDF

Download the full 78 page PDF to get a full copy of this article to read later.
Get a high resolution printable copy of this review.

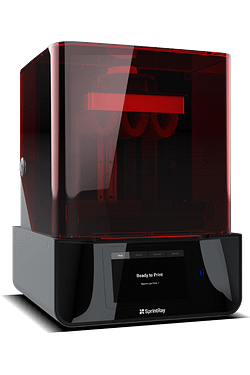
SprintRay Pro 95 S Review
3D Printer Ratings
Print Speed
Reliability
Ease of Use
Software
Material Options
Investment Cost
3D PRINTER FEATURES
Printer Type
DLP - 2K - 405 nm
Build Platform Size
Medium - 182 x 102 mm
Set Up Difficulty
Easy
Cloud Software
Yes - Fully Fledged with AI.
Open System
Closed but many validated resins
Built-in Heater
Connectivity
USB, WiFi and Ethernet
Print Speed
The SprintRay Pro 95 S is slightly slower than the Pro 55 S. Mainly because of the much larger build plate.
It is not a speed demon, but it still can be considered a fast printer, particularly after the most recent “Bolt Mode” update that is also available for it.
A simple model printed flat on the print bed will take around 30-35 minutes to print at 100µm.
When you combine this with the blazingly fast curing times of the ProCure2, this can also be used for some same-day indications.
The Pro 95 S seems to be the 'higher volume' / lab focused printer in the SprintRay range given its large build plate. In a way consider this for labs or high-volume in-clinic printing.
Ease of Use
Like the Pro 55 S, the Pro 95 S is very straightforward to use.
The touchscreen is simple to navigate and it’s easy and intuitive to go through. Overall, the SprintRay ecosystem is very well designed, with an ‘Apple’ feel to it.
Menus are polished and easy to follow, software is very well thought out and everything just works.
The setup process out of the box is straightforward.
Reliability
Reliability is decent. Just use the default support settings and you should be fine with your prints, even for those who are new to 3D printing. Everything is optimized for print success.
Like the 55 S we did experience a few failures, but this was mainly to pushing the printer to the limits.
Software
All SprintRay printers use the RayWare software – this can be in the desktop form, or the awesome cloud-based platform.
Both options have good and easy-to-use functionality. I do feel that the desktop version of RayWare is still more reliable and consistent, but unfortunately it lacks some nice little tricks the cloud version has, such as the option for “skinnier” supports that are easier to peel off, and adjustable fit offset.
Both options will tell you when a print is likely to fail and will do a relatively good job at orientating prints in the optimum way possible.
In saying that, RayWare desktop will still crash once in a while, despite being out for several years now, and the cloud version will certainly not handle bulk printing (such as aligner models) too well in my experience. This is being improved and updated all the time however.
Overall both software versions work very well and this is easily one of the best printer software I’ve come across.
Material Options and Availability
There is a large variety of resins validated for the SprintRay system – many resins in the popular KeyPrint and NextDent ranges have official settings for SprintRay printers.
However, the best thing about SprintRay resins is that they are all classified as biocompatible so they can all theoretically be washed in the same unit.
I have personally found the SprintRay resins to cover more or less all indications, but there are some 3rd party resins that can be officially printed on the Pro 95 S, depending on regional availability.
So overall SprintRay printers are “open” in the sense that there is a very good library of 3rd party resins with official print settings validated for it. However, depending on what is available in your geographic region, you may need to consider the SprintRay system as closed.
Investment Cost
The SprintRay Pro 95 S is slightly cheaper than the 55 S. The price of convenience and ease-of-use does not come cheap.
The printer alone will cost around $9,495.00 USD, depending on regional distribution and exchange rates.
Most users will want to buy entire ecosystem consisting of the printer, washing and curing unit. The Prowash and Procure 2 both cost around 3000 USD each.
The company does sell a package deal with a discount. The printer + wash + cure for around 15,000 USD.
Not the most economical option, but comes with a lot of benefits.
Printer Technology
Sprintray uses Digital Light Processing (DLP) technology for their printers.
SprintRay custom-built 2K (1080P FHD) projector resolution with a Texas Instruments DLP chip (405 nm) LED light source with 50,000 hours expected lifetime.
Build Platform Size
The Pro 95 S seems to be designed more for higher-volume printing. The focus seems to be printing a lot at the same time and possibly more of a focus on labs / ortho clinics than the GDP.
The Pro 95 S has a significantly larger build plate than the 55 S.
The build platform can fit around 6-8 well-trimmed models orientated horizontally. Alternatively, it can also fit around 10-12 (or even more) models orientated vertically.
Set-Up Difficulty
Like the Pro 55 S, the printer comes pre-levelled and physical set up was easy. Beautiful menus makes setup a breeze.
Set-up is straightforward. Just follow the on-screen prompts.
Connectivity
Multiple options exist to set up your printer - Ethernet, WiFi or direct USB connection.
You can can connect and send jobs via the IP from a computer on the same network, or via the cloud.
The USB slot is intelligently placed at the front of the printer for easy access.
Cloud
SprintRay has by fat the best cloud platform and software on the entire 3D Printer market by quite a margin.
SprintRay enables you to use the entire printer software online, on the cloud, from any browser.
It also comes with a CAD design service and AI-designs all from the same online website.
The company seems very serious about moving everything to the cloud and making it so you can control your printer all in the cloud. It is a great platform that is being improved regularly.
Heater
The Pro S line of SprintRay printers has resin (tank) heating and build platform heating functionality, which is noticeably more effective compared to the original Pro line printers.
This is one of the main differences between the Pro and Pro S SprintRay Printers.
The built in heaters work very well.
Washing / Curing Machines
The ProWash is an semi-automated 2 stage washing unit. You simply take your build platform and insert it into the wash and it will wash and dry the printed objects. It is one of the few 'semi-automated' wash devices on the market.
Depending on how you orientate your supported models, the ProWash is a generally good unit. However, we did notice that some objects still come out a little sticky. You may be be better off with an ultrasonic unit for certain prints such as temporaries or splints which seem not to wash fully. The wash unit does detect when it is time to change the washing fluid (99% IPA).
The ProCure2 is a fantastic addition of the SprintRay printer line, particularly when paired with SprintRay resins, which are clearly optimized for it. With its “Bolt mode” functionality, curing times can be cut very short (as low as 57 seconds). It is simply one of the best curing units on the market.
The Bottom Line
The SprintRay Pro 95 S is a great all-rounder dental 3D printer that seems to be the companies offering for those who see the Pro 55 S and want a bigger build platform.
It shares many of the same pros and cons of the Pro 55 S - these being ease of use, excellent software, large material selection etc. The cost again is the main drawback, as frankly, for a model printer there are many cheaper options these days.
What SprintRay do offer is the complete workflow. Their printers are some of the most popular on the market for good reason. Everything just seems to work and the entire ecosystem is very slick.
Coupled with a blazingly fast curing unit and the semi-automated wash, this is a fantastic general purpose dental 3D printer which all dental team members can enjoy.
Don't have time to read the full article?

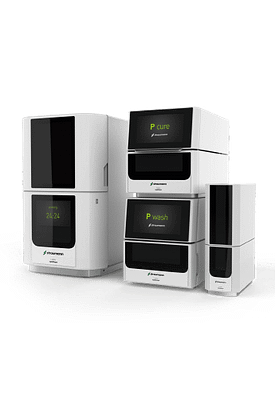
Straumann P20+ Review / Rapid Shape D20+ Review
3D PRINTER FEATURES
Printer Type
DLP - 2K - 385 nm
Build Platform Size
Small - 133 x 75 mm
Set Up Difficulty
Medium
Cloud Software
None
Open System
Open
Built-in Heater
No heater
Connectivity
USB, WiFi and Ethernet
Back in 2017, Rapid Shape announced a partnership with Straumann to use its global distribution network to sell its range of 3D printers to dentists and labs worldwide. We are reviewing the Rapid Shape D20+, but you will probably know it as the Straumann P20+ as this is the main distribution channel for dentistry, so that’s the name we will use for the rest of the review.
Print Speed
The Straumann P20+ is not particularly slow, but it’s not fast either. Like many printers on the list, a above average middle-ground option.
A simple model printed flat on the print bed will take around 35-45 minutes to print at 100µm layer thickness.
It’s certainly faster than the LCD printers and some other DLP printers in the market.
Ease of Use
The Straumann P20+ is generally quite a straightforward printer to use. The touchscreen is relatively simple to navigate but it can be a little confusing, depending on what you need to access. The menus could be simplified a bit.
The software that runs the software as well is a little intimidating at first, looking a lot more complicated than others. Once you get the hang of it however, overall it is an easy printing experience.
Reliability
The Straumann P20+ best works as a complete system with the companies own - P Wash and P Cure. Once the system is fully connected, it was awesome to see how the wash and cure units would automatically change their profiles based on the resin printed.
The addition of curing under a vacuum will reassure any user concerned with biocompatibility issues and it is a nice addition that many companies just ignore. The wash unit will also detect when it is time to change the washing fluid (99% IPA).
It’s clear that a significant amount of thinking has gone into the physical printing workflow, particularly in reference to printing biocompatible resins.
Overall the entire system works well. One glaringly obvious thing that was missing was internal heating functionality – I was quite surprised that this feature was missing.
Software
Unfortunately, where the Straumann P20+ falls a little short is the software – Netfabb.
The user interface is not pleasant to look at and as mentioned, initially it is quite daunting.
To put it simply, it’s definitely one of the harder slicing software programs that I’ve used, and I found it difficult to customize support settings and support positioning beyond what was given by default.
Attempts have been made to create some sort of top-down software workflow within Netfabb, which functions better but is still not quite as easy to use (and delegate) as other printer software.
Material Options and Availability
Straumann has a nice range of dental resins. On top of that there is a healthy variety of third-party resins validated for the P series, including Keysplint Soft, VOCO, and Crowntec.
It should not be difficult to source resins for any indication for this particular printer, depending on your geographic location.
Overall although the Straumann/Rapid Shape printers are not as open as something like the Phrozen, they have a commendable range of resins validated on their systems.
Investment Cost
Once again, the price of convenience and ease of use does not come cheap.
The Straumann Printer costs around $14,000 USD, depending on regional distribution and exchange rates.
If you add the wash and cure unit, the entire system costs around $23,000 USD.
Printer Technology
DLP printer with a resolution of 1920 x 1080 px.
This 2K (1080P) projector uses a 385 nm UV LED light source wavelength.
Build Platform Size
The build platform is more tailored for dental clinics than labs.
It can only fit 3-5 well-trimmed models orientated horizontally. Alternatively, it should be able to fit around 6-8 models orientated vertically.
Total volume: 133 x 75 x 115 mm
Build plate area: 9,975 mm2
Set-Up Difficulty
The printer comes pre-leveled, and the physical setup did take some time.
Connecting the printer with the wash and cure units did take some technical assistance which was well supported with a local technician who was readily available.
Not the easiest set-up but not something that requires a tech to come in and do start to finish.
Connectivity
The connection was reliable and consistent using Ethernet, WiFi or USB. All worked quite well.
As mentioned, the complete system has an Intelligent Connectivity feature that enables the communication between the Straumann P20+ printer and the P wash and P cure post-processing devices. Its quite unique and cool.
Once a connection is established between these devices, the printer can forward completed print jobs to the finishing devices for further processing. There, the cleaning and exposure process is carried out on the basis of the transmitted data. That means lower costs and higher process reliability.
Cloud
There is no cloud-based software for the Straumann P20+.
Heater
The P20+ surprisingly lacks a vat heater which these days seems to be included in most popular dental 3D printers of this price range.
Fortunately it didn’t seem to effect printing as far as we could tell. I can’t rule it out that it won’t affect printing for others in a cooler environment however.
Consider that for this printer you may want to ensure a temperature controlled room and keep your resin bottles in the same room. This will likely help with reliability of the printed outcomes.
Washing / Curing Machines
The Straumann P20+ is certainly best paired with the P Wash and P Cure. Having all three members of the family allows the user to benefit from a smooth, predictable, and reliable workflow.
It should be noted that the P Wash is only designed to wash small items and is certainly not catered for bulk washing applications like aligner model prints.
The ability to cure under vacuum in the P Cure adds a huge sense of reassurance when it comes to the biocompatibility of 3D prints thanks to removal of the oxygen-inhibited layer. You do not need an external air compressor for this functionality to work.
The entire system comfortably sits well on a bench top with space to spare as the curing unit stacks on top of the wash unit, so users with limited space for a 3D printing setup may want to check this out.
The Bottom Line
The Straumann P20+ is an overall strong entry in the dental 3D printing space by the company.
While it is is slightly let down by less-than-friendly software and a user interface that isn’t the easiest the use, it makes it up for its extensive resin library and the physical printing workflow, which streamlines the printing, washing, and curing process.
I believe with future planned software improvements being worked on as we speak, the P20+, P Cure, and P Wash will be a system to keep an eye on, particularly if you plan on printing biocompatible items such as splints, surgical guides, and restorations.
Download the Full Review PDF

Download the full 78 page PDF to get a full copy of this article to read later.
Get a high resolution printable copy of this review.

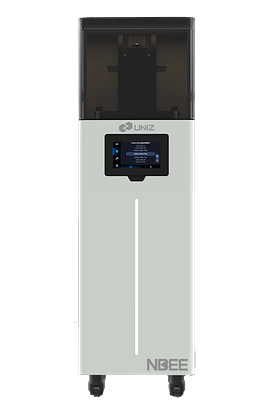
Uniz NBEE Review
3D PRINTER FEATURES
Printer Type
LCD
Build Platform Size
Medium
Set Up Difficulty
Medium
Cloud Software
Yes - Fully Fledged with AI.
Open System
Closed but many validated resins
Built-in Heater
Connectivity
USB, WiFi and Ethernet
In the competitive landscape of dental 3D printing, the Uniz NBEE distinguishes itself with its remarkable speed, cutting-edge technology, and extensive material versatility, catering to dental practices and labs prioritizing efficiency and precision.
First, let's take a moment to talk about UNIZ. They're quite notable in the 3D printing industry, particularly for their SLA and LCD printers which are designed with a focus on both speed and precision.
It's interesting to see how they've established a niche by delivering printers that can perform quickly and maintain a high level of detail in their prints.
UNIZ’s use of UV LCD technology to cure resin at a remarkable speed means that their 3D printers can cure entire layers simultaneously. They’ve even dubbed themselves as the “world’s fastest 3D printer” with their UNIZ NBEE.
So let’s dive into what makes this 3D printer, the UNIZ NBEE, so fast!
Print Speed
Unparalleled Speed: Capable of printing 6 full dental arches in just 5 minutes, ideal for high-volume production. With zDental Model resin for orthodontics, it takes only 18 minutes to print 18 models.
For dental labs, Die Models and Implant Models take only 30 minutes at 50µm resolution.
Crown Bridge Resins: Standard printing time is 20 minutes. Effectively fast for chairside 3D printing of temporary restorations.
Surgical Guides: 12 minutes at 100µm resolution.
Ease of Use
Plug-and-Play Operation: Requires minimal setup, ensuring a seamless transition from unpacking to operation. The printer includes a video and an instruction PDF for easy setup and calibration.
Reliability
Advanced Liquid Cooling and Air Purification Systems: Maintain operational temperatures below 40℃ and enhance the printing environment, extending the printer's lifespan.
Software
AI-Enhanced Software: Optimizes printing orientation and nesting for dental applications.
Seamless Integration: Compatible with leading 3D scanning and digital design software.
Uniz Dental software offers an easy step-by-step workflow from importing to slicing.
Material Options and Availability
Extensive Range of Dental Resins: Supports over 40 third-party resins, encouraging experimentation and customization.
Resin Temperature Control System: Maintains optimal reaction temperatures for consistent print quality, especially for third-party resins. The software offers options to create profiles for specific resins.
Investment Cost
Cost-Effectiveness: Priced at approximately $11,000 USD, it offers a balance between advanced features and investment return.
High Power Collimated Light Source: Delivers 16mW/cm² with 95% uniformity, ensuring even curing of resins.
Resin trays come with replaceable printing films, which are more cost-effective.
Printer Technology
Innovative LCD Stereo Lithography: Ensures precision and quality in dental printing with a substantial build platform of 192 x 120 x 180 mm.
Micro-Stereo Composite and Low Force Stereo Peel Technology: Enhances the structural integrity and precision of printed models.
Washing / Curing Machines
Connectivity
Versatile Connectivity Options: Includes Wi-Fi, Ethernet, and USB.
Open System Design: Adaptable for a wide range of dental printing needs.
The Bottom Line
The Uniz NBEE stands out as a formidable asset in dental 3D printing, marked by its exceptional speed, reliability, and versatile material compatibility. Its integration with leading software, efficient resin management, and innovative features make it a preferred choice for dental professionals seeking to merge efficiency with advanced technology. The Uniz NBEE's ability to significantly enhance productivity makes it a strategic investment for modern dental practices.
Don't have time to read the full article?
Dental 3D Printer Review Table
3D Printer | Speed | Reliability | Ease of Use | Software | Material Options | Cost | Printer Type | Size | Cloud Software | Open System | Built-in Heater | Connect | Wash & Cure |
|---|---|---|---|---|---|---|---|---|---|---|---|---|---|
Ackuretta Dentiq | 2.5 | 2.5 | 5 | 3.5 | 4.5 | $ | RGB LCD | Medium | |||||
Ackuretta SOL | 4 | 4 | 5 | 3.5 | 4.5 | $$ | Mono LCD | Small Medium Large | |||||
Asiga Max UV | 3.5 | 5 | 4 | 3 | 5 | $$$ | DLP | Small | |||||
Dentafab Sega | 5 | 4 | 3 | 3 | 5 | $$$ | DLP | Small | |||||
Dentsply Sirona Primeprint | 3 | 4 | 4 | 3.5 | 2.5 | $$$$$ | DLP | Small | |||||
FormLabs 3B+ | 2 | 4.5 | 4 | 4 | 3 | $$ | SLA | Medium | |||||
HeyGears UltraCraft ChairSide | 4 | 4 | 5 | 3.5 | 3.5 | $$$$ | DLP | Small | |||||
NextDent 5100 | 5 | 4 | 3.5 | 3 | 3.5 | $$$$ | DLP | Small | |||||
Phrozen Sonic 4K 2022 | 1 | 4 | 3 | 3.5 | 4.5 | $ | Mono LCD | Small | |||||
Phrozen Sonic Mini 4K | 2 | 3 | 3 | 2.5 | 4 | $ | LCD | Small | |||||
Shining 3D L4D/L4K | 2.5 | 3.5 | 3.5 | 4.5 | 4.5 | $$ | LCD | Large | |||||
SprintRay Pro 55 S | 4.5 | 4 | 5 | 5 | 4 | $$$ | DLP | Small | |||||
SprintRay Pro 95 S | 4 | 4 | 5 | 5 | 4 | $$$$ | DLP | Medium | |||||
Straumann P20+ | 3.5 | 4 | 3.5 | 2.5 | 4.5 | $$$$ | DLP | Small | |||||
Uniz NBEE | 5 | 3 | 3.5 | 4 | 3 | $$$$ | LCD | Medium |
Download the Full Review PDF

Download the full 78 page PDF to get a full copy of this article to read later.
Get a high resolution printable copy of this review.
Dental 3D Printer Review Authors

Dr Andrew Ip

Dr Ahmad Al-Hassiny

Dr Tom Shao
This printing review was the combined group effort of Drs Andrew, Ahmad, Tom and the team at iDD Lab.
Big thanks to Dr Andrew Ip in particular for all his help.
Dr. Andrew Ip is a Sydney-based private general dentist and speaker/educator on dental 3D printing technologies, having operated at least 19 different 3D printers so far. As a clinician, he provides many treatments, including complex crowns and bridges, braces, and implants. Some of his academic achievements include a Graduate Diploma in Orthodontics and a Masters of Science in Implantology and Dental Surgery. He has most recently completed a Graduate Diploma in Digital Dentistry.
Dr. Tom Shao first studied Science & Engineering in Newcastle, then relocated to the Gold Coast when invited to attend Griffith Dental School. Now a respected dental surgeon, he regularly attends national and international conferences and courses to consistently be at the forefront of modern dentistry. He runs 3D printing courses on the Gold Coast.

