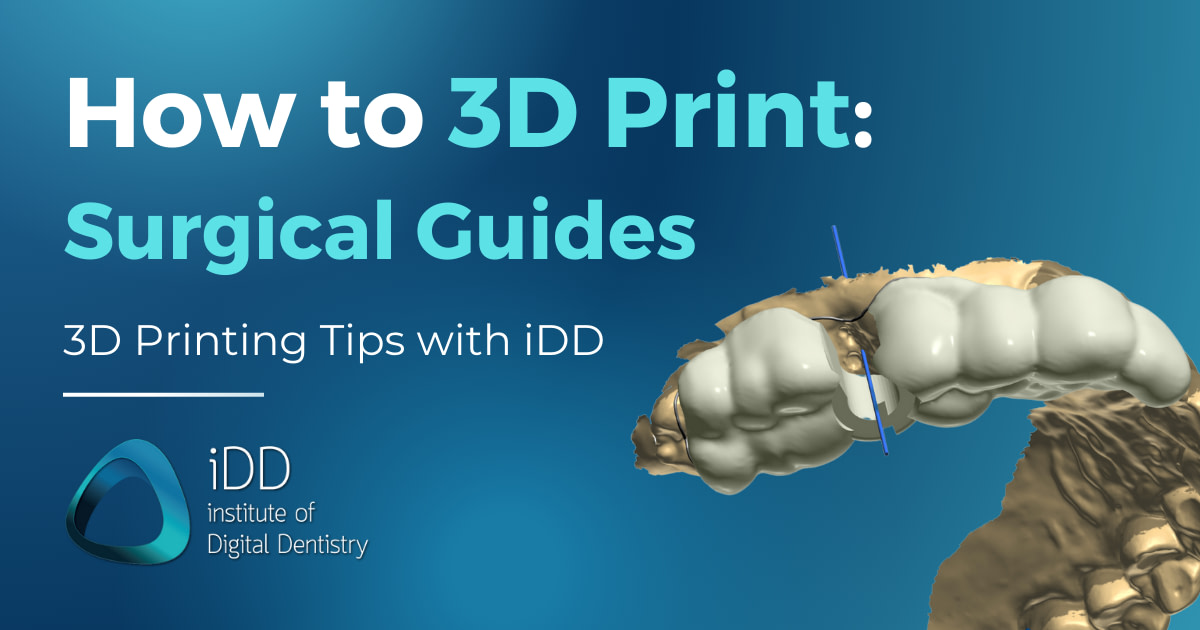
Surgical guides play a pivotal role in implant dentistry, facilitating precise and predictable implant placement.
The rise of 3D printing technology has transformed the fabrication of surgical guides from something that was quite tedious, to something produced in the dental office. In-house surgical guides offer numerous advantages in terms of accuracy, customization, and efficiency.
As custom-made dental appliances that aid in the accurate positioning of dental implants during oral surgery, they provide a guide for drilling pathways, ensuring proper implant angulation, depth, and placement. Assuming everything was designed correctly, fabricated correctly, and used correctly in the mouth.
In this blog, I will detail the process of 3D printing implant surgical guides as done by the dental technicians of the iDD Laboratory placement. This particular case was designed by Hugh Cho in 3Shape Implant Studio and processed by Marjorie Andrade using a Form 3B+ 3D printer by Formlabs, but the workflow is identical across all systems. The surgery was performed by Dr. Ahmad Al-Hassiny.
Step 1: Obtaining Digital Models for Surgical Guide Design
To create a surgical guide, precise digital models of the patient's oral structures are needed, both surface and internal. Intraoral scanning enables the capture of accurate digital models of the patient's dentition and surrounding tissues. Cone beam computed tomography (CBCT), provides comprehensive 3D models of the patient's bone structures. This data will be important for assessing the ideal implant position with regard to the patient’s anatomy.

Patients’ CT scans with intraoral scans should provide enough information for safe and functional implant placement. Software: 3Shape Implant Studio.
Step 2: Designing the Surgical Guide
Specialized software is used to plan the implant surgery ad design the surgical guide based on the digital models obtained.
In this case, we used Implant Studio by 3Shape, but there are many implant planning software available, some of them even for free with a pay-per-export option. 3Shape is just our favorite by far due to its ease of use and slick workflow.
Most software follows a so-called restoratively-driven implant planning workflow. This means, that a digital model of the future crown/restoration is used to help you plan out the ideal implant position. This way, you can prevent placing an implant with a screw channel opening coming through the buccal aspect or cusps.
Using the implant planning software, several factors such as adjacent teeth and bone density can also be addressed and accounted for. Additionally, you will be prompted to mark the inferior alveolar nerve when planning for a mandibular implant, and it makes it easy to account for sinuses as well as maxillary implants.
Within the same software, you get to choose your preferred implant brand, as well as the fixture type, width, and length for the implant company of your choice. This is done by importing the digital library of the brand of implant you want - something that can be obtained from the sales rep/company website. Implant planning software is generally open, meaning that you can download the digital libraries for any implant company.

For a restorative-driven workflow, a digital tooth mock-up is used to help find the most aesthetic and functional implant position. CBCT data help you account for bone density, sinus, or inferior alveolar nerve.
When designing the surgical guide itself - this is actually quite a straightforward task and shouldn’t take more than a couple of minutes.
You get to also design the size of your guide. For a single-unit case, it’s generally recommended to extend the guide over at least an entire quadrant, as you will achieve more stability from fitting the guide to more teeth. You can add cutouts to help you verify proper seating in the patient’s mouth or add the patient’s ID.
The design and digital library of the implant guide also accounts for a metal sleeve if required for your guide, that is purchased from the distributor and later inserted into your guide.
The surgical guide can be either created as a pilot guide - for use with the initial pilot drill only or fully guided - to assist you throughout the entire drill sequence. This depends on the surgical kit of your choice.
Once happy with your design, you can export the STL and the drilling protocol in PDF to refer to later.

The surgical guide design is very straightforward and fully customizable. In the step pictured above, the dental technician (Hugh Cho) is adding windows to help assess proper seating in the patient’s mouth.
Want To Know More About 3D Printing Surgical Guides?

Dr. Ahmad Al-Hassiny will go over everything you need to know when starting off with 3D printing using FormLabs printers as an example. The entire implant-guide production process is discussed in this webinar
Get instant access to this course for FREE now and learn about 3D printing from an experienced dentist's perspective .
Step 3: Preparing the Surgical Guide Design for Printing
Next, we imported the surgical guide design in STL into the printer software. This is where the CAM (computer-aided manufacturing) part of the workflow starts.
3D printing software allows you to position the designed object in space in relation to the build plate of the printer.
In this step, you also can add the supports and a raft if required that will attach the surgical guide to the printer’s build platform and ensure optimal printing results. Try to avoid placing supports in spots where the intaglio fit of the guide could be compromised, e.g. the fitting surface of the guide or space for the channel for drilling.
The surgical guide or any STL that is imported into printing software is then broken down into multiple layers, generally 50, 100, 150, or 200 microns thick, depending on your preference and/or printer abilities. This is why 3D printing software is called splicing software.
Why layers though? Modern SLA, DLP or LCD 3D printers manufacture in horizontal layers, from the build plate up. Each resin layer is cured and built upon.
So this is what slicing software does - it breaks the design down into simple steps your 3D printer understands. The whole process is generally quite simple, fast, and often more or less automated.
Every 3D printer brand comes with its own software, which communicates with the 3D printer using a cloud or your local network/direct connection. In this case, we used PreForm software for our Formlabs 3B+ 3D printer.

Surgical guide prepared for 3D printing in slicing software (PreForm by Formlabs). Every 3D printer comes with its own software.
Step 4: Preparations to 3D Print the Surgical Guide
There are several steps you must take before 3D printing a surgical guide. These include, but are not limited to:
Material Choice
Choosing the right 3D printing materials is crucial for the fabrication of surgical guides. You should always use biocompatible resins specifically designed for dental applications in the mouth. The materials meant for the fabrication of surgical guides are also capable of withstanding sterilization in an autoclave.
Other factors to consider when selecting the appropriate material are transparency for easy visualization or rigidity for stability during surgery,
Note that some closed 3D printers are limited to certain resins validated for use with their system, while open 3D printers allow you to use any compatible resin.
There are pros and cons to both of these systems. Yes, a closed system does not allow you to use some resins, but those resins you’re ‘allowed to use’ have been thoroughly tested and approved by the company, which warrants predictable results and usually ease of use as well.
In this workflow, we used a Formlabs 3D printer, which has a closed system with a wide range of validated resins, including a specific one for surgical guides.

Resins come either in bottles or printer-specific cartridges. In this workflow, we used a Surgical Guide resin by Formlabs.
Setting Up the 3D Printer
Similar to our previous series of 3D Printing workflow blogs, in every case you 3D print, the resin and printer are to be prepared.
Setting up the 3D printer for surgical guide production involves loading the selected resin material, choosing the correct printer settings, and ensuring optimal printing conditions.
Make sure the printer is calibrated (if required) and the build plate and resin tank are clean.
If you’re reusing a resin vat, make sure it contains the correct resin. The resin in the vat should be mixed before use, as it tends to separate when left alone still for a longer period of time. Most resins come in bottles, which need to be shaken or mixed for the same reason.
As we used Form 3B+ 3D printer by Formlabs - their resin comes in cartridges, they get inserted into the back of the printer, and the resin continuously pours into the vat as required.
Your printer may have presets for each resin, ensuring the correct wavelength and curing time for each layer. This is the benefit of validated resin workflows.
With any 3D printer you are using or any resin you are printing with, you need to make sure to follow the manufacturer's guidelines, otherwise the material properties or even printing itself may be compromised.

Projects are sent from software directly to the 3D printer. Make sure you’re using the correct material.
Step 5: 3D Printing the Surgical Guide
Once the setup is complete, the 3D printing process can now be initiated.
On the printer’s display, select the correct project file, aka what you want to print. This is what we prepared in the PreForm software in the previous steps.
Make sure the correct resin settings are selected and the correct cartridge is inserted.
Sporadically monitor the progress of the print to address any potential issues that may arise during the printing process. Most issues relate to inadequately designed supports or debris in the resin vat.
The 3D printing process can take anywhere from ten to twenty-five minutes to three hours, depending on the 3D printer used and the size (height) of the object printed. In this particular case, the surgical guide was printed in one hour and nine minutes.
Since the printing process occurs in horizontal layers, the taller the set-up design, the longer the printing is going to take. In other words, the amount of time spent on 3D printing directly correlates to the height of the tallest point in the project rather than the number of objects printed. This is particularly true for DLP and LCD printers, which cure the entire layer at the same time, as opposed to the point-by-point approach by SLA printers.

A freshly printed surgical guide still attached to the build platform by supports and a raft. The printing process happens upside down, layer by layer, as the platform is submerged into a vat of liquid resin where only certain points are cured by the light source below.
Step 6: Post-Processing
Once the printing is complete, carefully remove the surgical guide from the base using a spatula and remove the supports by hand (for some resins) or with the use of pliers.
Some manufacturers recommend leaving the removal of supports after curing to avoid warping, but it’s generally easier to do it before the resin is fully set and hardened.
Wash the guide in isopropyl alcohol (IPA) to remove the excess liquid resin. Perform two alcohol baths, one for bulk resin removal (‘dirty bath’) and another with a cleaner IPA solution for a final wash (‘clean bath’).
It’s important to make sure that the IPA wasn’t used to clean resins that are not biocompatible, e.g. model resins, for anything to be used in the mouth.

Prints should be washed in two IPA baths minimum. You can use any container that will fit the prints or designated wash stations, e.g. semi-automated Form Wash by Formlabs (pictured above).
Leave on the bench or air dry the guide completely before curing, otherwise, you might compromise the material properties. Drying is a must to prevent porosities.
You can either insert the metal sleeve in place before or after the curing, but I would recommend doing it prior, to counteract any material shrinkage during the final cure. For extra security, you can use a bit of the same liquid resin as a bonding agent and then cure the guide.

Surgical guide before curing.

Surgical guide after curing.
Perform the final cure - you must use the recommended settings provided by the manufacturer to ensure its strength and biocompatibility. The Formlabs surgical guide resin even changes color once it’s cured from translucent yellow to translucent orange.
Remove and polish any support leftovers or sharp parts that may interfere with the guide’s seating in the mouth or simply annoy the patient’s oral mucosa. You can use any burs and silicon polishers, but there’s no need to polish surgical guides to a high gloss.
Now, the surgical guide is ready to be pouched and sterilized, ready for clinical use. Once sterilized in an autoclave, Formlabs resin changes color once again.

Example of a surgical guide for implant surgery with a metal sleeve inserted before polishing. There is no need to polish for high gloss, only smooth any spots that could cause patient discomfort or prevent the guide from proper seating.

Finished surgical guide with metal sleeve inserted before autoclave.

Finished surgical guide with metal sleeve inserted after autoclave.
Want To Know More About 3D Printing Surgical Guides?
Dr. Ahmad Al-Hassiny will go over everything you need to know when starting off with 3D printing using FormLabs printers as an example. The entire implant-guide production process is discussed in this webinar
Get instant access to this course for FREE now and learn about 3D printing from an experienced dentist's perspective .
Conclusion
The use of 3D-printed surgical guides in implant dentistry offers numerous benefits. By incorporating accurate intraoral scans, CBCT scans, precise planning, and customized drilling sequences, surgical guides enhance the accuracy and predictability of implant placement. This leads to improved patient outcomes, reduced surgical time, and enhanced long-term success rates of dental implants and restorations.
In conclusion, 3D printing technology has completely transformed the fabrication of surgical guides in implant dentistry. It is by far the preferred method compared to milled surgical guides.
When compared to milling machines, 3D printers are generally much cheaper to buy, maintain and run -, which makes adopting CAD/CAM technologies easier and more affordable than ever before, especially with so much implant planning software available for free.
By embracing this innovative technology, we can elevate the standard of patient care in implant dentistry, providing patients with optimal treatment outcomes.
Want to learn more about 3D Printing?
Attend our upcoming two-day lecture and hands-on workshop Master Scanning and 3D Printing in Your Clinic in Sydney, Australia this November.
If you can’t make it to our live courses, check out our 3D Printing and Design course bundle available online now with our Premium membership or as a one-off purchase discounted at 50% off.
I want to learn about 3D printing and designing
Check out our courses here – https://instituteofdigitaldentistry.com/bundles/