If the splint is subsequently delivered to the patient, the occlusal contacts could be very uneven. This is due to the even thickness of the sheet of material. The jaw is a hinge. For every 1mm opening in the posterior, there is a 3mm opening in the anterior. Therefore, the patient may occlude on the splint only with their molars.
Hard acrylic can be used to make a thicker, more durable splint.
Cold-cured acrylic can be built up on the model, or heat-cured acrylic can be invested in a flask.
To control the occlusion, the model can be mounted on an articulator and static and dynamic contacts can be checked with articulating paper, followed by grinding the occlusal surface of the splint. This is a time-consuming task, and should the patient lose or break the splint, there is no quick or easy way to replicate the bite splint.
A Digital Dentistry Revolution
The introduction of intraoral scanning and computer-aided design and manufacturing (CAD/CAM) has revolutionized how dental professionals plan and fabricate oral appliances such as bite splints.
3Shape has emerged as one of the leaders in this field. Their scanners are excellent for speed and accuracy, and the Unite software is a powerful tool for streamlining dental workflows, such as fabricating bite splints.
This case study aims to showcase how easy it is to incorporate these technologies into your daily workflow for bite splints. A bite splint can be designed quickly and precisely using a TRIOS intraoral scanner and 3Shape Unite software. It can then be 3D printed or milled in the clinic or lab. Should the patient lose or break the bite splint, it can immediately and identically be remade using the same design. Therefore, there are many benefits to this digital workflow.
This article is not sponsored by 3Shape.
I wanted to demonstrate how we use 3Shape software to plan and fabricate a bite splint.
Patient Background
My patient (a female in her early 20s) presented to me for a consultation with a chief complaint of a broken lower front left tooth. She recently had an examination, clean, and filling with her regular dentist. Her lower right front tooth 41 chipped 3-4 times in a short period, not due to trauma. The previous dentist did a filling but could not explain. She was very concerned as her lower left front tooth 31 was also chipping. She had no prior orthodontic treatment.
On examination, I found:
- Minimal signs of dental caries and periodontal disease
- 47O, 41IL existing composite fillings
- 31I enamel fracture and visible cracks
- Attrition wear on incisal edges of upper and lower anterior teeth
- RHS molar relationship 3mm Class II
- LHS molar relationship class I
- Class II division 2 incisal relationship
- Deep curve of Spee with over-erupted lower incisors
- Retroclined upper incisors
- Deep overbite
- Lower midline shifted 2mm to RHS.

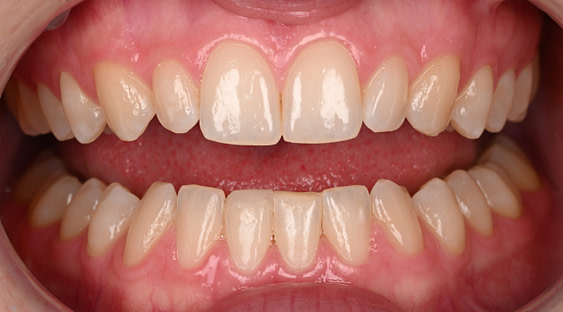
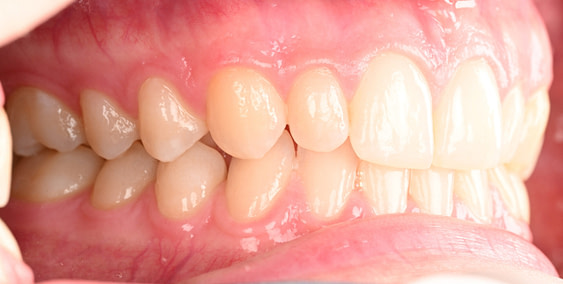
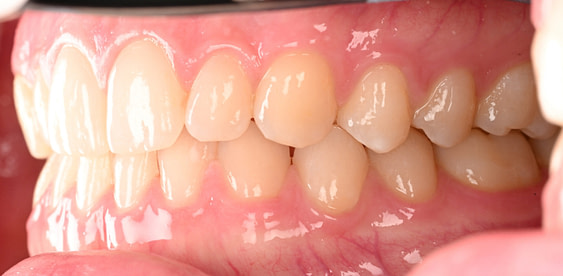
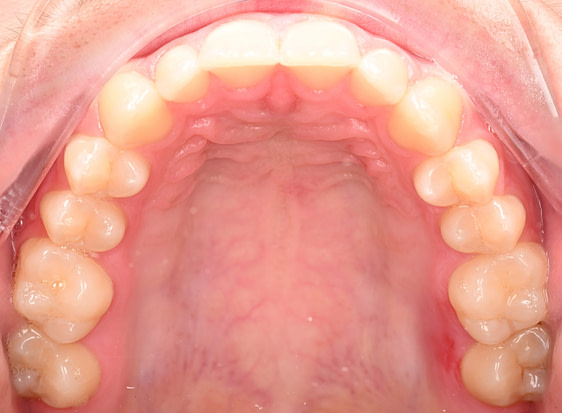


No radiographs were taken as she recently had an examination with x-rays and was given the all-clear, apart from 47O caries, which was restored. I took a full-mouth intraoral photo series. Intraoral scans were taken of the upper, lower, and bite using TRIOS 4 Move wireless intraoral scanner by 3Shape.

Treatment Planning
My diagnosis was class II malocclusion and likely parafunction leading to tooth wear and fractured teeth.
In my treatment planning, I discussed findings to highlight functional problems with her bite:
- Lower midline is shifted
- Upper front teeth are protruded
- Pressure from the lip has retroclined the upper incisors leading to a deep overbite
- Overeruption of the lower incisors has led to a deep curve of Spee
This is causing tooth wear and the presenting cracking and chipping of her lower central incisors. I warned this would worsen over time, with the 41 incisal restoration also likely to fracture again.
I gave options of:
- Do nothing.
- Orthodontic treatment - fixed braces with Class II elastics to restore Class I molar relationship, procline upper incisors, the level curve of Spee, and correct deep overbite.
- Bite splint - this will protect her teeth at night while she is asleep.
My patient elected to do the bite splint. I completed a leaf gauge scan for the bite splint design. This is very quick and easy to do.
In the 3Shape Unite software, I duplicated the previous case in which the intraoral scans were recorded in maximum intercuspation position. I kept the existing upper and lower jaw scans and deleted the previous bite scans. I used a leaf gauge to open the bite in centric relation to allow adequate clearance in the second molar region for the minimum thickness of the bite splint (1.6mm in this case). I then redid the right and left bite scans in this position and processed the scans.

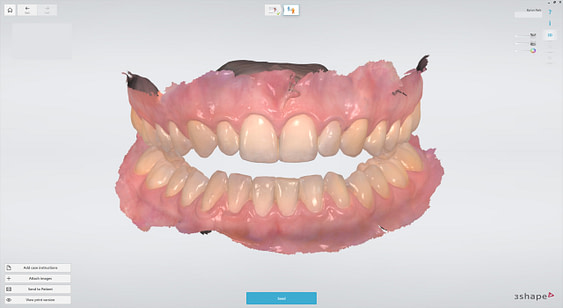
Centric Relation and Leaf Gauge
What is centric relation?
Simply put, when the condyle of the mandible is seated in the most posterior and superior position. This is widely considered the most comfortable and therapeutic position for the lower jaw. It often differs from the patient’s natural bite or maximum intercuspation position. The bite may have occlusal interferences, preventing the condyle from fully seating.
A leaf gauge discludes the teeth and removes the occlusal interferences. It is an autoclavable device made of a stack of strips. The one I used has numbered polyester strips measuring 0.1 mm in thickness. You can choose how many strips you stack together for the desired thickness. At times, you may select only enough to slightly disclude the teeth. In this case, I used it to simulate the thickness of the bite splint.
I ask the patient to bite on the leaf gauge and slide their lower jaw forward and then all the way back. As the only occlusal contact is on the incline of the leaf gauge, this works to seat the condyle of the lower jaw into centric relation. In cases with tension/spasms in muscles of mastication, you may need to deprogram the patient first before you can take an accurate centric relation record.
It is possible to manually open a closed bite in the design software. However, this involves assumptions that the patient’s maximum intercuspation position is similar to a centric relation and that their jaw opens identically to an articulator. I would prefer to design the splint in a real position that I know the patient can physically and comfortably reach rather than a theoretical position from opening the virtual articulator.
Designing the Bite Splint
I utilized 3Shape Splint Studio, a module within the 3Shape Unite Platform, to plan and design the bite splint.
In this case, the bite splint was planned as a maxillary full-coverage flat plane splint with canine ramps. This would provide even occlusion in centric relation position and disclude the teeth during lateral excursions.
Here is how I completed the splint design in 3Shape Splint Studio:
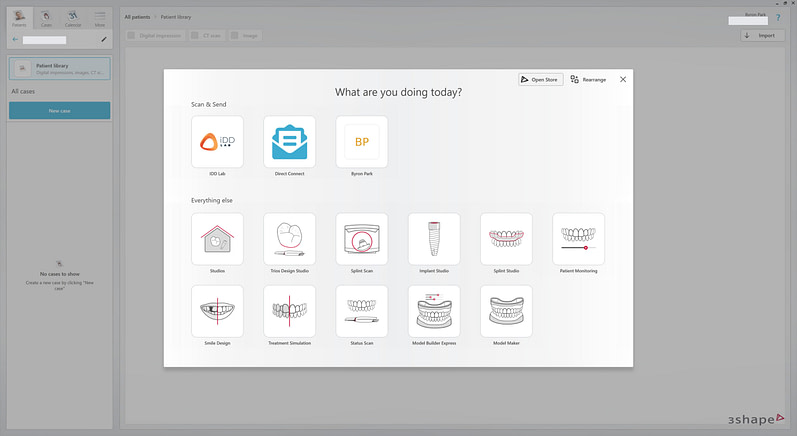
1. Create a New Case in Splint Studio
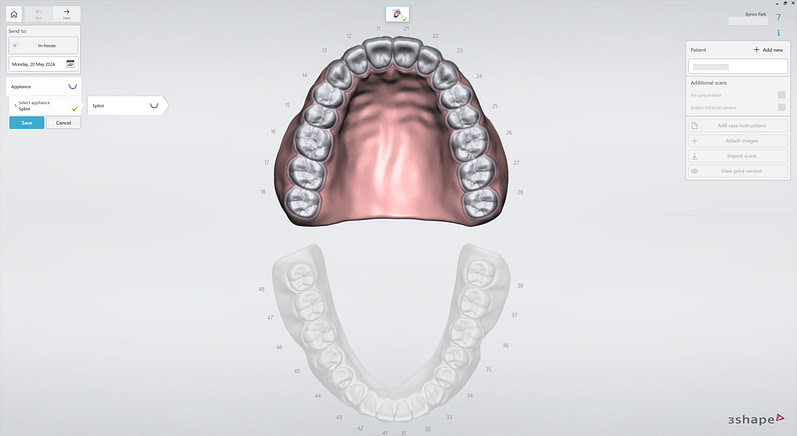
2. Select Appliance Splint. The upper jaw is chosen.
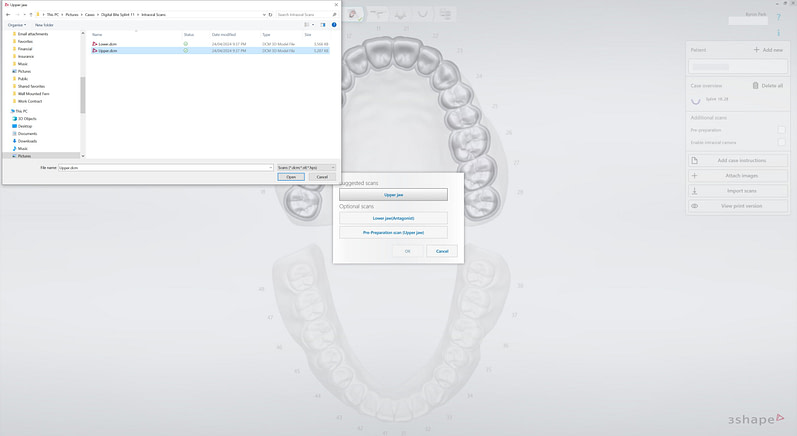
3. TRIOS intraoral scans are imported.
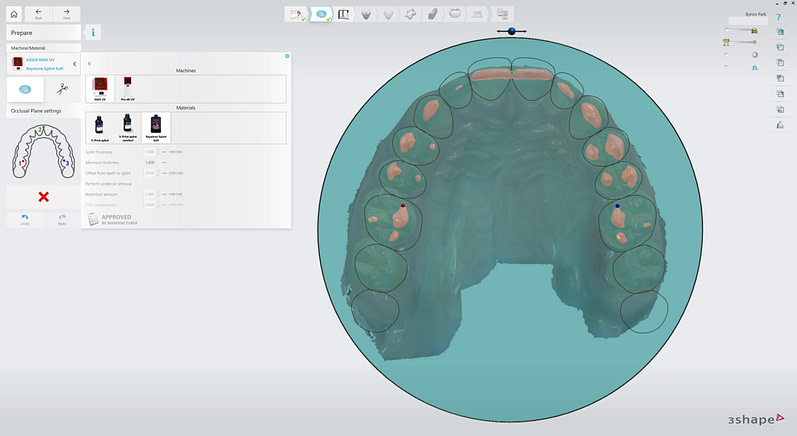
4. Machine and Material are set. ASIGA MAX UV 3D PRINTER and Keystone Splint Soft are chosen. Material settings are locked for validated workflow. Occlusal Plane is set by clicking on molar and incisor points.
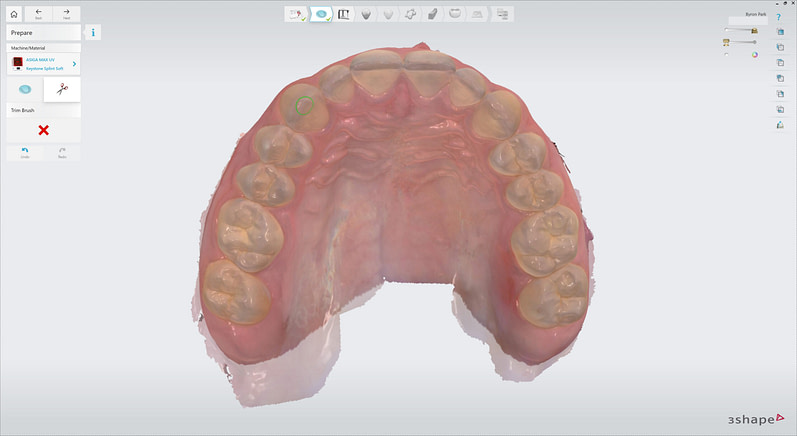
5. Scans are trimmed using Trim Brush to tidy up edges of the scans.
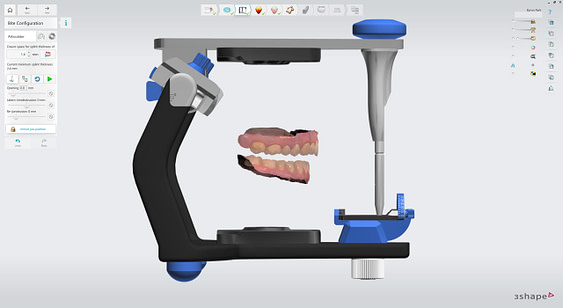
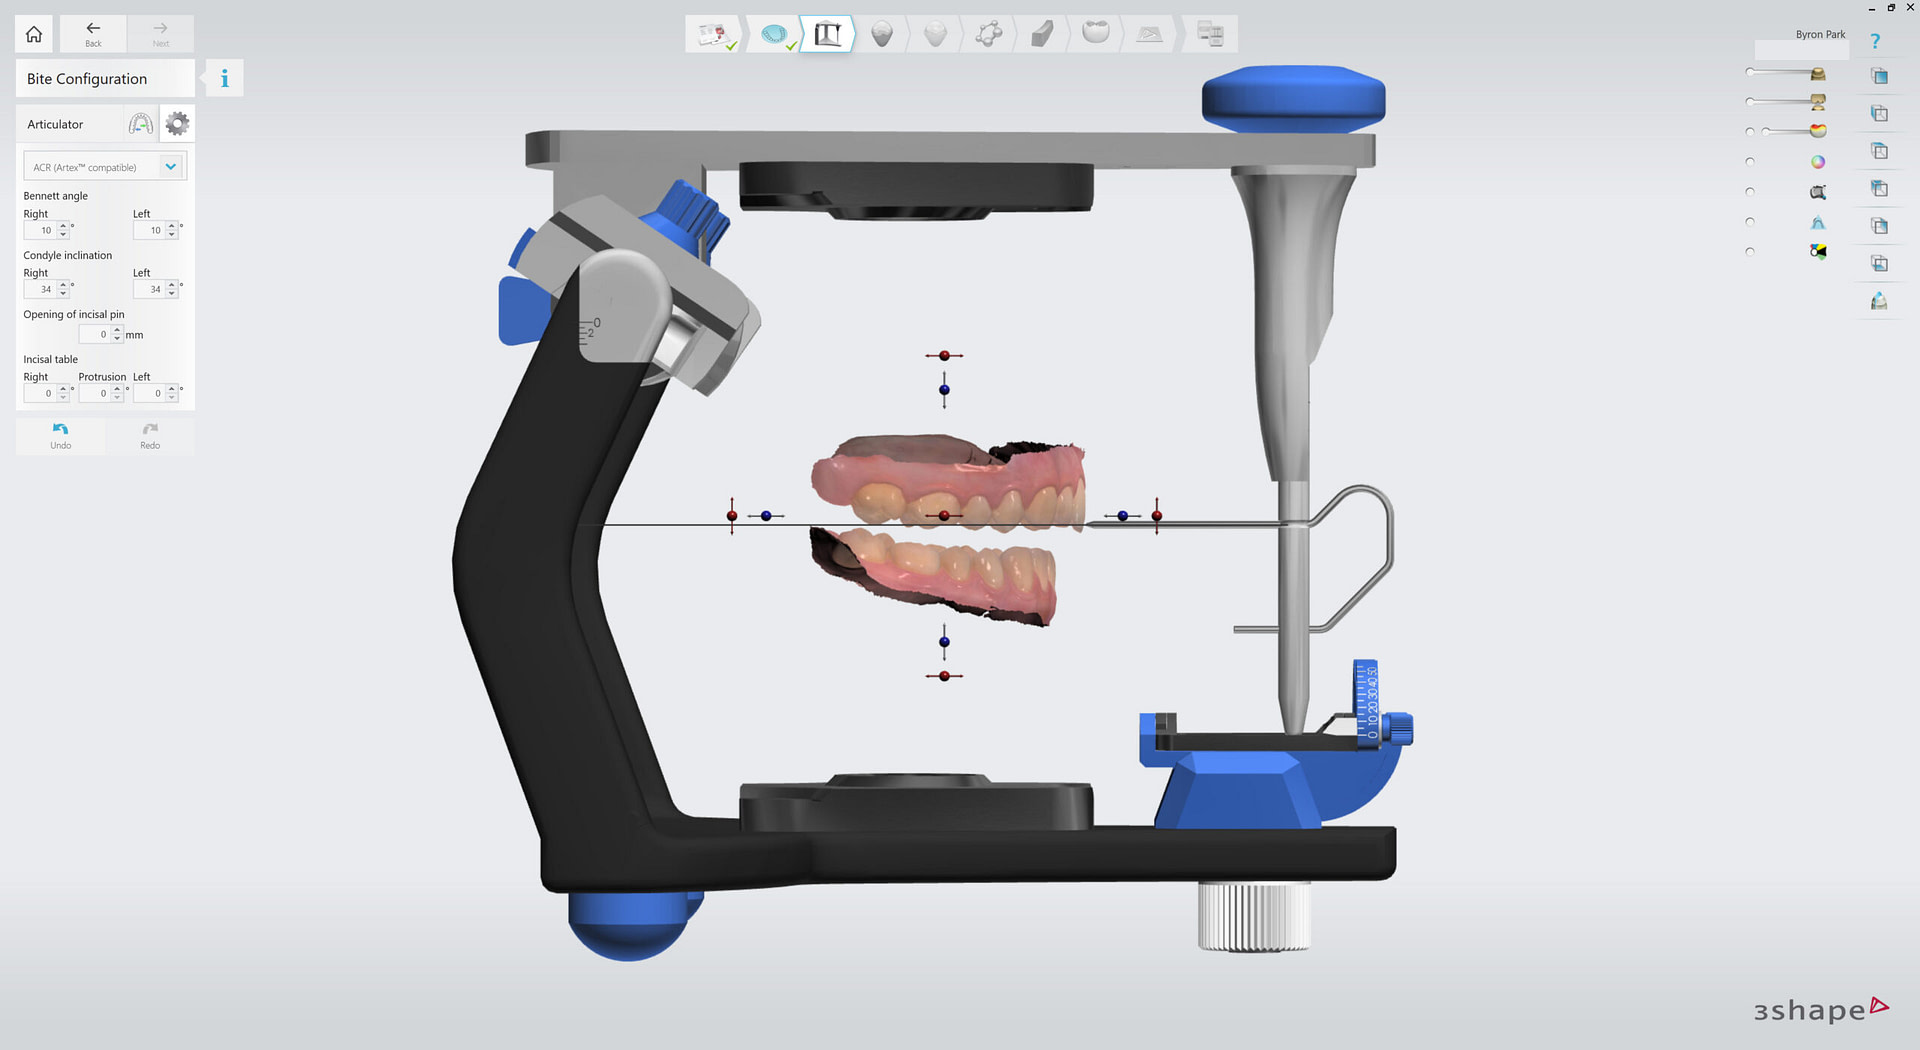
6. Virtual Articulator has fully adjustable settings and simulated movements. It can be manually opened and closed further. Jaw position is locked to proceed.
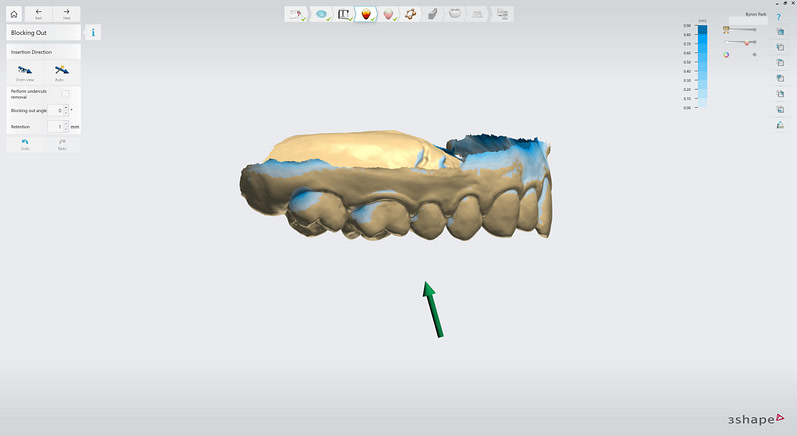
7. Insertion direction can be set automatically or from view direction.
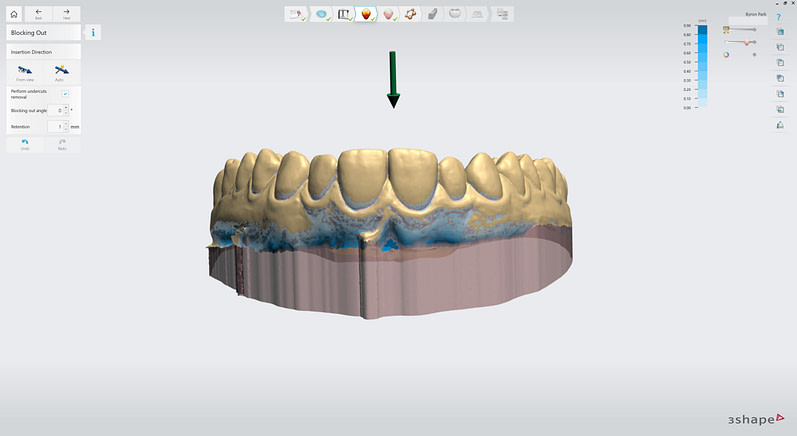
8. Automatic undercut removal can be selected as well as the angle of block out.
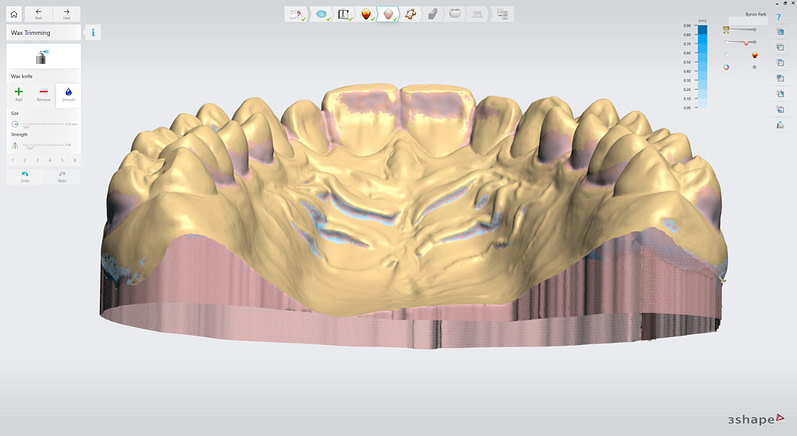
9. Wax Trimming tool can be used to manually add or remove wax to block out areas around the teeth and gingiva. This adjusts retention and increases patient comfort when inserting and removing the bite splint.
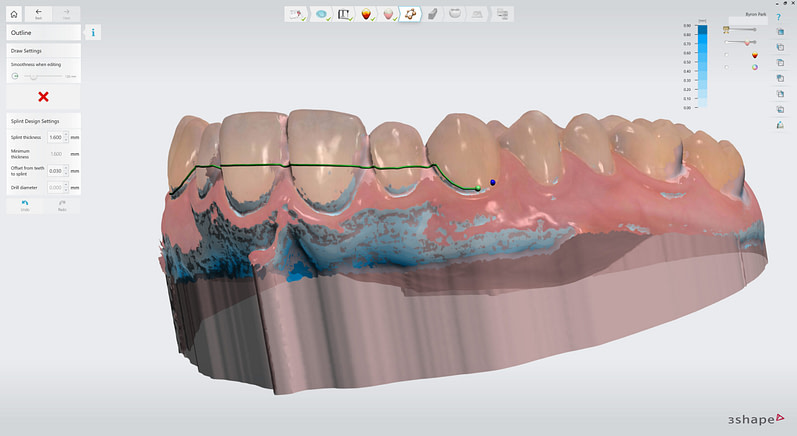
10. Outline of the splint is drawn by adding points.
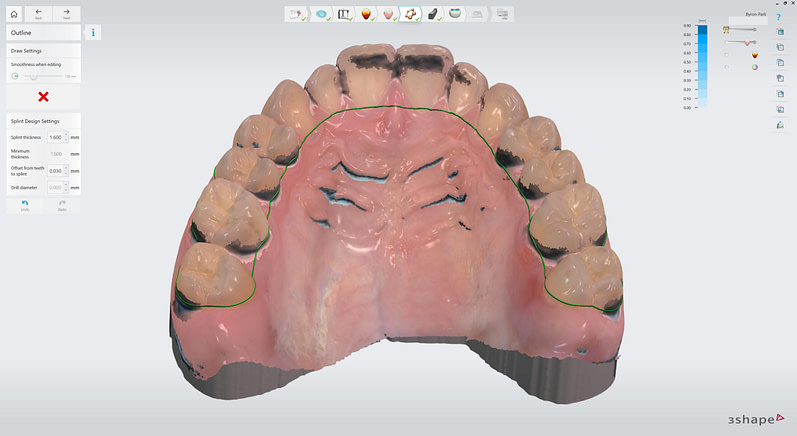
11. The fast edit line can quickly and easily be modified with intuitive tools.
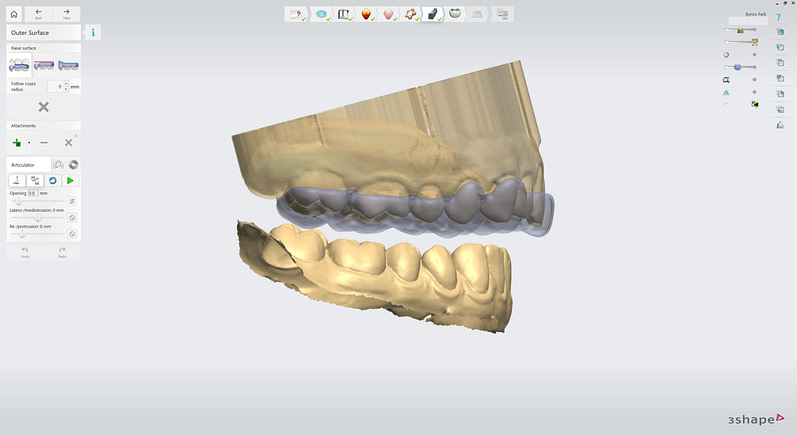
12. A uniform thickness splint is automatically generated according to set minimum thickness.
There are three options to raise the outer surface of the splint.
- Raise to opposing cusp tips.
- Raise to antagonist (flat) plane.
- Raise to create a ramp.
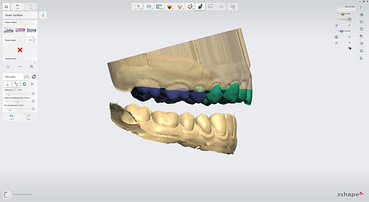
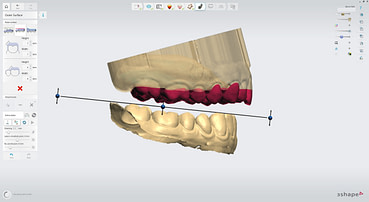
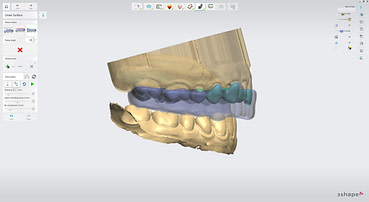
These can be mixed and matched easily and quickly to change the design. This is done by selecting the desired option and clicking and dragging over the teeth. This will colour the teeth according to the option that applies.
This is the design that I used.

Raised to opposing cusp tips in the posterior. Raised ramp in the anterior segment (canine ramps) to facilitate disclusion on lateral excursions.
I didn’t use this design but here is a demonstration of the option to raise the outer surface of the splint to the antagonist plane.

The flat plane can be set at any height and angle. The transition to an area of flat plane can be adjusted as well.
The bite splint that would be generated from this option is a completely flat plane. Again, these three options could be mixed together in any combination desired. This enables the creation of many different types of splints/appliances.
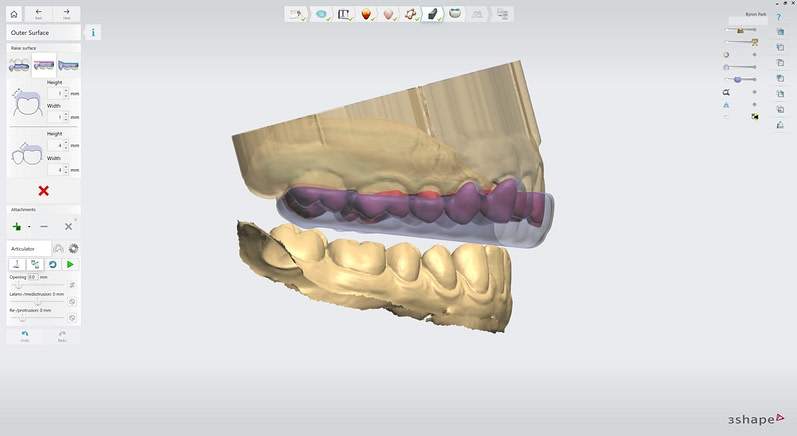
Adapt Design step has Wax Knife tool to add, remove or smooth material. Sculpt tool is an adjustable size pull/push tool. Static occlusion is shown with distance colour map and outlined areas of intersection with the opposing arch. Minimum thickness can be visualised as well.
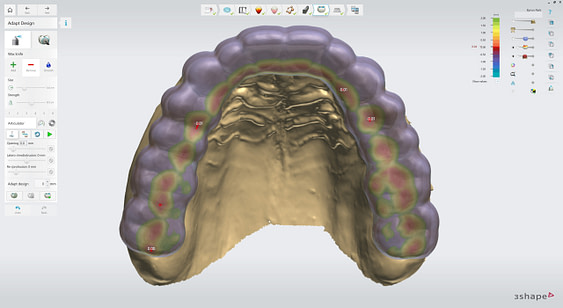
Virtual articulator dynamic movements with options to set guidance by the incisal table or by the design. The dynamic contacts are visualised by splashes of colour. The design can be adapted to the static and dynamic contacts instantly with one click. Area selection mode allows the selection of an area to be protected from this automated adaptation.
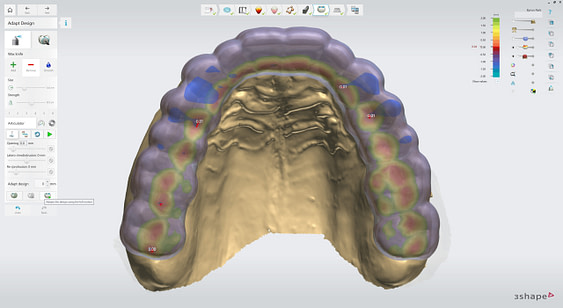
The final occlusal scheme for this case was even occlusal contacts in centric relation position. Ramps in canine region allowing for disclusion of other teeth during lateral excursions. No other occlusal interferences during dynamic movements.
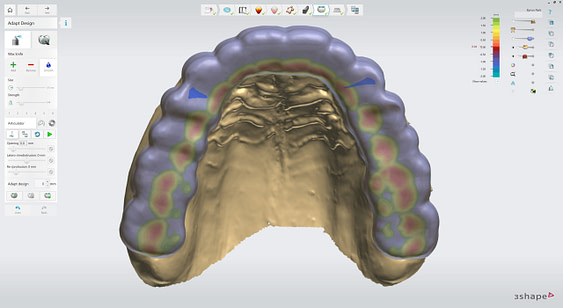
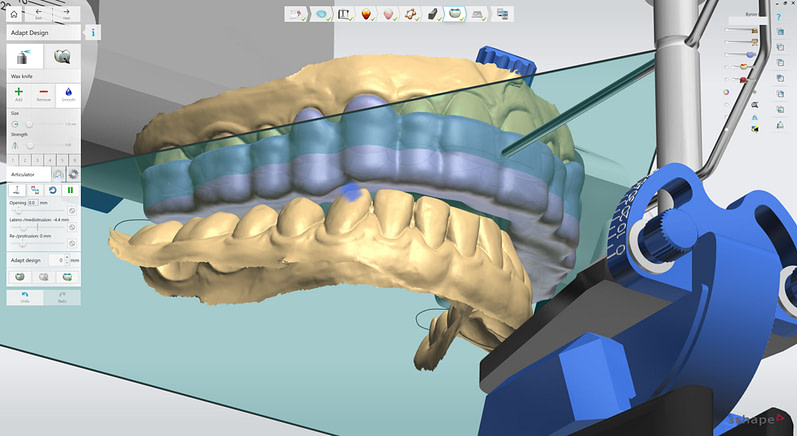
13. Canine ramp can be seen with contact on only the lower canine in right lateral excursion on Virtual Articulator.
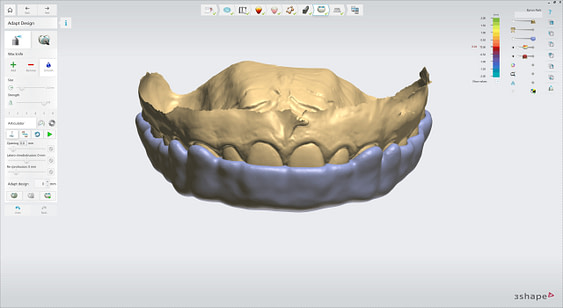
14. Final smoothing done to the outer surface of the splint.
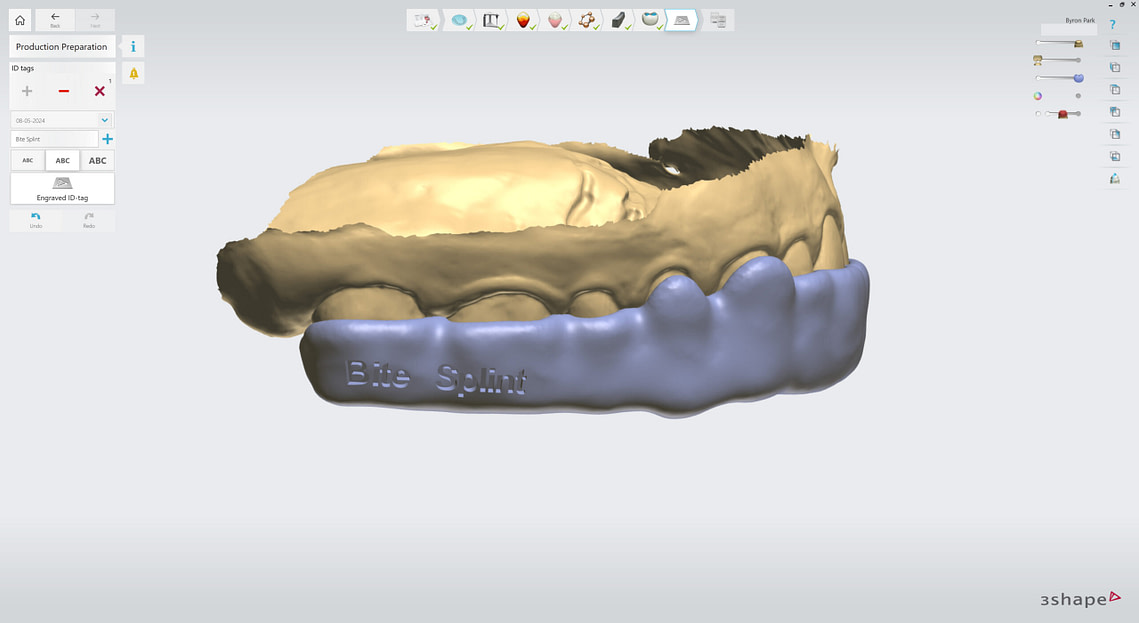
15. Option of adding engraved ID tag to bite splint design. I didn’t wish to do so for this case.
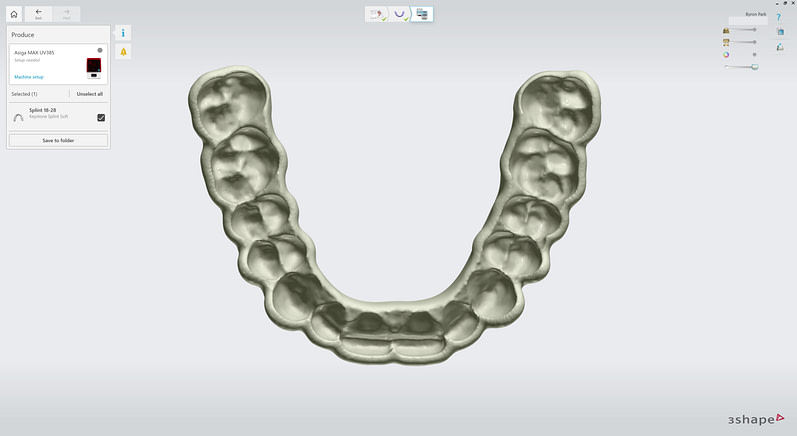
Finished design of bite splint able to be exported to folder as an STL file ready for manufacture.
Manufacturing the Bite Splint
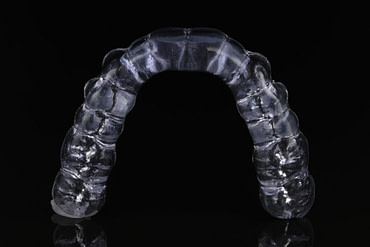
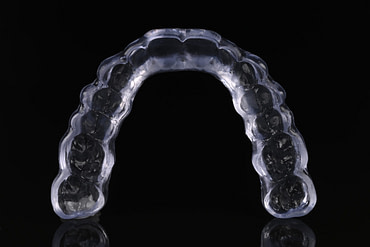
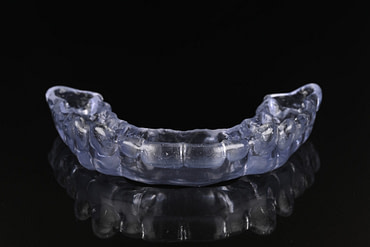
The exported STL was 3D printed by Niamh Ward at iDD Lab. ASIGA UV MAX printer and Keystone Splint Soft resin. The outer surface of the bite splint was finished with the candy coat technique.
Bite Splint Delivery
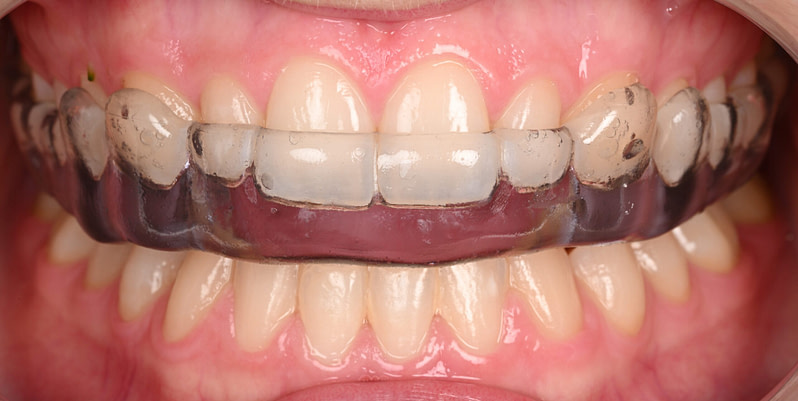
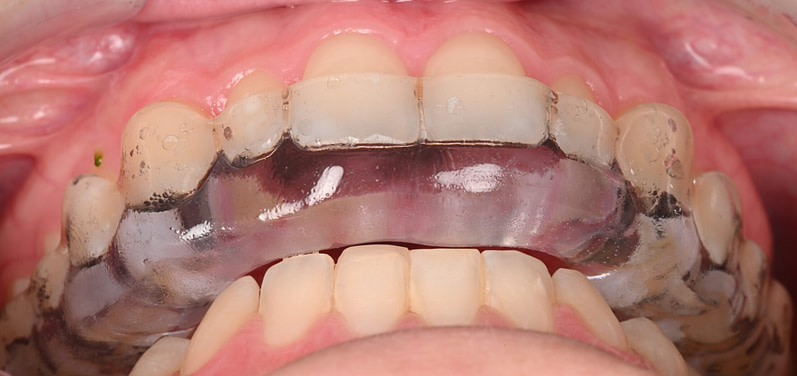
The patient returned for a bite splint delivery appointment. A 3D-printed bite splint was inserted and had excellent fit and retention. Occlusion was checked in static and dynamic movements. Care instructions were given.
Conclusion
This case study highlights the numerous advantages of the digital workflow in fabricating bite splints, particularly when compared to traditional analog methods.
Integrating advanced technologies, such as 3Shape TRIOS scanners and TRIOS Splint Studio, has revolutionized how dental professionals design and deliver bite splints, offering speed, precision, and repeatability.
The digital workflow streamlines the entire treatment process, reducing the time and effort required for each stage. Digital technologies automate and standardize many processes, reducing the potential for human error and ensuring consistent, high-quality results. Moreover, the improved communication and collaboration enabled by digital files promote better coordination, faster decision-making, and a more cohesive treatment approach.
The successful outcome of this case underscores the future implications of digital dentistry in transforming the field of oral appliances. As digital technologies evolve and become more widely adopted, dental professionals will be empowered to deliver increasingly predictable, efficient, and patient-centered care.
As the dental profession continues to embrace the digital revolution, practitioners must stay informed about the latest advancements and best practices in digital dentistry. This case study serves as an invitation for readers to explore the world of digital dentistry and actively seek opportunities to integrate digital technologies into their own practices.

