Medit recently held its 2023 Innovation Day, where they showcased ClinicCAD. We've written a quick blog that breaks down just what ClinicCAD is, you can read it here.
I was grateful to be invited to speak and share my experience with ClinicCAD, so I thought I’d show you my experience in a short blog.
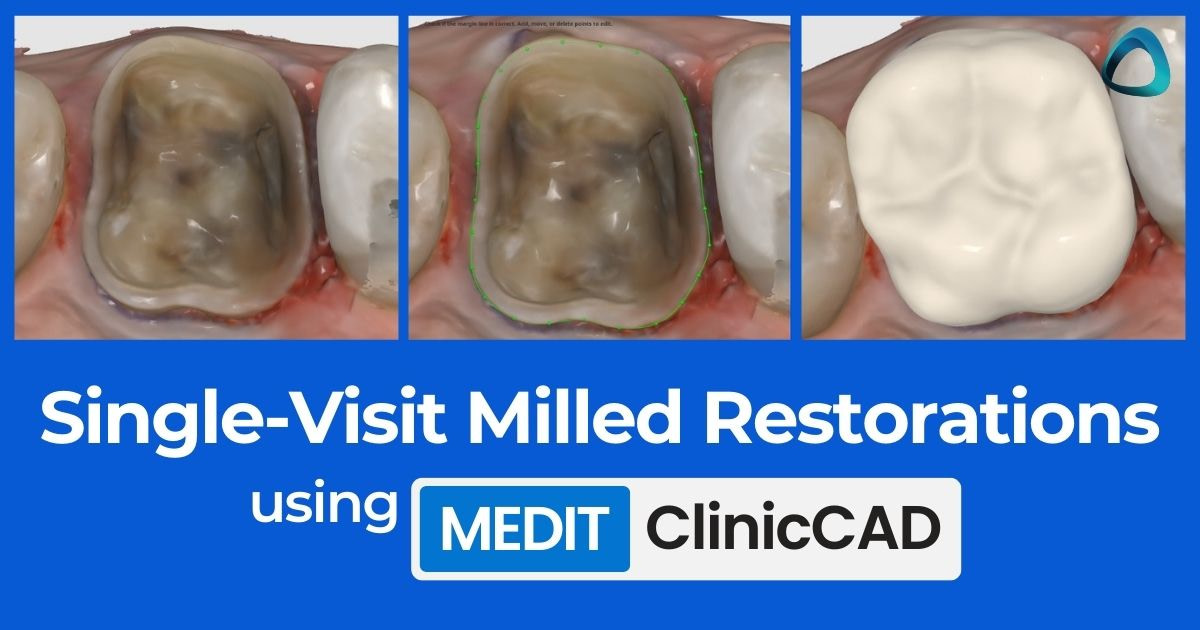
Here's how I was able to use ClinicCAD and Medit apps to complete the below transformation, in a single visit.


First, I prepared the tooth for the restoration. Before picking up your Medit scanner, you should have cleaned the tooth sufficiently and carried out your tooth preparation depending on your tooth preparation type and material of choice.
Then, the key part, retract the gingiva to enable a clear scan, and in this case, I use a retraction cord.

Then, as usual, the vital part of the process, the data collection. Using an intraoral scanner, I captured a digital impression, which I will use to design the restoration.
The better the soft tissues are retracted, the better and faster your scan will be. The beauty of digital impressions is that if you miss some data, you can always rescan.
Intraoral scanners can also ignore any artifacts, like my dental mirror or the patient's cheek and tongue. And this is all thanks to AI in the software, which makes the scanning process even easier. Lastly, we scan the bite, or carry out our occlusion scan. This is straightforward. You get the patient to bite down and scan the buccal aspect of their teeth.
Within five seconds, the Medit software is capable of capturing the bite and correlating this to the upper and lower scans that have just been taken, bringing these scans together. A new feature recently released by the company is optimization of the bite scan to ensure this is even more accurate. So that is our scanning process complete.
Now we have all the data we need to proceed with the CAD design using Medit Clinic CAD. To begin, simply click this icon here to start the software.

Medic Clinic CAD attempts to make designing as simple as possible. It is really as easy as 1, 2, 3.
- Start the app.
- Draw the margin line
- Design the crown using a library of teeth in the software.

And then you are ready to mill or print your restoration.
Let me show you how this works on this case we have just recently scanned.
First, we start the app. The software automatically aligns the arch in the occlusal plane. The Medit software uses AI to recognize and correctly identify each tooth in the arch.
As we can see, If the scan data is good, the software will automatically align the occlusal plane very accurately. Next, we need to draw the margin line on our tooth preparation. The margin line is simple. It delineates the edge of your tooth preparation, so it tells the CAD software where does the restoration end.
Now that we're starting with CAD, this can feel intimidating to a lot of doctors. But hang in there. The Medit software makes it very simple. The Medit software will automatically place the margin line for you. But like most CAD software, it does require some touch ups to get it perfect. And it will also depend on how good your tooth preparation is.
To modify the margin line, it's really simple. Click and drag the small green icons that you see to adjust the margin line. Make sure you zoom in and rotate your scan to view your prep from many different angles. Once you are happy with the margin line, you can proceed with the workflow by clicking next.
Now that the margin line is done, we need to place a digital tooth from our library onto our tooth preparation. Think of it like doing a wax up, but digitally it is so much easier and so much faster. You can rotate this digital tooth, make it bigger or smaller depending on your prep and the patient's anatomy.
It is important to take your time during this step and align the tooth library properly. I am told Medit is working on AI that will make this step automatic without the need for library data. For now, once you are happy with the position of the library tooth, you can click next and the Medit ClinicCAD software will join this design to your margin line.
From here, there are a number of tools for you to refine your design.
You can use add, remove, and smooth tools - which are all pretty common in CAD software across the entire market. You can easily modify and change your design to suit you and what will be best for the patient. This part of CAD is all up to you, the tools are there for you to use as you see fit.
And here it is, our final crown design for this patient, which in real time. took less than 15 minutes to design.

Once you are happy with the final design, the Medit Link software enables you to easily export this design in any file format for importing into your CAM software or 3D printer.
Most commonly, you will be using STL files. And that is the CAD process.
One of the most simple and easy to use CAD software on the market, and the only one that can be used with a Mac operating system - which is a pretty great bonus. And the final part of all of this is manufacturing. And in this case, I sent the design file to my mill using its CAM software, and started milling my crown.
Here you can see the final milled crown, which we made from IPS EMAX CAD ceramic.

This was then post processed, cut off the sprue, stained, glazed, and put it in a furnace. And you can delegate this to the team. We then can resin bond this onto our tooth preparation. And yes, with adequate minimum thickness, this can be used on a second molar.
This is the final result. All carried out in a single visit.

And that's the entire workflow I used. I hope you enjoyed this quick look at ClinicCAD.
Drop a comment down below if you've used it yet, would love to hear your thoughts!