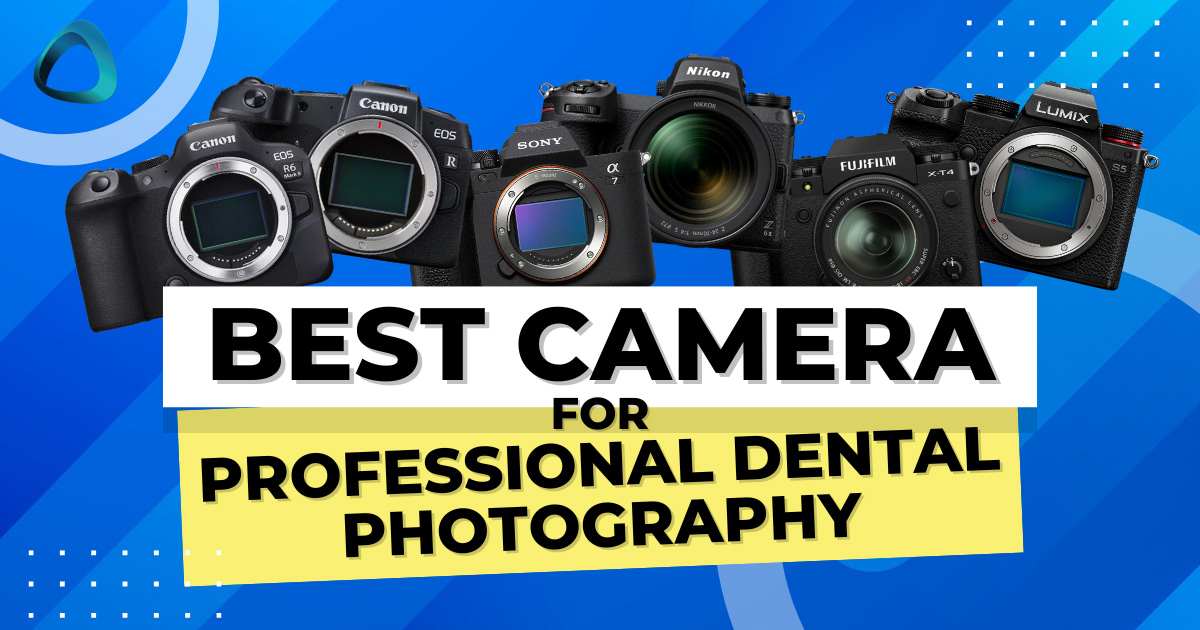
Let's talk about something that can really elevate your practice: top-notch dental photography. Whether you're documenting cases, educating patients, or showcasing your skills, having the right photography setup is key.
In this blog post, we're diving deep into the world of dental photography equipment. We'll explore everything from selecting the perfect camera to assembling a comprehensive kit that includes lenses, flashes, retractors, and mirrors.
Our goal? To help you capture those incredible images that truly represent your exceptional work.
You might be wondering, "With so many options out there, how do I choose the right camera for dental photography?"
Don't worry – we've got you covered. We'll break down the essential features to look for and explain why they matter in a dental setting.
But we're not stopping at cameras. We'll also discuss:
- The importance of dental photography in modern practice
- Key components of a professional dental photography kit
- How to select the right accessories for your needs
To add some real-world perspective, we have also collaborated with one of our associate dentists - Dr. Byron Park, as he is incredibly talented at dental photography. He shares his invaluable insights on transforming good dental photos into great ones.
So, whether you're just starting out or looking to upgrade your current setup, this guide will provide you with the information you need to make informed decisions about your dental photography equipment and techniques.
The importance of Dental Photography
Dental photography has become an indispensable tool in modern dentistry and an essential aspect of the dental practice.
These visuals are vital for clear communication, better diagnosis, and superior patient care. It's no secret that the camera used can greatly influence the quality of the final product.
High-quality, clear images allow dental professionals to better communicate with patients. This enables the development of precise treatment plans and encourages patients to take a more active role in their dental care.
But that's not all—these photos can also serve as promotional material for your work and practice, highlighting your expertise and helping you stand out.
Given the importance of high-quality dental photography in modern dentistry, choosing the best camera for the task is essential.
Let's look at the top cameras dental professionals should consider for capturing exceptional photographs.
What is the Best Camera for Dental Photography?
Dental professionals need high-quality images that speak a thousand words to communicate with patients and plan effective treatments. That's where a good camera setup comes in – think a high quality camera body paired with a high-quality macro lens. True Macro lenses are defined at 1:1 magnification ratio or above. Most clinicians should go for 1:1 in dental photography.
When it comes to choosing a camera or camera brand for dental photography, many novice photographers might feel overwhelmed by the various options available, such as:
- Nikon
- Canon
- Sony
- Olympus
And the list goes on. Then, there’s the choice between a mirrorless or a DSLR camera.
The good news is that selecting and using a dental photography setup is easier and cheaper than one might fear.
In reality, the specific camera brand you choose is not the most critical factor. All the major brands offer cameras capable of delivering excellent results for both extraoral and intraoral photos.
That being said, Canon and Nikon are often recommended for dental photography, primarily because they have a large user base within the dental community. So, if you encounter any issues or need assistance, finding support from colleagues or online resources is more accessible.
Moreover, opting for a Canon or Nikon camera can be beneficial if you're on a tight budget, as there is a broader selection of used camera bodies and lenses available for these brands.
Mirrorless vs. DSLR Cameras
When choosing a camera for dental photography, you might consider two main types: mirrorless cameras and DSLRs. Both have unique features, benefits, and drawbacks, so let's explore each one a bit more to help you make an informed decision.
Mirrorless Cameras
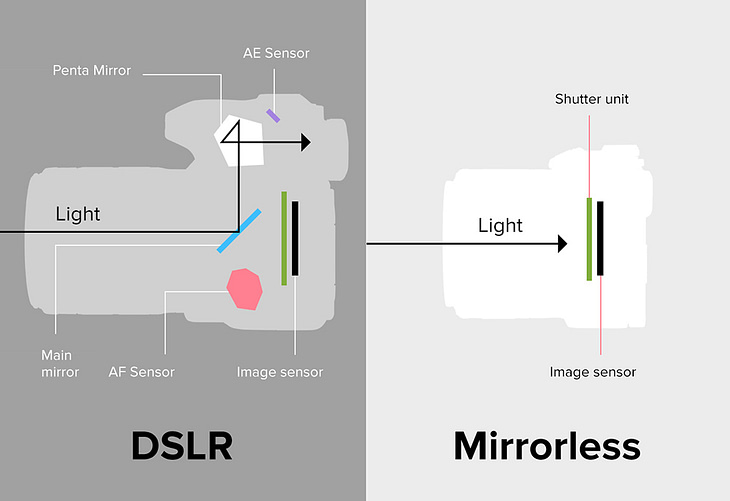
As the name suggests, mirrorless cameras don't have a mirror inside the camera body. Instead, light passes directly through the lens and onto the image sensor, which displays the image on an electronic viewfinder or rear screen.
One of the main advantages of mirrorless cameras is that they tend to be smaller and lighter than DSLRs, making them more portable and easier to handle. They also often have advanced autofocus systems that work very well in photo and video modes.
However, mirrorless cameras do have some downsides. They are typically more expensive.
In dental photography, there is a big market shift towards mirrorless cameras. They are a lot better than their counterpart:
DSLR Cameras
DSLRs, or Digital Single-Lens Reflex cameras, have been popular among photographers for many years. They use a mirror system to reflect light from the lens into an optical viewfinder, allowing you to see exactly what the lens sees.
When you press the shutter button, the mirror flips up, allowing light to hit the image sensor and capture the photo.
One of the main benefits of DSLRs is their extensive selection of lenses, which can be especially important for dental photography when you need a high-quality macro lens.
On the downside, DSLRs are often larger and heavier than mirrorless cameras, which should be considered if you're looking for a more portable setup. They also typically have slower autofocus performance in live view or video modes compared to mirrorless cameras.
So, Which Camera Should You Choose - Mirrorless or DSLR?
It ultimately depends on your specific needs and preferences.
If portability and advanced autofocus are your top priorities, a mirrorless camera might be the way to go.
On the other hand, a DSLR could be a better fit if you prioritize cost (especially if buying second-hand).
Remember that both types of cameras can deliver excellent dental photography results when paired with the right lenses and techniques.
The Best Mirrorless Cameras for Dental Photography
Let's look at some of the best mirrorless cameras that offer the perfect combination of image quality, performance, and features for capturing stunning dental images.
Canon EOS R6 Mark II
The Canon EOS R6 mirrorless camera has gained popularity among dental photographers.
Its 35mm full-frame 24.2 MP CMOS sensor and advanced autofocus system produce sharp images. This is particularly useful in clinical environments where capturing precise details is essential.
The EOS R6 stands out with its exceptional performance in low-light conditions. This is particularly beneficial in dental photography even with the use of a flash.
This is a top camera and is the one Dr Ahmad Al-Hassiny from iDD uses.
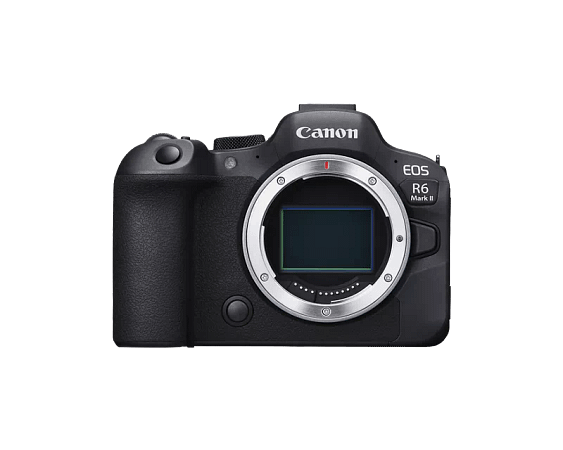
Price: $2499 USD
Canon EOS RP
Another Canon camera (body) to consider is the Canon EOS RP.
Its body is the lightest of any full-frame EOS (electrical optical system), making it perfect for clinicians looking for a portable, easy-to-use mirrorless camera.
Its full-frame 26.2 MP CMOS sensor provides excellent image quality. At the same time, the Dual Pixel CMOS AF system offers fast and accurate autofocus performance.
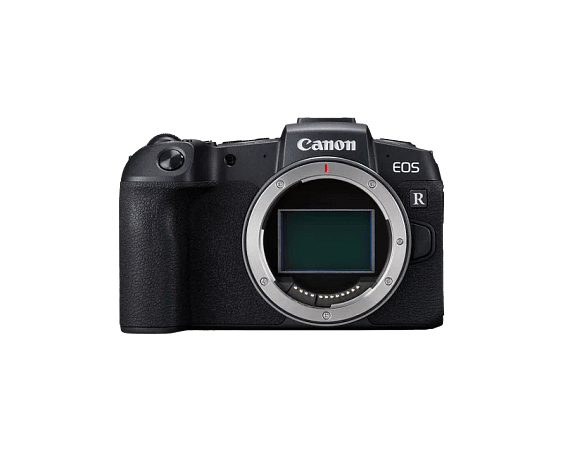
Price: $999.99 USD
Although it may have some limitations compared to higher-end models, such as a slower continuous shooting speed and shorter battery life, the Canon EOS RP's combination of full-frame image quality, good autofocus performance, and portability make it an attractive choice for dental professionals looking for a more compact and affordable camera system.
A tip from Dr Byron Park - this is a 5 year-old camera body, hence why it’s so affordable. Another option to consider is the Canon R8, which was released last year and is their modern entry-level mirrorless camera however, it is more expensive.
Sony Alpha a7 IV
The Sony Alpha a7 IV has also made a name for itself in dental photography.
Its 33 MP full-frame CMOS sensor captures detailed images with great accuracy. This camera's advanced autofocus feature sets it apart. This results in sharp, well-defined images that accurately reflect the level of care provided to patients.
The Alpha a7 IV's compact design and intuitive layout make it easy to use, even in cramped spaces, making it an excellent fit for dental offices with limited space.
This camera is particularly useful if you also want to use your dental photography camera to make videos in the clinic (think social media).
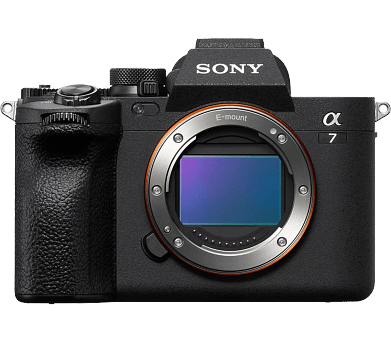
Price: $2499.99 USD
Nikon Z6 III
Recently released as of June 17, 2024, the Nikon Z6 III is an upgraded version of its predecessor, the Nikon Z6 II, which already was a solid choice for photographers.
The Nikon Z6 III features several key upgrades over the Z6 II, including a higher-resolution 24.5 MP sensor, improved autofocus with enhanced subject detection, and a faster EXPEED 7 processor. Thanks to its advanced image processing and ISO range, the Z6 II performs well in challenging lighting conditions.
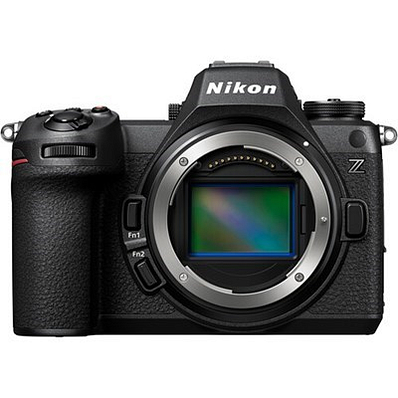
Price: $2499.95 USD
One key benefit of the Nikon Z6 III is its compatibility with Nikon's extensive range of lenses. The Z6 III’s connectivity utilizes the new Nikon Imaging Cloud, a complimentary cloud service that expands the capabilities and connectivity of the Z6 III.
Overall, you cannot really go wrong with a top of the line Nikon or Canon camera.
Fujifilm X-T4
The Fujifilm X-T4 is another solid choice for dental photography.
A 26 MP 4th generation CMOS sensor delivers crisp images with excellent color reproduction. This is particularly important in dental photography, where capturing fine details and accurate colors is crucial for documentation and treatment planning.
This is a camera you don't see in the dental offices as often but is also a high performing unit.
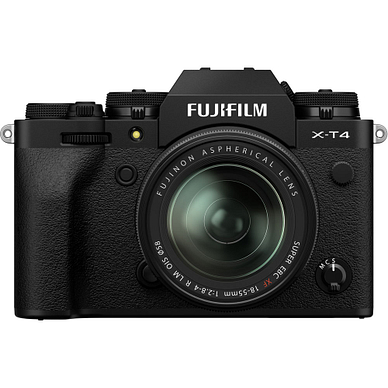
Price: $1499-1599 USD
Panasonic Lumix S5
The Panasonic Lumix S5 is a strong contender among dental photography cameras.
It boasts impressive image quality with a 24.2MP 35mm full-frame CMOS sensor. The camera also performs well in bright ambient lighting, producing excellent highlights. Skin tones appear natural and lifelike, with smooth color transitions.
Overall, the Panasonic Lumix S5 is another decent choice for dental photography.
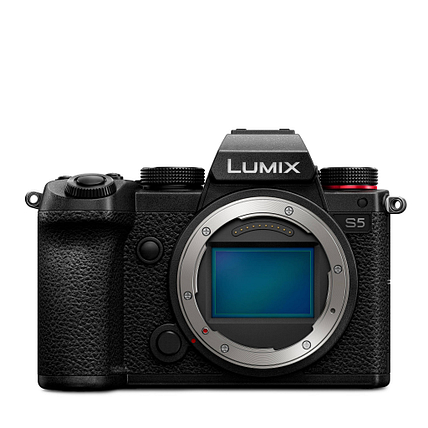
Price: $1799.99 USD
Best DSLR Cameras for Dental Photography
When choosing the best DSLR cameras for dental photography, several factors must be considered, including image quality, ease of use, and compatibility with macro lenses and flash systems.
Additionally, features like a tilting or articulating LCD screen can make it easier to compose shots at awkward angles when the patient is in. the dental chair.
Here are some of the top DSLR cameras for dental photography and the features that make them stand out.
Canon EOS 90D
The Canon EOS 90D is a favorite among dental professionals for its exceptional image quality and versatility.
This DSLR camera boasts a 32.5 MP APS-C sensor, delivering high-resolution images even in low-light settings, perfect for detailed dental photography. The camera's fast autofocus system ensures sharp photos, even in close-up shots.
Its ergonomic design and intuitive controls make it user-friendly, even for those new to DSLR photography.
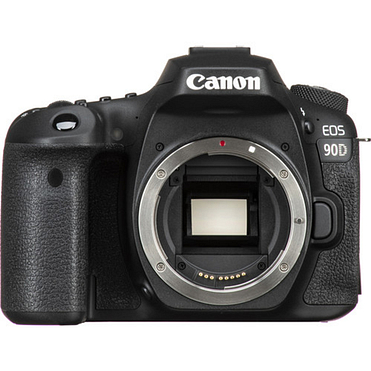
Price: $1199 USD
Nikon D850
The Nikon D850 is another top contender. It’s known for its impressive 45.7 MP full-frame back-side illuminated (BSI) image sensor, which captures incredible detail.
This camera is ideal for macro photography, which is crucial in dental imaging. The D850's focus stacking feature is beneficial for achieving maximum depth of field in macro shots.
The camera is also compatible with Nikon's wide range of F-mount lenses, including macro lenses.
Although the D850 has built-in Wi-Fi connectivity and Bluetooth, it can seamlessly transfer images from the camera to the smartphone app only and not a PC or Mac.
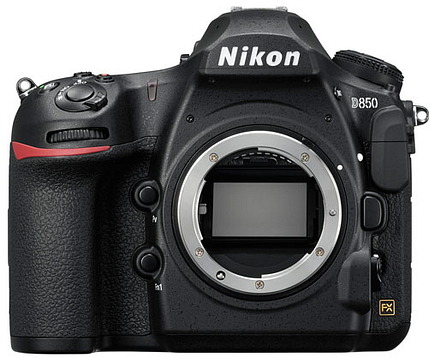
Price: $2999.95 USD
Shofu EyeSpecial C-IV: A Digital Camera Made Exclusively for Dentistry
The Shofu EyeSpecial C-IV is a digital camera explicitly designed and made exclusively for dental photography.
It works very well for those looking for something more simple and point-and-shoot. But you will be paying a premium price for a dare I say, average quality camera.
This camera has a 12 MP sensor which is not huge and a fixed focal length lens optimized for capturing detailed intraoral images. It offers eight preset shooting modes tailored for dental photography applications, such as close-ups, mirror shots, and whitening.
The EyeSpecial C-IV's compact and lightweight design, simplicity, and ease of use make it an attractive option for those who really dont want to learn how to operate a DSLR but want to step up from taking iphone pictures.
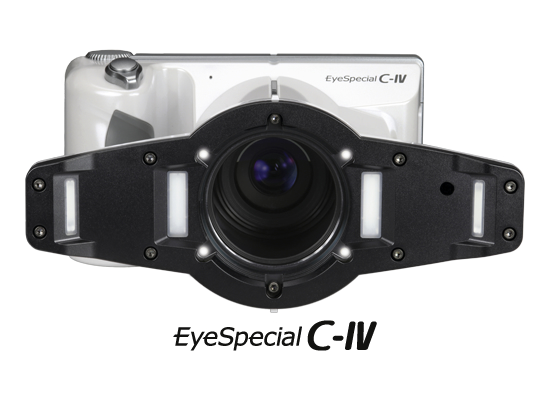
Price: $2819 USD
Essential Dental Photography Equipment
In addition to a great camera body, you will also need other photography equipment to get the best results.
Here are some of the critical pieces of gear you need!
Macro Lenses
Fro dental photography a good macro lens makes all the difference. Think of a macro lens kind of like a microscope for your camera. A macro lens is designed to capture small subjects at close distances. There are two important distinctions between a macro lens and a regular lens. A macro lens increases the magnification of the subject to make it look bigger. They also typically project a 1:1 ratio, meaning the subject appears the exact same size as it is in real life.
Look for a high-caliber macro lens with a 1:1 ratio to produce sharp, detailed close-ups of teeth and oral structures. This lens type allows you to capture images at the right proportions as real life. Below is an example of a typical macro lens used in many dental clinics.
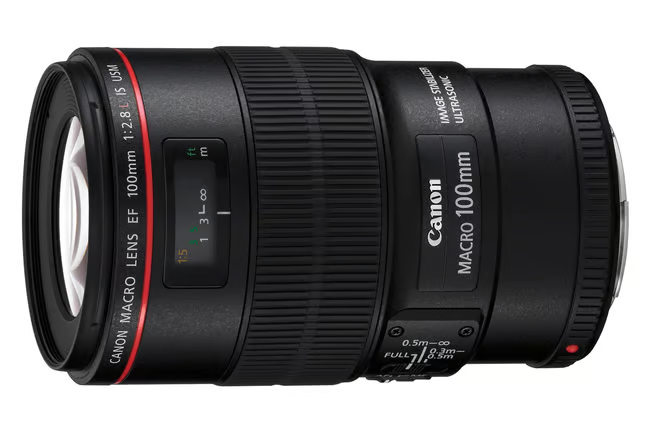
Top picks for macro lenses which boast impressive sharpness, color accuracy, and bokeh, include the:
- Canon EF 100mm f/2.8L Macro IS USM (for DSLRs unless you buy a lens adapter)
- Canon RF 100mm f/2.8 L Macro IS USM Lens (for mirrorless cameras)
- Nikon AF-S VR Micro-Nikkor 105mm f/2.8G IF-ED
- Sony FE 90mm f/2.8 Macro G OSS
Also note that lenses have a specific lens mount that is generally only compatible with cameras with that lens mount. Meaning you cannot easily interchange camera lenses and bodies. There is some cross-compatibility with adapters, but you should double-check before purchasing a specific camera.
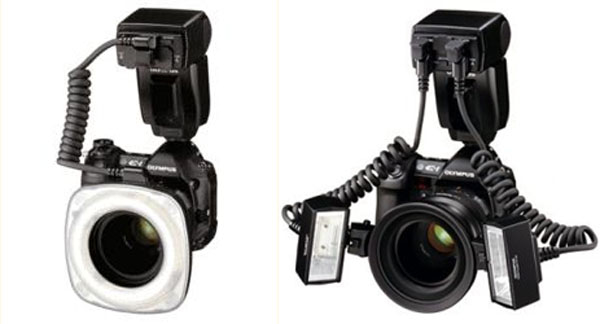
Ring Flashes and Twin Flashes
Proper lighting is also critical for dental photography. The mouth is a dark place, you must use flashes to take a proper dental photography and we do not mean the in-built ones. So, investing in high-quality flashes is equally important to achieve this goal.
Ring flashes like the Canon MR-14EX II Macro Ring Lite are ideal ease of use. These flashes provide even, shadowless illumination. Ring flashes are great as they are simple, just point and shoot.
The MR-14EX is a perfect ring flash for Canon camera bodies, however, it is for Canon only as the hot shoe mount for flash differs for each brand.
Alternatively, twin flashes like the Nikon R1C1 Wireless Close-Up Speedlight System offer more flexibility with lighting direction but they can be annoy to use in day to day operation - because you need to make sure the flashes are pointing in the direct direction each time.
These systems allow for off-camera lighting, giving photographers greater control over the direction and intensity of the light. The R1C1 is fantastic for Nikon cameras, but again only Nikon. We have this flash. It is a little underpowered when using flash diffusers to soften the light. Twin flashes are great for more experienced users.
Memory Cards
With a reliable memory card, you can focus on capturing the perfect shot without worrying about storage.
SanDisk Extreme PRO SD cards are well known for their fast read/write speeds, durability, and large capacities.
Tip - Always format your memory card when using it for a new camera, and back up your images regularly to prevent data loss.
Retractors and Mirrors
In pursuing stunning dental images, an often overlooked aspect is properly utilizing retractors and mirrors.
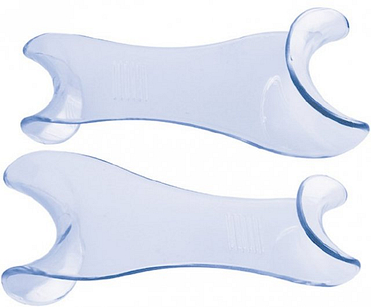
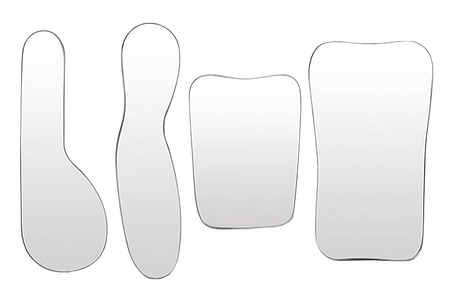
High-quality retractors and mirrors are critical in dental photography. You need to move the cheeks out of the way and to take any form of occlusal photo you need to use mirrors.
Thankfully this is usually the cheapest part - retractors dont need to be fancy. I like the retractors shaped below and you can get them off amazon very. cheaply.
Mirrors are more interesting - either polished metal or glass mirrors. I prefer the glass mirrors. Yes they can break if you are careless, but the images look much better from them. Get a number of occlusal mirrors and also buccal mirrors stocked in the clinic.
Mastering Dental Photography Techniques
Great camera equipment is a crucial foundation for capturing impressive dental photography.
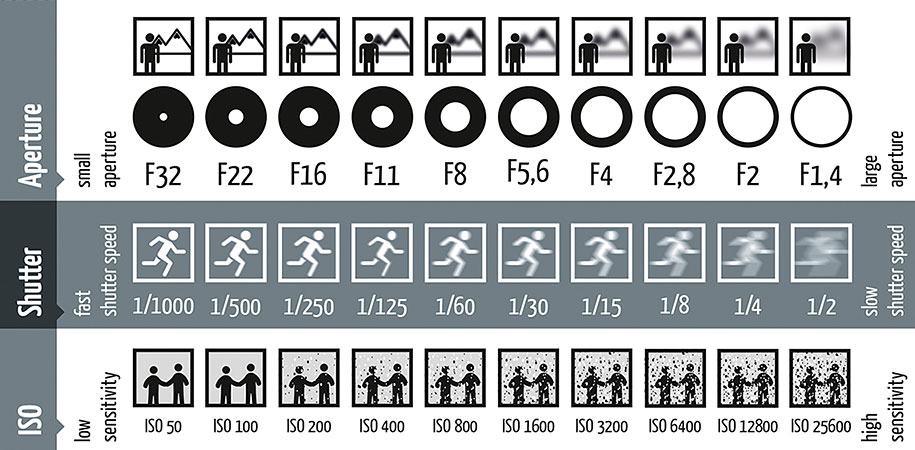
However, success in dental photography requires an understanding of DSLR settings. These being Aperature, ISO and Shutter Speed.
Camera Settings
In mastering dental photography you need to harmonize three key settings:
Aperture
The F-stop number controls the size of the aperture; the higher the number, the smaller the aperture, and the deeper the field of focus.
As a general rule of thumb,
- Around f/8 for full-face and portrait images
- f/22 for most extraoral and intraoral images
- f/25 or higher for close-up and quadrant images

Shutter Speed
The shutter speed determines how long the camera's sensor is exposed to light. While a longer exposure time can lead to a brighter image, it also increases the risk of motion blur if the camera is not steady.
Shutter speed is somewhat irrelevant for flash photography as it is an instantaneous burst of light. We recommend setting your shutter speed as the sync speed for the flash - typically 1/200 or 1/250.
ISO
The ISO determines the sensor's sensitivity to light; the higher the sensitivity, the grainier the image. Or what is called 'noise'.
Setting an ISO of 100-400 for low-noise images is recommended, and iso 160 or thereabouts is often considered an ideal ISO for intraoral images.
Standard Views and Positioning
Consistency is key in dental photography. Learn the standard views such as frontal, buccal, occlusal, and lingual, and practice positioning the camera and patient for optimal results.
Remember to use a standardized approach to ensure your images are comparable across different time points and cases. This will greatly improve communication with patients and labs, improving treatment outcomes.
Lighting and Exposure
You need to nail the lighting and exposure for dental images that truly shine.
So, don't be afraid to experiment with different flash setups – like ring flashes and twin flashes – to find what works for you. Then, dive into manual mode and adjust your aperture, shutter speed, and ISO as needed.
The key is to find the perfect balance!
Focusing and Depth of Field
Sharp focus is essential for capturing intricate dental details.
Manual focus is good when you have help from your DA to hold the retractor and mirror. We often use autofocus to be able to take photos operating the camera with one hand only. Aim at the point of focus, lock the autofocus on this point, then pivot to reframe the shot and take it.
Post-Processing and Image Management for Dental Photography
Capturing the picture is only the starting point of dental photography.
The next step is where the true potential of your dental photos unfolds – with expert post-processing and image management.
Editing Software and Techniques
To tidy up your dental images that may have not come out perfectly (too dark etc), you can use editing powerhouses like Adobe Lightroom and Photoshop, post-picture to adjust exposure, white balance, contrast, and sharpness.
If you want to do a lot of processing you may consider shooting in RAW which you would have to process every single photo.
We usually just shoot in a high quality JPEG setting and try to get the exposure right at the time. Windows photo editor is great for a quick rotate, flip or crop.
Organizing and Storing Images
Proper organization is key to managing a growing library of dental images. Develop a consistent naming and filing system that includes patient info, date, and procedure details.
Use a reliable storage solution like a RAID system or cloud backup to protect your images from data loss. With a well-organized library, you can quickly find and share the images you need.
Sharing and Presenting Images to Patients and Labs
Dental photos can be a powerful tool in patient education and collaboration with labs. When you take the time to show patients what's going on, they're more likely to understand and accept treatment, leading to higher case acceptance rates and satisfaction.
Reference photos are also key for shade-taking when outsourcing your work to a dental lab. This makes a dental technician’s life that much easier when they have photos to reference when choosing different blocks to shade-match your patient’s adjacent teeth.
Continuous Learning and Skill Development
Stay connected with online resources to stay ahead of the curve.
iDD offers a free Dental Photography Basics online course, which covers the basics of dental photography, such as the ideal camera settings for extra-oral and intra-oral photography.
Looking For Dental Photography Training?
Enroll for free now by clicking the button below.
By continuously honing your photography skills, you'll refine your technique, showcase your work, improve patient communication, and ultimately drive better clinical outcomes.
What sets great dental photographers apart is not just the camera they use but their commitment to honing their craft.
By combining the right equipment with a passion for learning and improvement, you'll start taking dental photos that truly wow - and as a result, your practice will flourish.
Conclusion
Investing in the best camera for dental photography is a decision that can significantly impact the success of your practice.
Your camera is more than just a piece of equipment – it's a key to improving patient education and case acceptance. Camera bodies are all about finding that perfect balance between size, functionality, and image quality.
By selecting a camera tailored to your unique needs, with features such as a high-quality sensor, fast autofocus, and compatibility with macro lenses and flash systems, you'll be well-equipped to capture stunning, high-quality images that accurately represent your expertise, showcase your work, improve patient communication, and enable more effective treatment.
As technology continues to evolve, it is important to stay up-to-date with the latest trends and advancements in dental photography. By continuously learning and developing your skills, you'll be able to adapt to the changing landscape and provide your patients with the highest level of care.
Key Takeaway
Invest in a reliable camera body, macro lens, and lighting equipment, and master the art of dental photography techniques, including standard views, lighting, focusing, and composition, to capture high-quality images that showcase your cosmetic dentistry work and improve patient communication.

