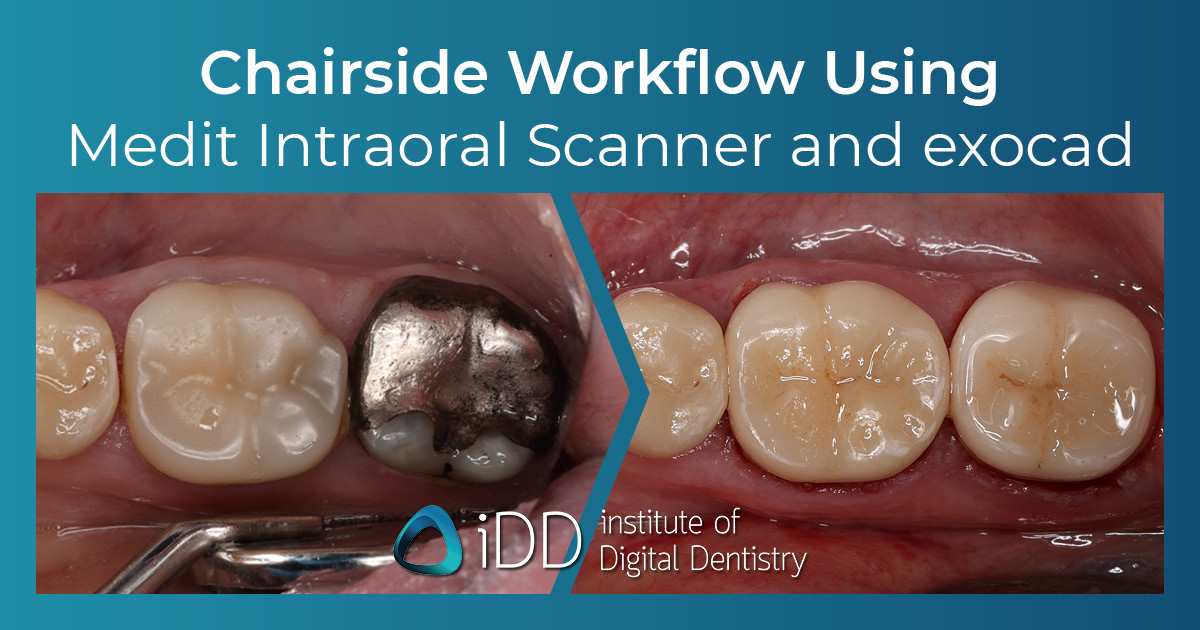
Transitioning from a traditional dental practice to a digital workflow offers a unique set of challenges for practitioners steeped in conventional analog techniques.
As we undertook our evolution to a completely digital clinic many years ago, we have seen how the entire market has changed and digital technologies have matured.
Modern intraoral scanners such as the Medit i700 are now much faster, accurate, and affordable than what we ever had access to over 15 years ago.
In addition to scanners, milling technology has also advanced significantly. Nowadays, the technology is much more precise, intuitive and user friendly than ever before.
Most importantly, my associates and I worked very hard to master and streamline our workflow processes, which directly impacted the profitability of our practices. Digital dentistry has completely revolutionised our practice and has resulted in much better patient outcomes. One example of this is same-day crowns, something that in my opinion is an excellent service to patients and a great practice builder.
Today, our standard workflow from prep to design and mill for a single crown is all done in a single visit and can be accomplished within 2 hours or less.
Single visit dentistry provides endless advantages for the dentist and moving production in-house opens a world of opportunity and treatment possibilities - most significantly, return on investment.
In our clinic 95 percent of the work that was once sent to the laboratory is now completed in- house. This effectively slashed our lab bill by more than 70%. Not only that, but we no longer deal with the frustrating issues that come with temporary crowns.
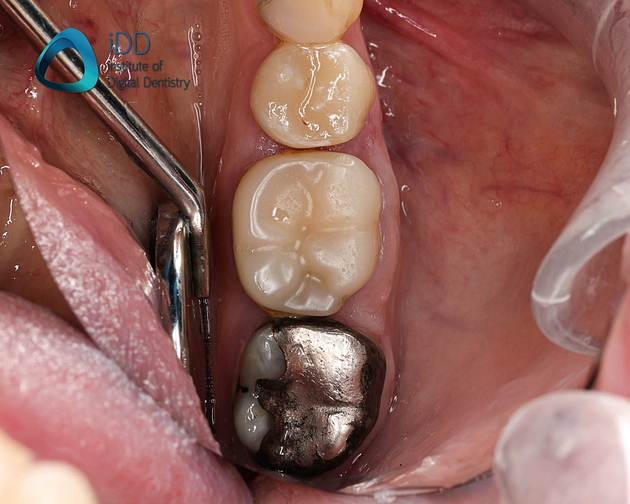
Below I have outlined a standard example of the sorts of cases we do every day in our practice. In this example the patient had two crowns completed within a single visit. The patient had been having issues with food packing around the first molar crown due to open contacts and it was decided we would replace the crown for this tooth and crown the heavily filled second molar too (Figure 1).
Using Digital Dentistry To Restore Two Posterior Crowns in a Single Visit

Figure 1. Preoperative picture of the situation the patient presented with
Prepping the tooth for intraoral scanning
First, we start with prepping the teeth.
With digital dentistry and modern ceramics we can be more conservative with tooth structure, keeping margins supragingival for instance. This effectively means it is also easier to scan the preparation correctly.
After I prep the teeth, I routinely use a retraction cord to displace the gingiva and ensure an accurate scan of the margins and a dry field of operation to avoid contamination from blood, saliva, or crevicular fluid (Figure 2).
The preparation and tissue management part of the workflow is critical.
Scanners are optical devices and if there is any gingiva or fluids such as blood on the tooth margins this will result in subpar scanning images. Incorrect use of scanners is the most common reason for a digital impression to have errors.

Figure 2. Completed tooth preparations for two IPS e.max ceramic crowns
Using Medit i700 Wireless To Take An Intraoral Scan
Following the preparation stage, I use the Medit i700 Wireless scanner to take an intraoral scan (Figure 3). The Medit i700 is an extremely fast scanner and one I have personally used for many years. You can read our comprehensive review of the Medit i700 here.

Figure 3. Intraoral scan taken using the Medit i700 Wireless.
When used correctly and with correct retraction, this scanner can easily achieve a full arch scan within 45 seconds. The new Wireless model of the i700 adds an extra layer of comfort as you do not have to worry about wires. It makes the scanning process more comfortable for the dentist.
HD Mode vs Non-HD Mode - Medit Intraoral Scanners

Figure 4. Non-HD (top) and HD (bottom) scans were taken of the same preparation with the Medit i700 Wireless to illustrate the difference when using this mode. As you can see, the HD scan mode clearly results in a higher definition scan.
Having the option of an HD mode in the Medit intraoral scanners is quite beneficial. Although not absolutely mandatory to use, it is a simple click on the software to switch to HD mode, and as you can see in Figure 4, it results in margins that are more defined and clearer. Clearer margins and an accurate scan will mean the entire CAD/CAM workflow is more efficient and easier to carry out.
Designing the Crowns With exocad CAD Software
Back to our workflow. Once the scans are completed this scan data is then exported to be used in our CAD software, in this case, exocad (Figure 5). Our dental assistants are fully trained to be proficient with using CAD software and do all of our CAD designs with clinician oversight. Medit software is also very easy to use and enables simple exporting of STL and also OBJ or PLY (colour files) if required.

Figure 5. PLY scans exported from the Medit i700 Wireless and imported into exocad software for CAD designing.
As you can see in Figure 5 the PLY scan file is imported into exocad software. The Medit scanner has produced a very clear digital impression for us. The next steps of the workflow are as follows – margin line placement and CAD design (Figure 6).

Figure 6. The final CAD design of two ceramic crowns using exocad.
The final CAD design is completed (Figure 6) and is ready to be produced. This is a process that has a learning curve much like using an intraoral scanning device but once you learn it, it is easy and routine.
This is why we provide digital dentistry courses online via our website to help teach dentists how to perform this efficiently in their practice. If you need some guidance in digital dentistry, you can check out our membership here.
The design is then nested in the CAM software (Figure 7) and sent to our milling machine.

Figure 7. Nesting the CAD design in the CAM software for manufacturing.
Choosing the right material for your milling machine
Here you can see our material of choice is IPS e.max by Ivoclar Vivadent. This is an excellent ceramic for any single unit restoration in the mouth. It is backed by over 15 years of research and high success rates over 95%.
After milling is completed (Figure 8) then the final part of the workflow is carried out – material post processing and finishing - which is another aspect we cover in our online dental training courses.


Figure 8. IPS e.max CAD/CAM blocks are loaded in the milling machine and are then milled into the CAD design we have produced.
Post Processing the Crowns
These are the final crowns completed after polishing off the sprue and carrying out characterisation and glazing (Figure 9). This is another part of the workflow that our dental nurses are trained to do. So by this point everything is done by the team and I am free to see other patients.


Figure 9. IPS e.max crowns before and after post-processing including ceramic characterisation, glazing and firing.
Using Medit Link Apps In The Digital Dentistry Workflow
One excellent aspect of the Medit Link software is the free apps included. As you see in Figure 9, the crowns are fitted on a 3D printed model. While the crowns are milling we can use the Medit Model Builder App to create a 3D printable model with dies to check the fit of the crowns (Figure 10).
This is not a required step in the workflow and we often do single visit crowns completely modeless but this is a good illustration of how you can use Medit Link apps in day to day practice.


Figure 10. Medit Model Builder App used to design printable models from the intraoral scans. This was then printed using NextDent 5100.
Bonding the Crowns with Resin Cement
During this entire production workflow, the retraction cord stays in place so that during the seating of the final crowns the fit at the margin is clearly visible and once cemented, excess cement is removed as the cord is removed.
The most critical part to this workflow and the profitability of our practices is that while the design, milling, and post-processing is taking place, our clinicians are busy seeing and treating other patients. The final ceramic restorations are bonded using resin cement (Figure 11).


Figure 11. Post-operative photograph. The final ceramic crown restorations are bonded using resin cement.
Putting it all together - perfecting your digital dentistry workflow
Perfecting a digital workflow that is efficient, predictable and increases profitability requires practice and understanding of all aspects of the workflow. The first step is an intraoral scanner and the Medit i700 or the more affordable i600 are an excellent first step in this world of digital dentistry.
Restorations fabricated using CAD/CAM in-house have revolutionised dentistry. Digital is the future of the profession and provides endless benefits to both dentists and patients.
Anyone not adopting digital techniques is falling behind. By choosing the right equipment, suitable materials and executing the treatment properly, you will have peace of mind in the long-term outcome of the result. Whether you are interested in CAD/CAM in-house or simply scanning and sending to a lab, there are many benefits for both you and the patient.
The time to go digital is now.


What milling machine was used? How long to mill?
Ceramill Motion 2 by Amann Girrbach AG
About 25 min each.